The app dotnet build tool contains features for "Chromitizing" any
.NET Core Web App into a .NET Core Windows Desktop App by just installing the app dotnet tool:
dotnet tool install -g app
If you already have app tool installed make sure you're running the latest version with:
dotnet tool update -g app
Launch .NET Core App inside a Windows Chromium Desktop App
Then run your .NET Core Web App with:
app MyApp.dll
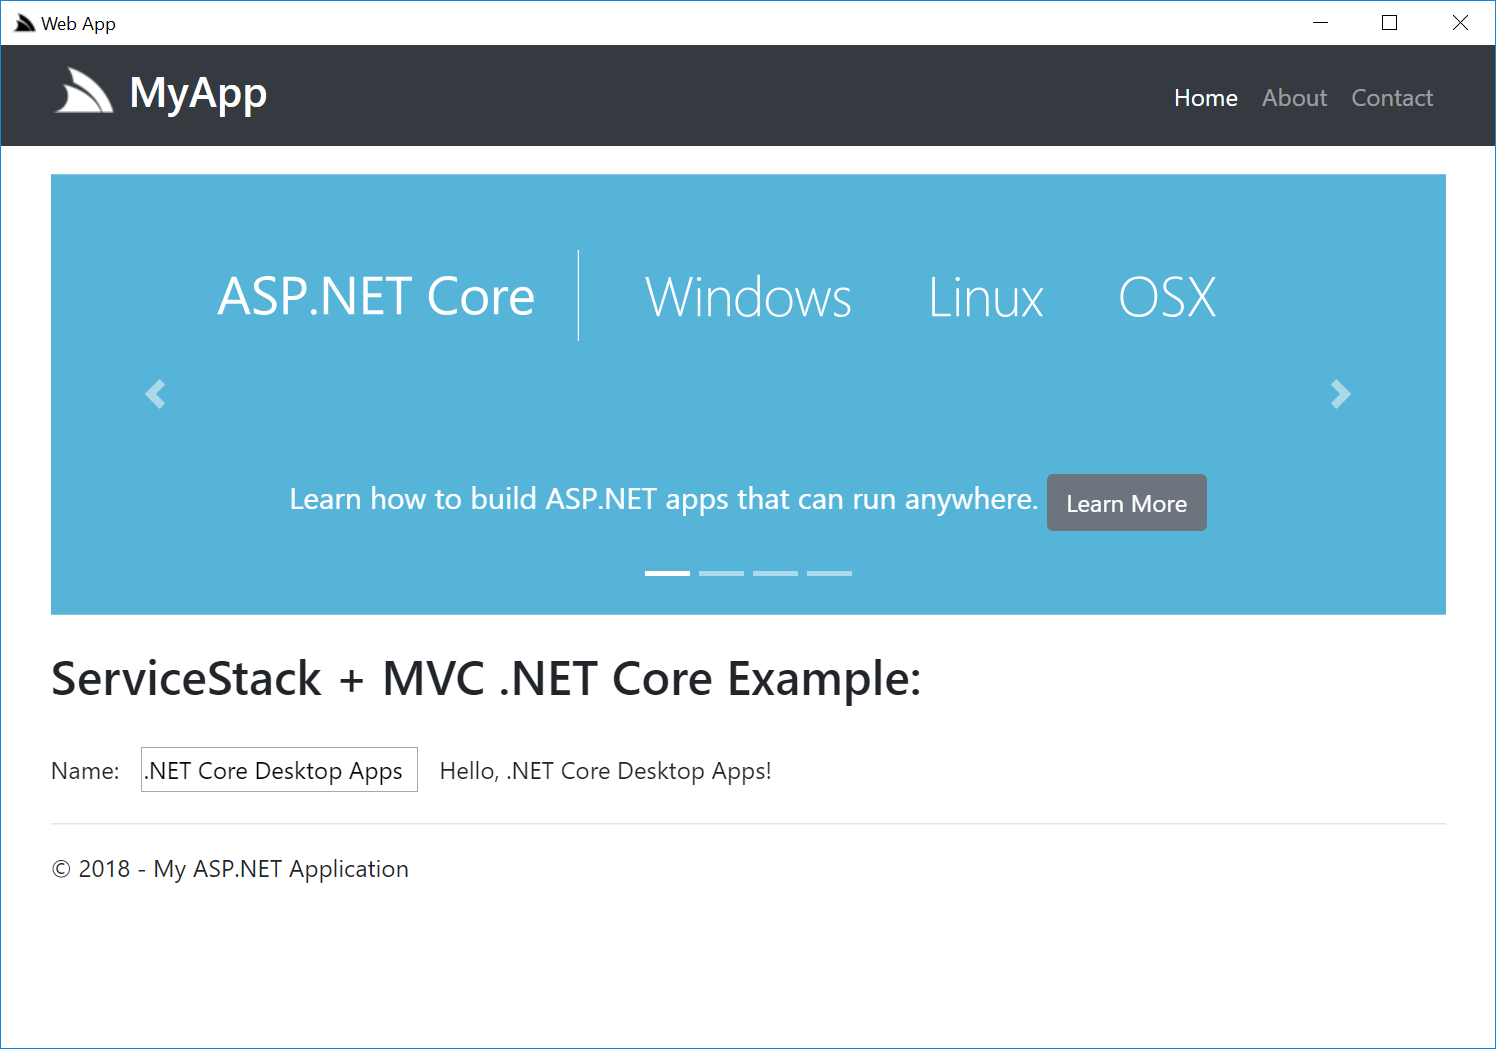
Where it will run your .NET Core App and host it inside an Chromium Embedded Framework (CEF) browser.
This provides instant utility for being able to deploy .NET Core Apps end users can run locally using Chrome's leading and consistent rendering engine within a Windows Desktop Application.
app includes a number of features and deep integration with GitHub that makes running .NET Core Chromium Desktop Apps a seamless experience.
To illustrate this we can install any .NET Core project from GitHub by specifying the project's name along with the name of
the GitHub User or Organization via the --source argument. If you don't have a .NET Core Application on-hand to try it on, you can use
any of ServiceStack's .NET Core Templates which are all functioning .NET Core projects in their own right.
Where we can create a new NetCoreTemplates/mvc project with:
app new mvc Acme --source NetCoreTemplates
Which will download and unzip either the Project's latest release, or an archive of master if none exists.
Then publish the .NET Core App as normal by going into the Host project folder using the project name you specified above, eg:
cd Acme\Acme
Create a published version of the App:
dotnet publish -c Release
Then in the /publish folder:
cd bin\Release\net6.0\publish
You can use app to run the .NET Core binary:
app Acme.dll
Where it will run the .NET Core App and launch it within a CEF Windows Application:
Create Windows Desktop Shortcuts
To make the experience of running .NET Core Desktop Apps even nicer you can use the shortcut command to create a Windows Shortcut for your App:
app shortcut Acme.dll
Which you can either double-click to run or copy to a more accessible location like the Users Desktop:
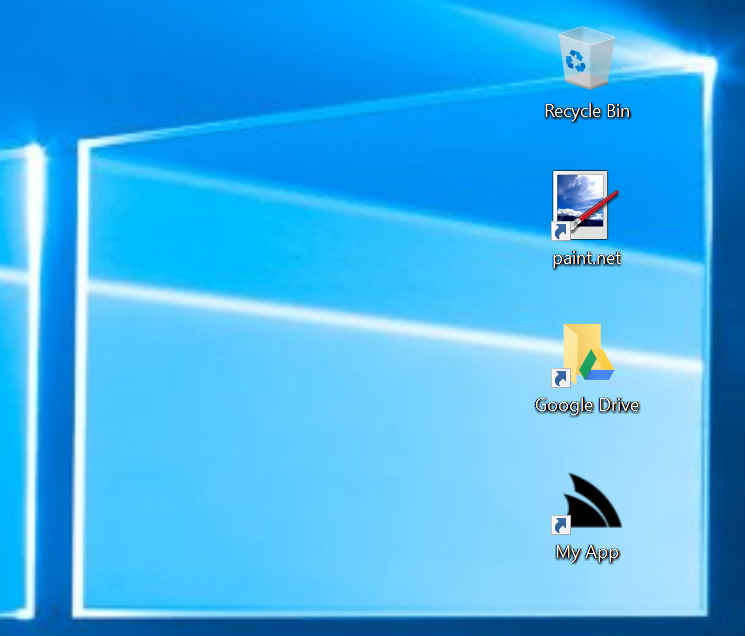
If you wanted to use your own icon instead, copy it as favicon.ico in your /publish folder and rerun the command:
app shortcut Acme.dll
Where it will be used in both Shortcut Icon and Windows Desktop icon:
![]()
Create new Project Templates
See x new for available Project Templates you can create with:
app new
Mix Features into existing ASP.NET Core Apps
The app dotnet tool is a versatile utility belt packed with a number of features to simplify discovering, installing, running and deploying
.NET Core Apps. You can view the full list of supported commands by running app ?, e.g. another useful command is using app mix
for generating pre-set templates:
app mix                     Show available gists to mixin         (Alias '+')
app mix <name>              Write gist files locally, e.g:        (Alias +init)
app mix init                Create empty .NET Core ServiceStack App
app mix [tag]               Search available gists
app gist <gist-id>          Write all Gist text files to current directory
View available gists with:
app mix
Where you can use app mix nginx to generate a common nginx template configuration for reverse proxying .NET Core Apps, making configuring
Linux deployment servers for your .NET Core Apps less tedious.
In addition to the pre-set templates, you can create your own public GitHub gist with any number of different files customized for your Environment that anyone can write to their current directory with the gist id or gist URL:
app gist <gist-id>
Installing Sharp Apps
The app tool also makes it easy to install .NET Core Sharp Apps where you can open apps that are available
to open or install with:
app open
By default this will list all Gist Desktop Apps and GitHub Sharp Apps and available:
   1. redis       Simple, lightweight, versatile Redis Admin UI                                 by @ServiceStack  [redis]
   2. spirals     Explore and generate different Spirals with SVG                               by @ServiceStack  [svg]
   3. blog        Minimal, multi-user Twitter Auth blogging app                                 by @ServiceStack  [sqlite]
   4. rockwind    Example combining Rockstars website + data-driven Northwind Browser           by @ServiceStack  [example]
   5. redis-html  Redis Admin Viewer developed as server-generated HTML Website                 by @sharp-apps    [redis]
   6. plugins     Extend Apps with Plugins, ServiceStack Services and other C# extensions       by @sharp-apps    [example]
   7. chat        Extensible App with custom AppHost leveraging OAuth + SSE for real-time Chat  by @sharp-apps    [example]
   8. bare        Basic Sharp Content Website                                                   by @ServiceStack  [website]

Usage: app open <name>
Custom .NET Core Desktop Apps
When running the .NET Core MyApp.dll, it effectively runs an external dotnet MyApp.dll process, pipes the output to the console and launches
a CEF browser with the url in ASPNETCORE_URLS.
The ServiceStack.CefGlue.Win64.AspNetCore project shows how to launch both the .NET Core App and a customized CEF browser in the same process by referencing the ServiceStack.CefGlue.Win64 NuGet package in your win-x64 .NET Core project:
<Project Sdk="Microsoft.NET.Sdk">

  <PropertyGroup>
    <OutputType>WinExe</OutputType>
    <TargetFramework>netcoreapp3.1</TargetFramework>
    <RuntimeIdentifiers>win-x64</RuntimeIdentifiers>
    <Platforms>x64</Platforms>
    <ApplicationIcon>favicon.ico</ApplicationIcon>
    <AssemblyName>webapp</AssemblyName>
    <TrimUnusedDependencies>true</TrimUnusedDependencies>
    <TargetLatestRuntimePatch>true</TargetLatestRuntimePatch>
    <RuntimeFrameworkVersion>2.1.2</RuntimeFrameworkVersion>
    <CopyLocalLockFileAssemblies>true</CopyLocalLockFileAssemblies>
  </PropertyGroup>

  <ItemGroup>
    <PackageReference Include="Microsoft.AspNetCore.Server.Kestrel" Version="2.*" />

    <PackageReference Include="ServiceStack.CefGlue.Win64" Version="8.*" />
  </ItemGroup>

</Project>
Then in your .NET Core App after calling StartAsync() to run your .NET Core App:
class Program
{
    static int Main(string[] args)
    {
        var startUrl = Environment.GetEnvironmentVariable("ASPNETCORE_URLS") ?? "http://localhost:5000/";

        var host = new WebHostBuilder()
            .UseKestrel()
            .UseContentRoot(Directory.GetCurrentDirectory())
            .UseStartup<Startup>()
            .UseUrls(startUrl)
            .Build();

        host.StartAsync();

        var config = new CefConfig(debug:true)
        {
            Args = args,
            StartUrl = startUrl,
            HideConsoleWindow = false,
        };

        return CefPlatformWindows.Start(config);
    }
}
Call CefPlatformWindows.Start(config) to launch the CEF browser with your preferred customizations in a Windows 64bit OS.
CefConfig.cs supports high-level configuration
where you can change the Window size and position, icon, title as well as the CefSettings and CefBrowserSettings the browser is launched with
and whether to enable or disable the ALT+LEFT/RIGHT Navigation Keys, F5 Refresh or F11 Chrome Dev Tools.
Eventually we intend to provide different packages using the same high-level
CefConfigsettings to simplify the effort required to run .NET Core Desktop Apps on different Operating Systems.
Upgrading
A nice benefit from delivering app as a dotnet tool is that updates are effortless as running:
dotnet tool update -g app
Which will upgrade to a newer CEF and app versions as they're released. app also lets you know if there's a newer version available
after running the list, gallery and -v commands.
Chromium Desktop Apps
Chrome Desktop Apps are increasingly becoming the preferred approach for developing Desktop Apps today, they benefit from the vast amount of resources Google invests in developing their most important Desktop Application in Chrome and its Chromium project which provides the Chrome rendering engine in popular frameworks like CEF and Electron that's used to power many of the actively developed Desktop Apps today like VS Code, GitHub Desktop, Twitch.tv, WhatsApp, Slack, Skype, Discord, Signal, Microsoft Teams, Microsoft SQL Operations Studio and hundreds more. Whilst CEF is used to render Web content in popular native Desktop Apps like Spotify, Stream, Facebook Messenger, Adobe Acrobat, Adobe Creative Cloud, Amazon Music, Battle.net, Evernote as well as game engines like Unity3D and Unreal Engine.
Ultimately what "Web Desktop Apps" provide most is value, with easy access to advanced Web technologies, rich layout and design techniques, live debugging inspector, navigation, deep-linking and offer significantly greater ROI when needing to support multiple Operating Systems or an online hosted version of your Software. Even without the code-reuse of targeting multiple platforms they offer a leap in productivity for many classes of Apps, e.g. the depth and velocity of VS Code's frequent releases are rarely seen in Native Desktop Apps.
Of course if you can offer software hosted on the Internet that would typically be the preferred approach for increased accessibility, maintainability and reach to your Software. But there's a number of use-cases that would benefit from a Desktop App, e.g. any offline tasks, management of personal data, access to Native Desktop features, local computing and infrastructure resources or to avoid maintenance and management of a central hosted server.
Places where you're using Windows Services could be better served as a unified Packaged Desktop App where you can ensure consistent behavior by using the same tested Chrome rendering engine to run your App, mitigating any environment, versions and cross-browser issues.
Desktop Sharp Apps
Whilst app is useful for running any Windows .NET Core Desktop App, it provides the greatest value for running .NET Core
Sharp Apps - a revolutionary new simplified development model for developing .NET Core Apps
which eliminates much of the friction .NET developers have historically had to face. Sharp Apps
are built with #Script and require no builds/compilation, wait times, complicated build tooling, configuration,
incompatible dependencies, dev tools or IDE's.
The simplicity of being able to use the same executable for running all Sharp Apps allows us more flexibility to provide even greater value-added functionality than what's otherwise possible. By contrast Sharp Apps can be developed with any text editor in an iterative, live-development environment that updates itself on save, whilst the App is running. It utilizes a familiar JavaScript and Handlebars syntax in a high-level dynamic language that late-binds to .NET APIs using Compiled Expressions for avoiding runtime reflection.
Sharp Apps are highly customizable by nature as they're delivered and run in source code form, requires no external dependencies or dev tools as they
can be edited by any text editor whilst the app is running. They're also significantly smaller than normal Web Apps since the app tool already
contains the shared binaries that all Sharp Apps use - making them easier to deploy, install and update.
Installing Sharp Apps
As sharp-apps is the default APP_SOURCE, running:
app list
Will return the list of publicly available Sharp Apps:
   1. bare            Basic Bootstrap + jQuery multi-page Content Website with dynamic Menu Navigation + API pages
   2. blog            Minimal, multi-user Twitter OAuth blogging platform that can create living, powerful pages
   3. chat            Highly extensible App with custom AppHost leveraging OAuth + SSE for real-time Chat
   4. plugins         Extend WebApps with Plugins, Filters, ServiceStack Services and other C# extensions
   5. redis           Redis Admin Viewer developed as Vue Client Single Page App
   6. redis-html      Redis Admin Viewer developed as server-generated HTML Website
   7. rockwind        Example Sharp App combining multi-layout Rockstars website + data-driven Northwind Browser
   8. rockwind-aws    Rockwind Cloud Sharp App on AWS
   9. rockwind-azure  Rockwind Cloud Sharp App on Azure
  10. spirals         Explore and generate different Spirals with SVG

Usage: app install <name>
Include your Sharp App in the Gallery
We've also made it easy to list your App in the App gallery, by running:
app gallery
Which opens the Sharp App Gallery Gist where you can request for your Web App to be listed in the gallery by commenting on the gist with a link to your project. We'll review it and if it's acceptable we'll fork it in sharp-apps which creates a "link" to your project where it will be automatically listed.
All existing app installs will be immediately able to install your App, which either installs the latest published release or from master if it
hasn't published any releases.
Installing blog
Installing an App is then just selecting the name of the app to install:
app install blog
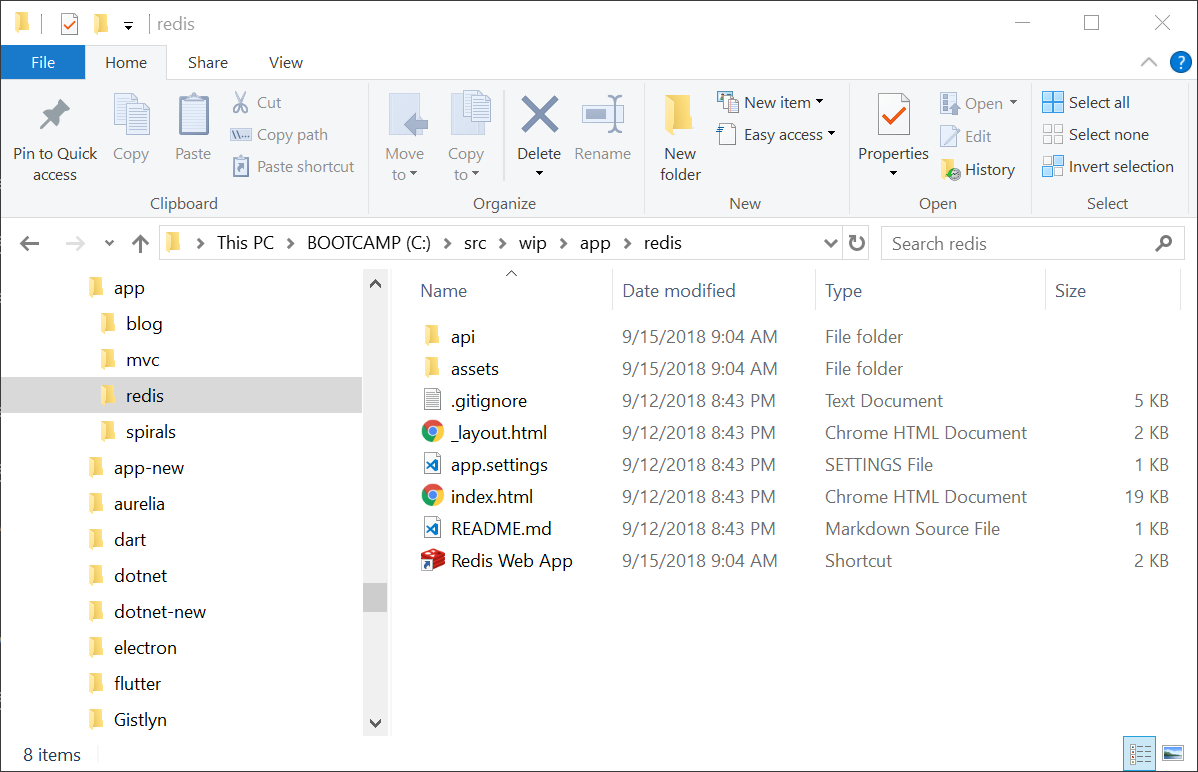
Where it will download the latest .zip release (36kb) and extracts it into a folder named after the project:
Installing blog...

Installation successful, run with:

cd blog && app

Shortcut: blog\Blog Web App
Which can either be run on the command-line with:
cd blog && app
Or by double-clicking the Blog Web App Desktop shortcut.
Running the blog App for the first time will create a new blog.sqlite database seeded with meta content describing itself:
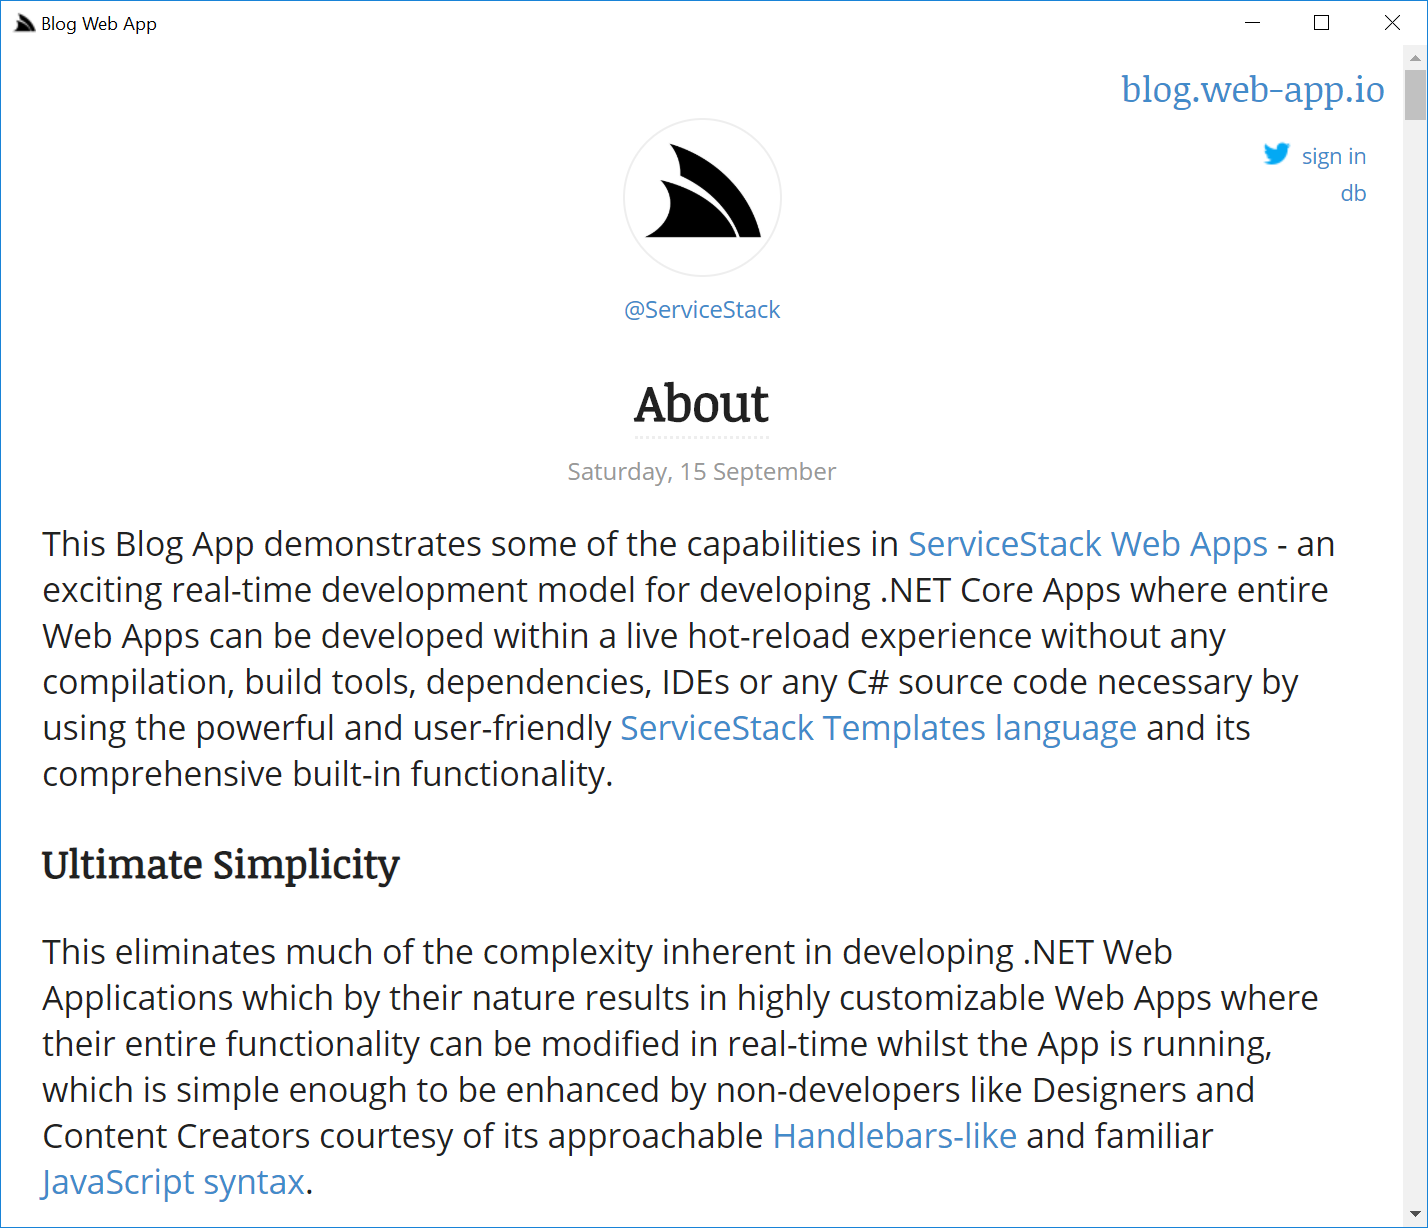
Despite it's small 36kb size it packs a punch:
- Multi User Blogging Platform - Authenticated with Twitter
- Rich Dynamic Content - Each post can contain the same powerful language used to build the app
- Rich Markdown Editor
- Auto saved drafts
- Live Previews - showing rendered content as you type
- Database dump of SQLite tables
At the bottom of each individual post shows the content used to create it, e.g. the Live Document Example shows an example of maintaining a live budget with a dynamic list of projected savings.
Installing redis
From SQLite powered blog, lets install something entirely different - a Redis Admin UI!
app install redis
The redis app includes some additional customizations which controls how the App looks and behaves when run as a Desktop App in its
app.settings:
debug true
name Redis Web App
redis.connection localhost:6379
icon assets/img/redis.ico
CefConfig { Width:1200, Height:1200 }
Where icon is used to point to the App Icon and CefConfig is used to configure the CEF browser, allowing any
CefConfig.cs
to be configured using a JavaScript object literal. On install the specified icon and name is used to create the Desktop shortcut:
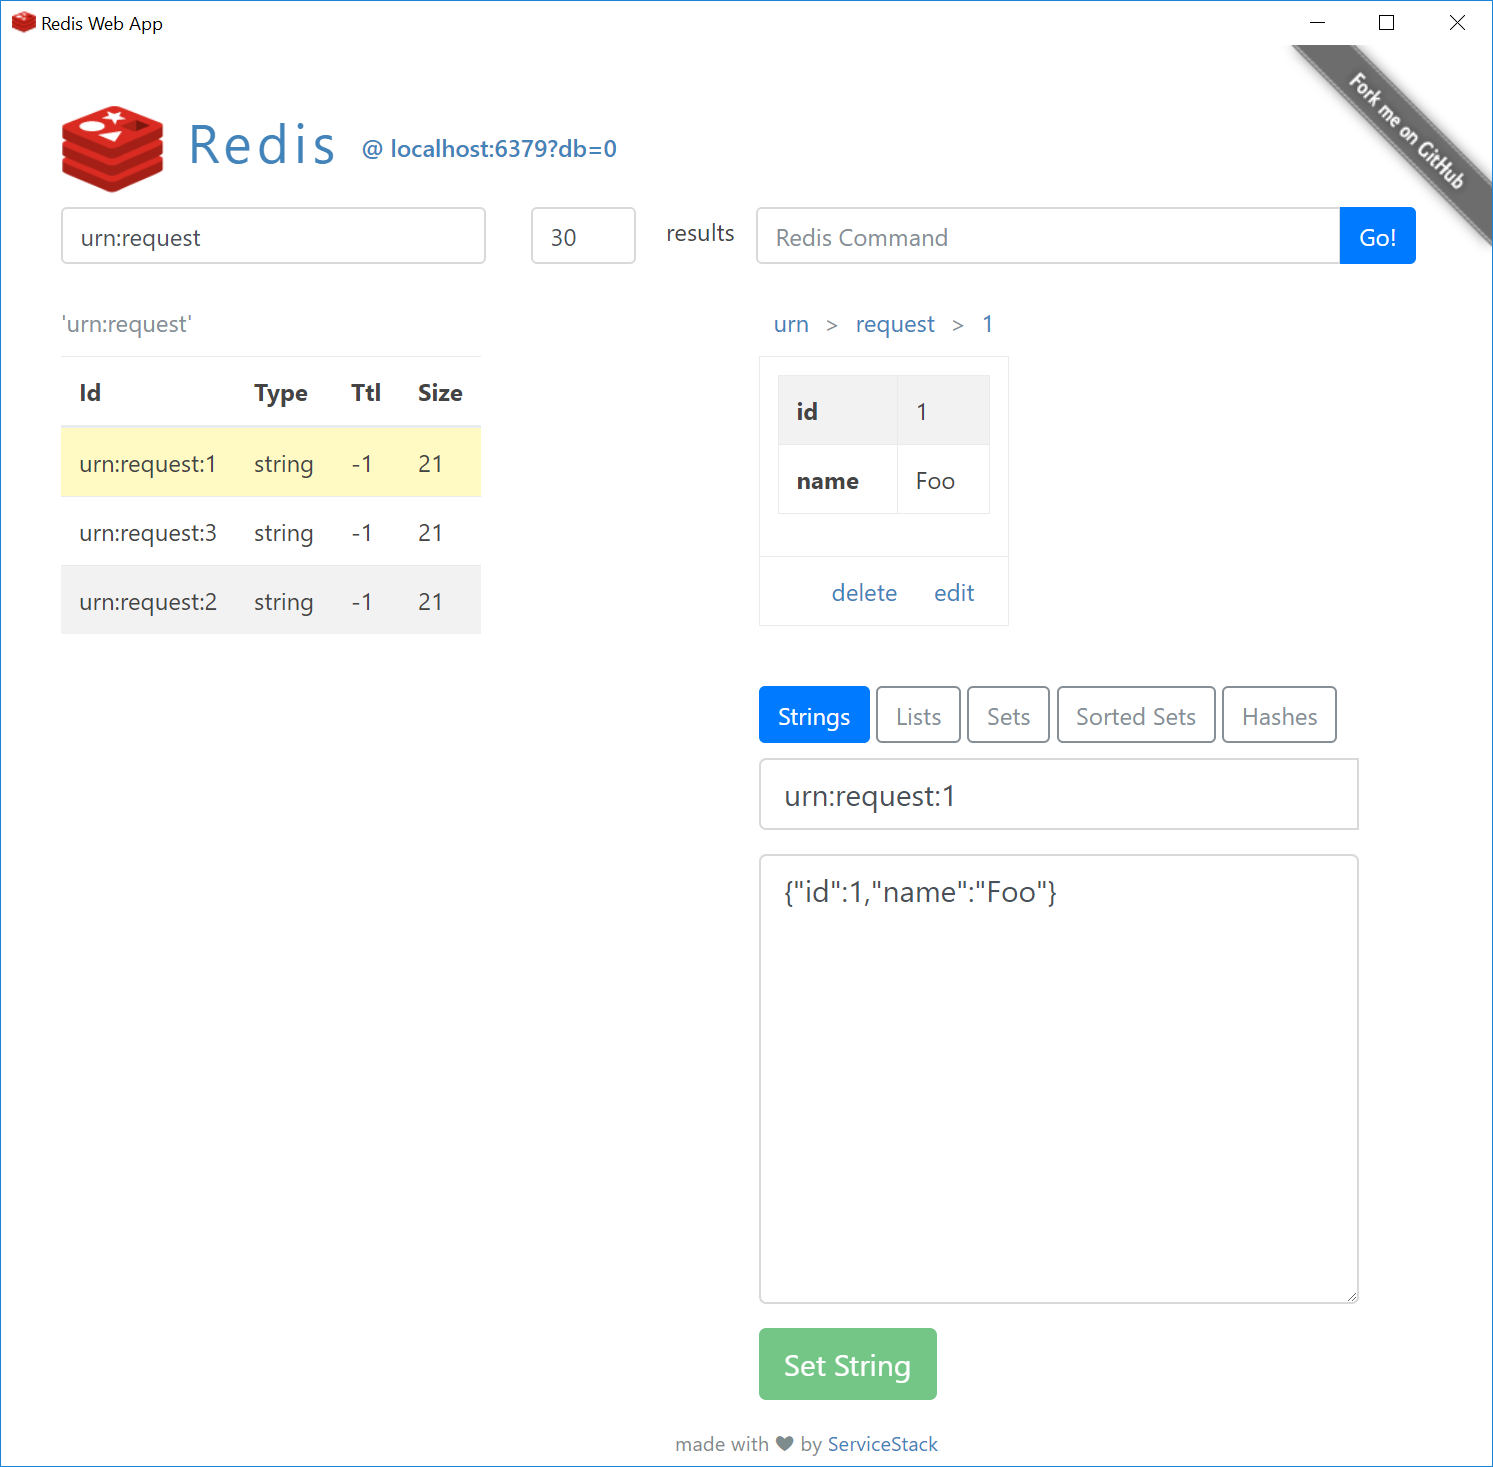
Where it will open a Redis Admin UI connected to your localhost:6379 redis instance:
Customizing CEF Browser
Likewise we can also configure any nested CefConfig.CefSettings using an object literal. We can use this to view verbose logging messages by
telling app not to hide the Console Window and changing CEF's LogSeverity to Verbose:
CefConfig { Width:1200, Height:1200, HideConsoleWindow:false }
CefConfig.CefSettings { LogSeverity:'Verbose' }
Now when running the App we can see the CEF's verbose logging messages mixed in with request logs from .NET Core:
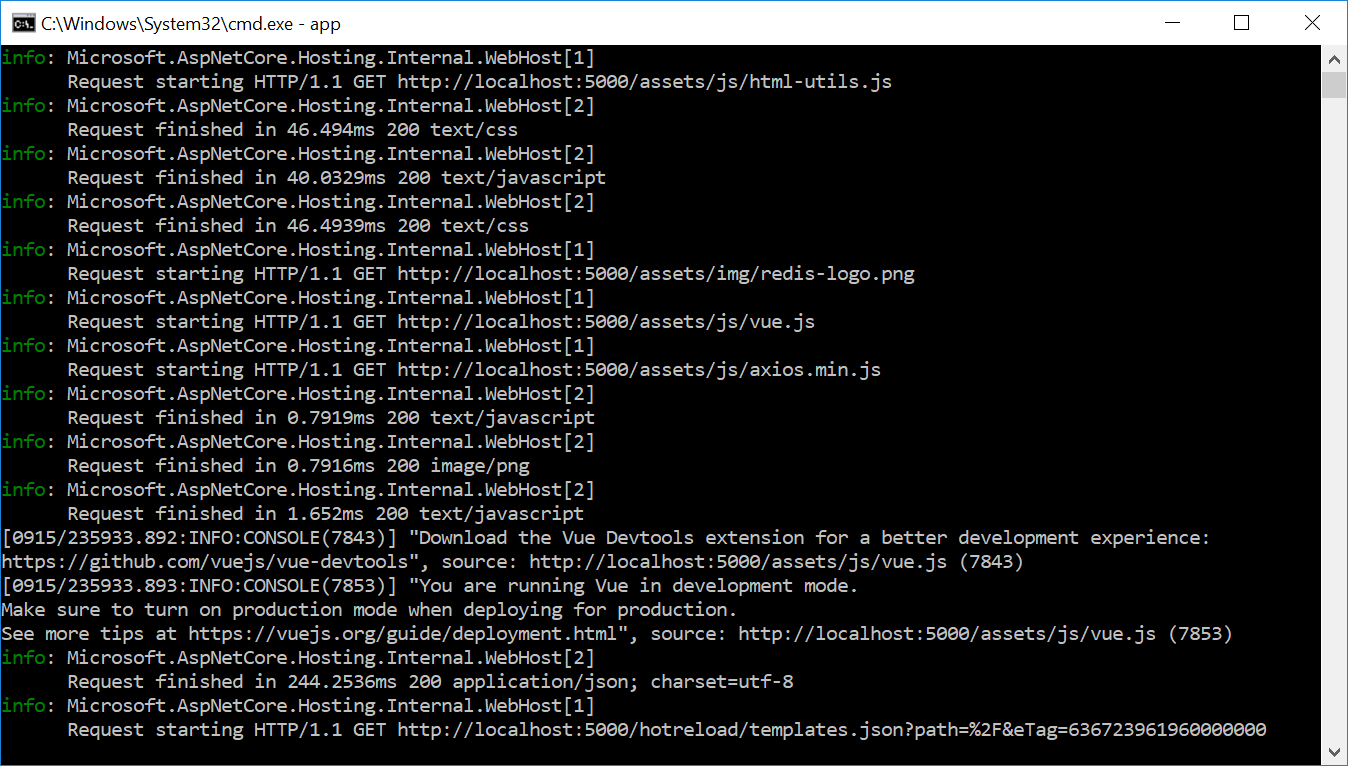
Which in this case shows messages written to Chrome's console.log() which is from Vue.js telling us we're running a development build of Vue.js.
To run the production version of our app we can either set debug false in the app.settings or by running app --release which takes precedence:
app -r
This flag changes whether to use vue.js or vue.min.js in the _layout.html page:
<script src="../assets/js/vue{{ '.min' | if(!debug) }}.js"></script>
To instead force running the App in debug mode use
app --debugorapp -d
Compact and easy to Customize
The redis App has all the features you'd expect from a Redis Admin UI:
- Change connection to any Redis instance / database
- Live Search of Redis Keyspace (updated as you type)
- Management of all Redis's core String, List, Set, Sorted Set and Hash Key types
- Execute any arbitrary Redis command
- Display blobbed JSON value data in human-friendly UI
- Redis Server Info List
- Breadcrumbs
- Deep Linking + Browser Navigation (ALT+LEFT Back, ALT+RIGHT Forward, F5 Refresh)
What differs this from other Redis Admin UI's is its terse implementation where its entire custom UI is contained within a single index.html page thanks to the expressiveness of both Vue and #Script.
Its minimal size makes it easy for curious and advanced Users to customize and add features since they can make them locally and see their changes in real-time. Its simpler implementation makes contributions easier as they only have 1 page to edit and can paste their changes directly using GitHub's Edit UI to easily create a pull-request where it can be reviewed and merged.
Simple Updates
Thanks to the easy distribution all users can update to the latest version of any installed App by re-running:
app install redis
Which will replace their existing version with the latest release.
Creating Desktop Sharp Apps
Now that we've seen how easy it is to Install and use existing Sharp Apps, lets walk through how easy it to create one of our own.
For this example we'll create a small App that leverages one of the advanced Web technologies in SVG that would be cumbersome to create using a native GUI toolkit. To start let's create a folder for our app called spirals and initialize and empty Sharp App with app init:
mkdir spirals
cd spirals && app init
We could have started from one of the more complete Sharp App Templates but this gives us a minimal App generated from this gist.
Now let's open the folder up for editing in our preferred text editor, VS Code:
code .
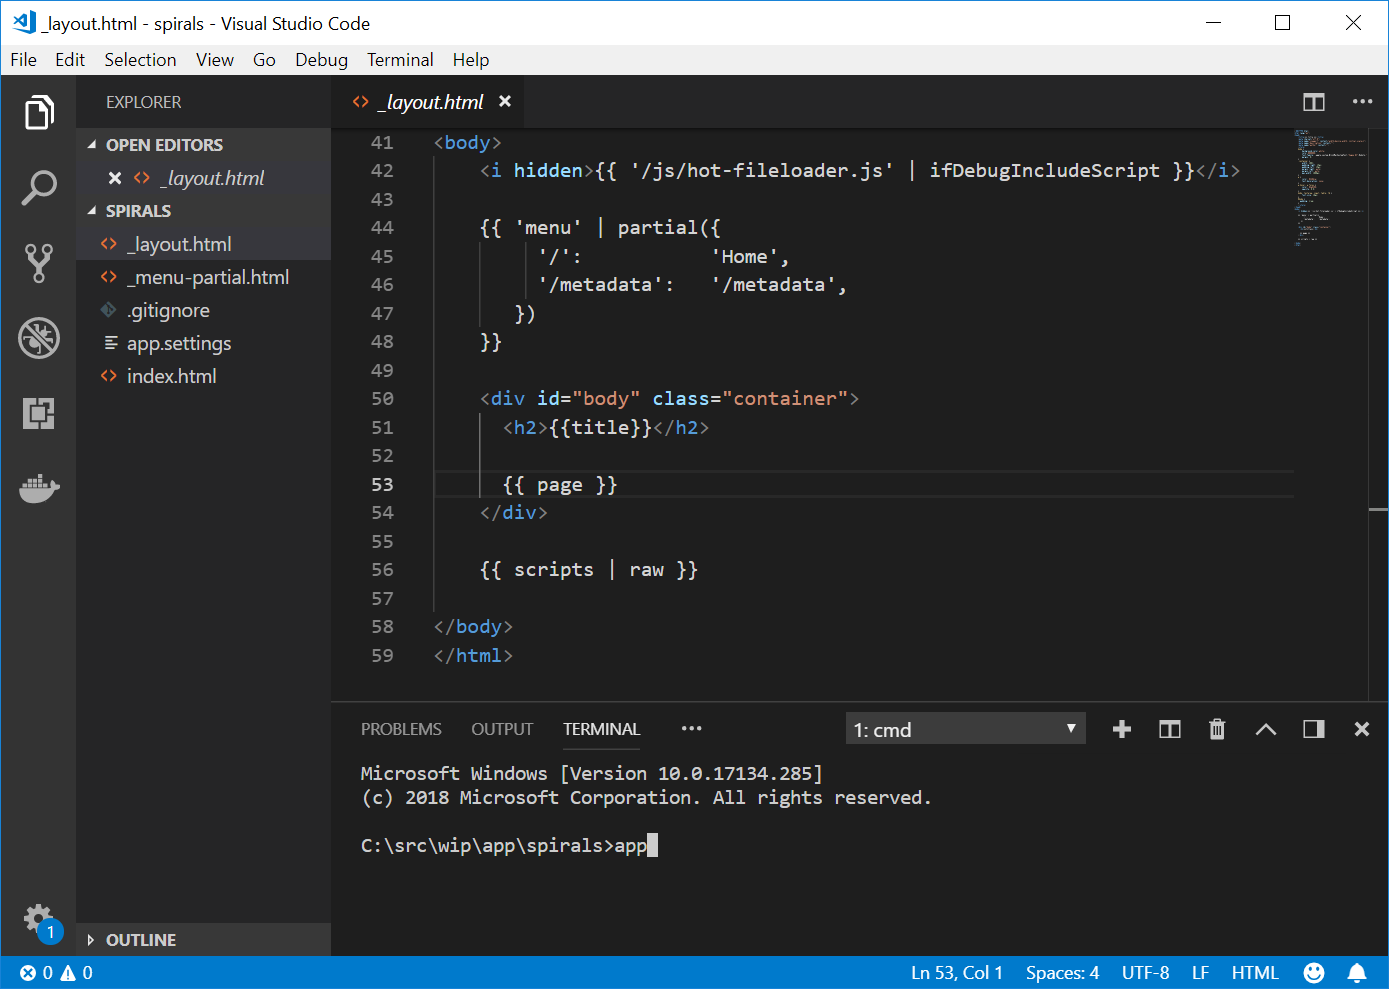
To start developing our App we just have to run app on the command-line which in VS Code we can open with Terminal > New Terminal or the Ctrl+Shift+` shortcut key. This will open our minimal App:
The _layout.html shown above is currently where all the action is which we'll quickly walk through:
<i hidden>{{ '/js/hot-fileloader.js' | ifDebugIncludeScript }}</i>
This gives us a Live Development experience in debug mode where it injects a script that will detect file changes on Save and automatically reload the page at the current scroll offset.
{{ 'menu' | partial({
'/': 'Home',
'/metadata': '/metadata',
})
}}
This evaluates the included _menu-partial.html with the links to different routes we want in our Menu on top of the page.
<div id="body" class="container">
<h2>{{title}}</h2>
{{ page }}
</div>
The body of our App is used to render the title and contents of each page.
{{ scripts | raw }}
If pages include any scripts they'll be rendered in the bottom of the page.
The
rawfilter prevents the output from being HTML encoded.
The other 2 files included is app.settings containing the
name of our App and debug true setting to run our App in Debug mode:
debug true
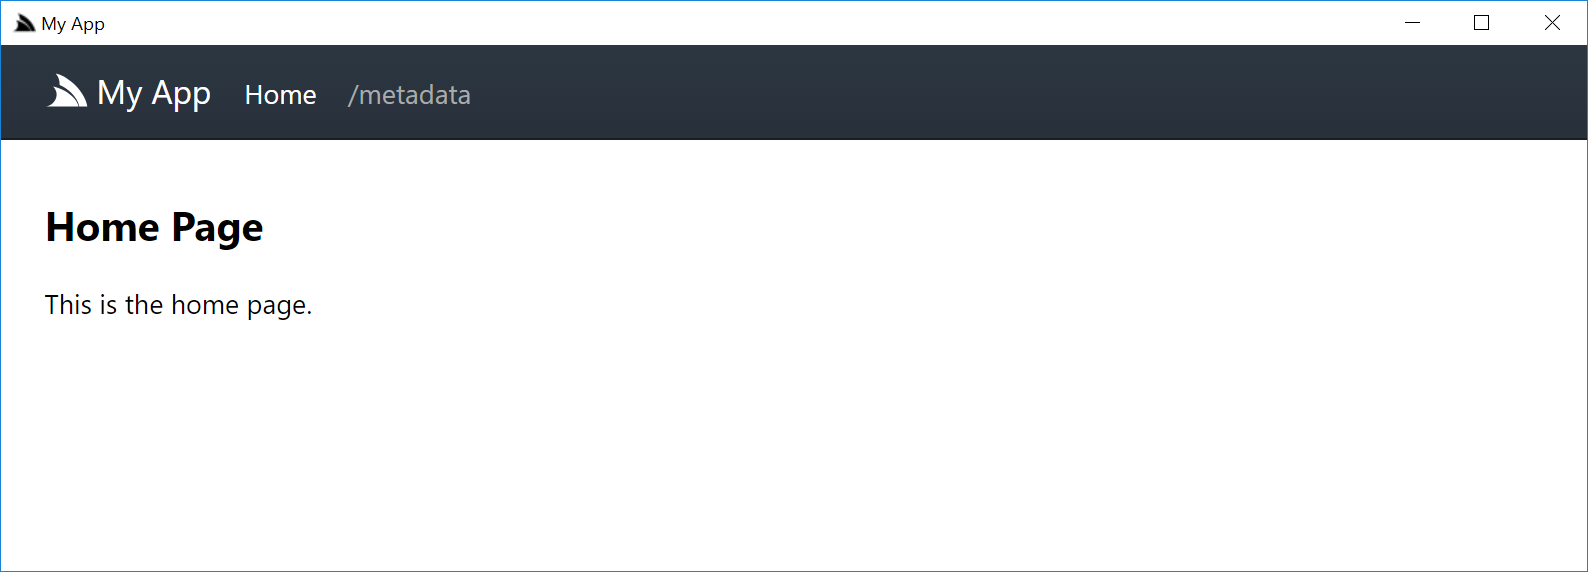
name My App
The template only has one page index.html containing the title
of the page in a page argument which the _layout.html has access to without evaluating the page, anything after is the page contents:
<!--
title: Home Page
-->

This is the home page.
We can now save changes to any of the pages and see our changes reflected instantly in the running App. But we also have access to an even better live-development experience than preview as you save with preview as you type :)
Live Previews
To take advantage of this we can exploit one of the features available in all ServiceStack Apps by clicking on /metadata Menu Item to view the
Metadata page containing links to our Apps Services, links to Metadata Services and any registered plugins:
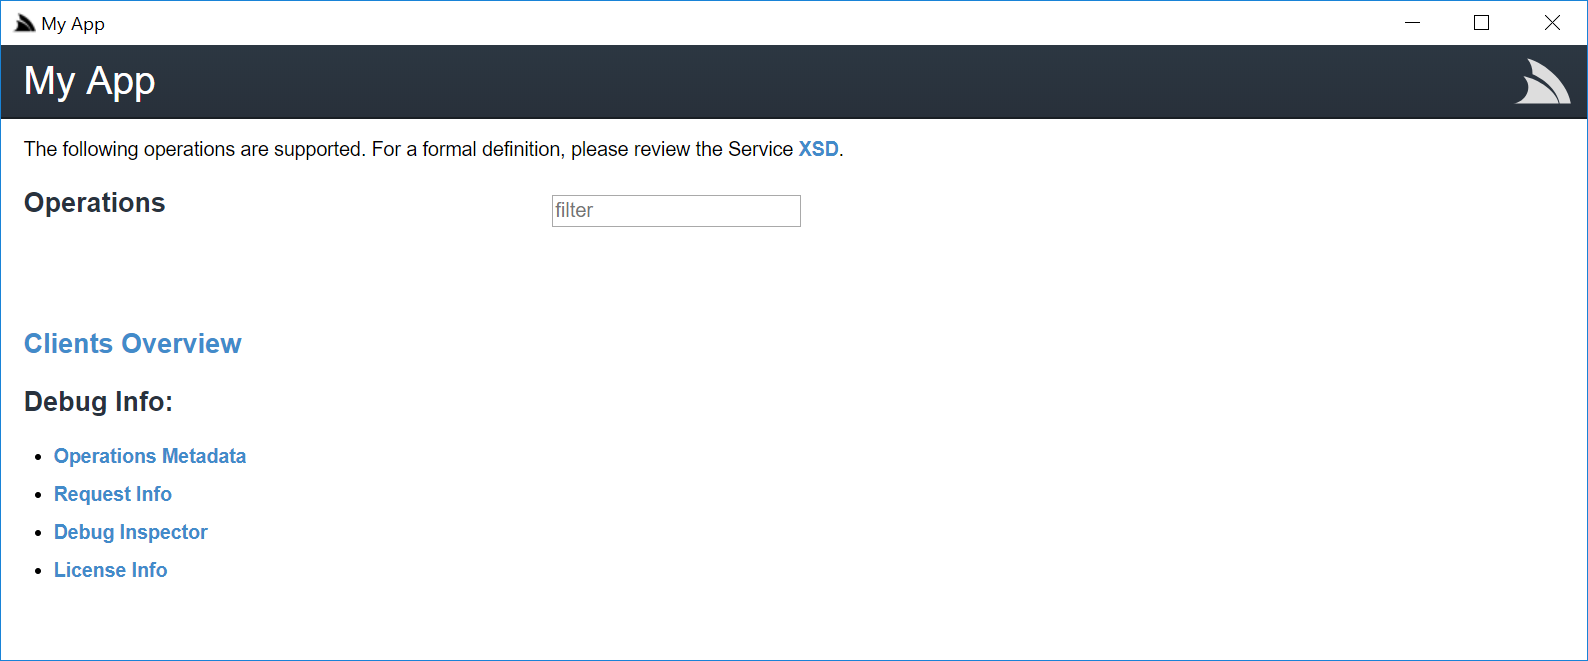
Then click on Debug Inspector to open a real-time REPL, which is normally used to get rich insights from a running App:
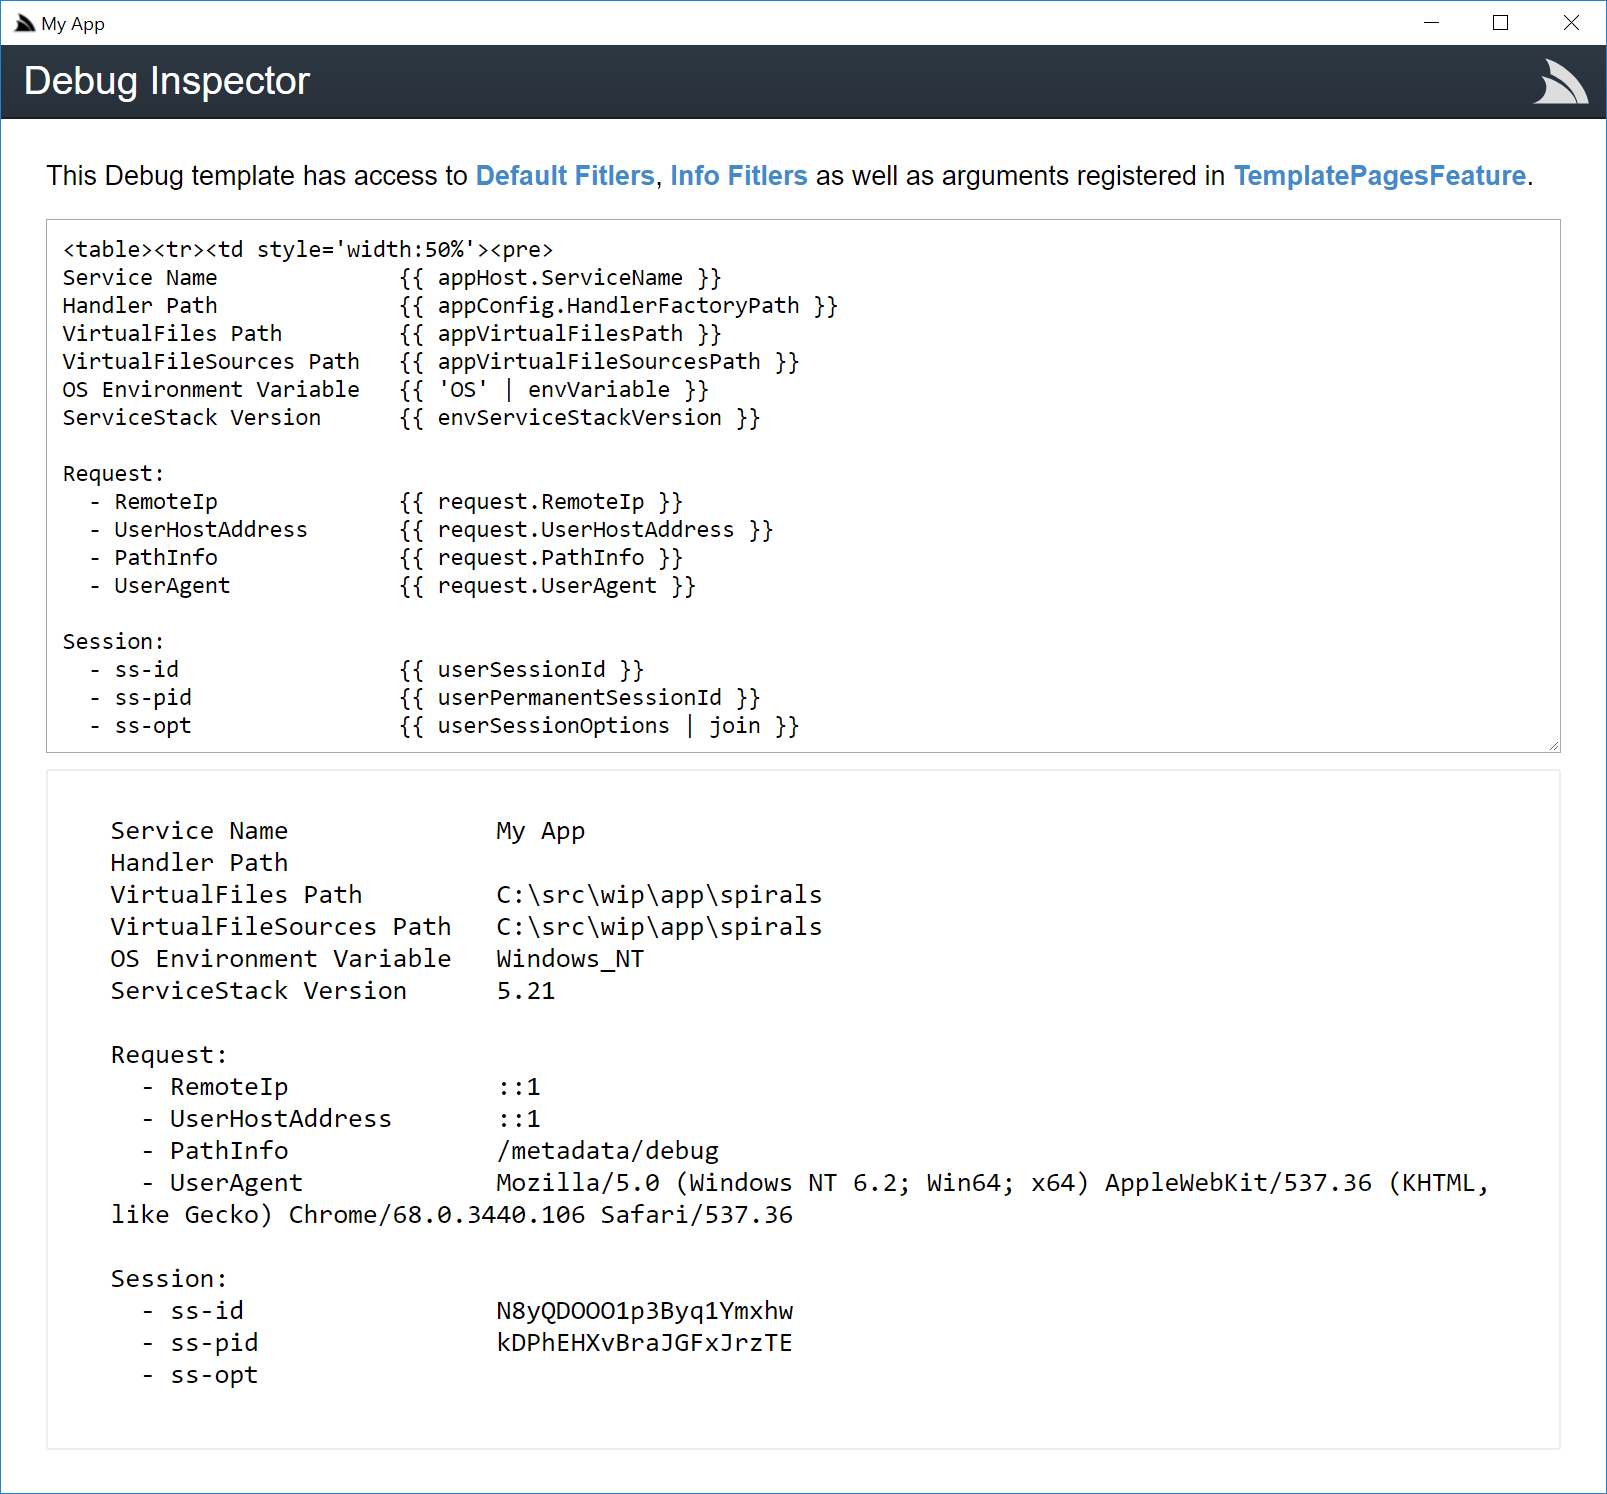
But can also be used for executing ad hoc Template Scripts. Here we can drop in any mix of HTML and templates to view results in real-time.
In this case we want to generate SVG spirals by drawing a circle at each point along a
Archimedean spiral function which was initially used as a base and with the help of the live REPL was
quickly able to apply some constants to draw the tall & narrow spirals we want:
<svg height="640" width="240">
{{#each range(180) }}
{{ 120 + 100 * cos((1) * it * 0.02827) | assignTo: x }}
{{ 320 + 300 * sin((1) * it * 0.02827) | assignTo: y }}
<circle cx="{{x}}" cy="{{y}}" r="10" fill="rgb(0,100,0)" stroke="black" stroke-width="1"/>
{{/each}}
</svg>
We can further explore different spirals by modifying x and y cos/sin constants:
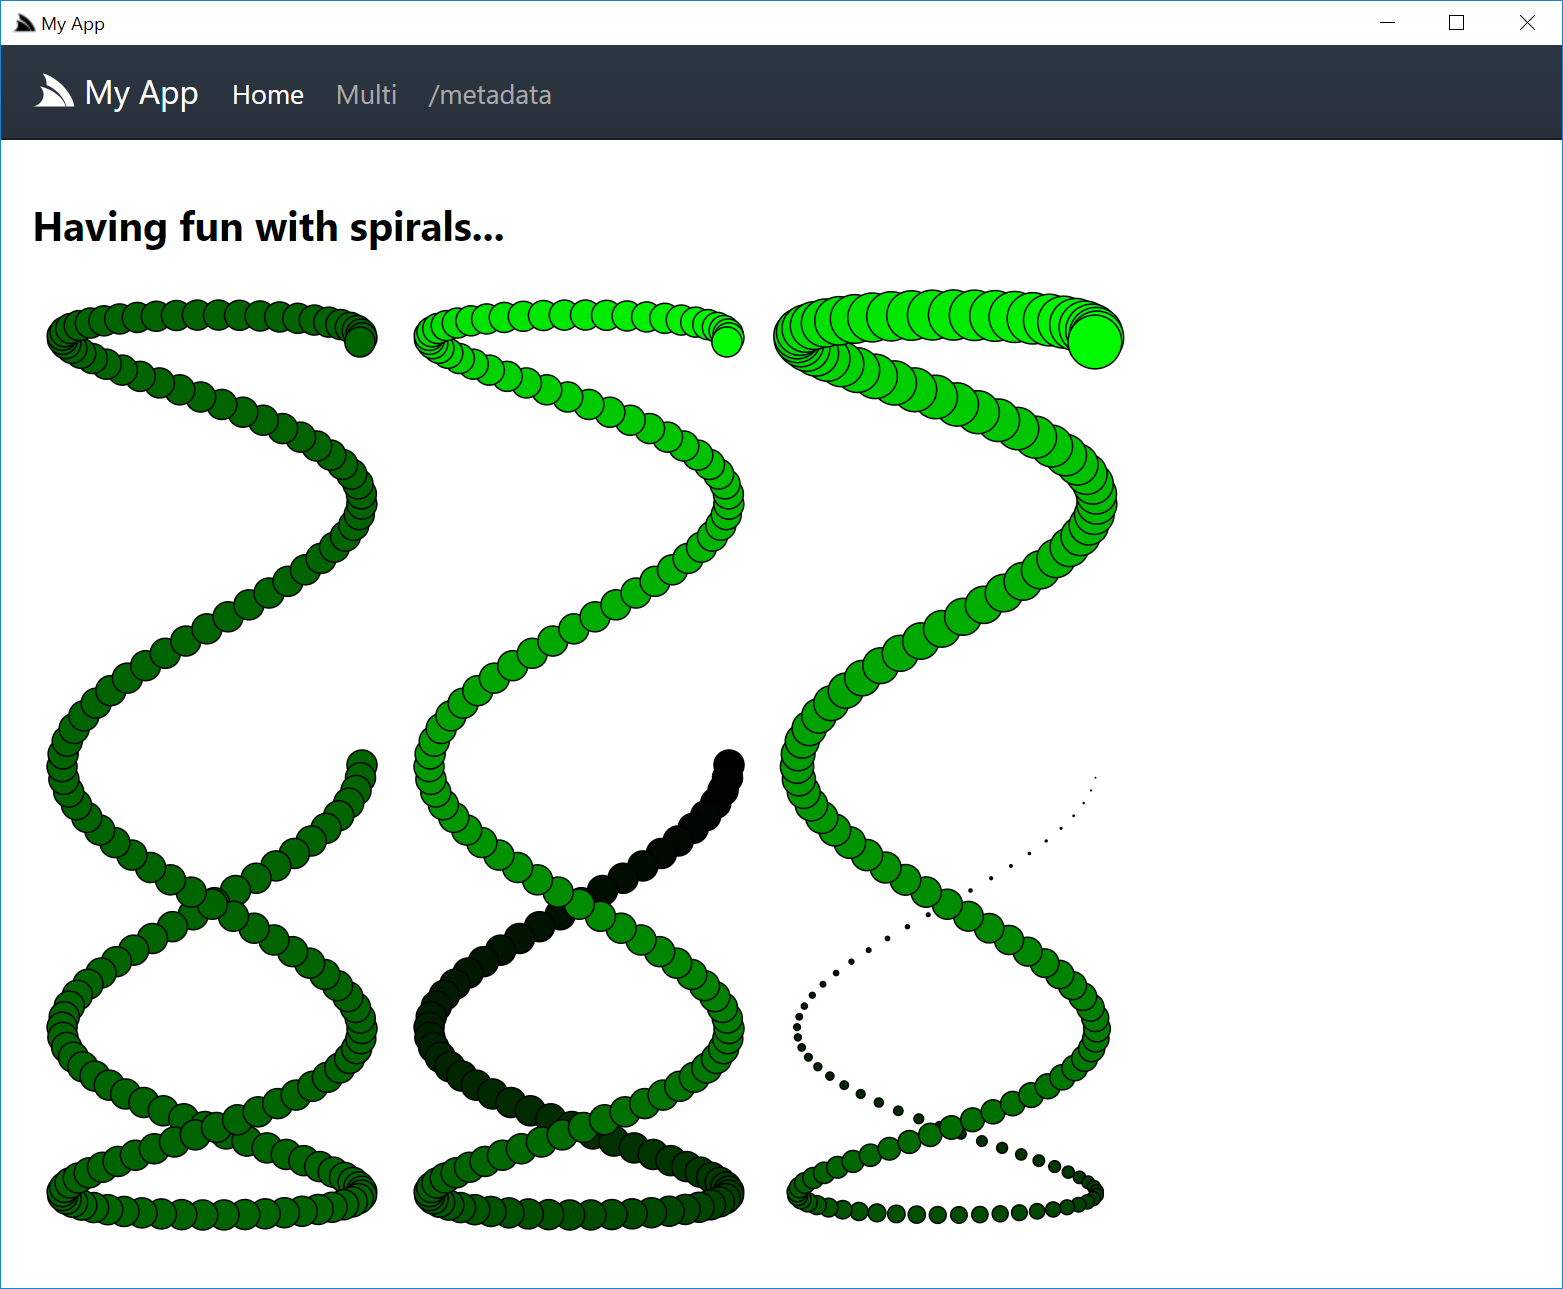
Out of the spirals we've seen lets pick one of the interesting ones and add it to our index.html, let's also enhance them by modifying the fill and
radius properties with different weightings and compare them side-by-side:
<svg height="640" width="240">
{{#each range(180) }}
{{ 120 + 100 * cos((5) * it * 0.02827) | assignTo: x }}
{{ 320 + 300 * sin((1) * it * 0.02827) | assignTo: y }}
<circle cx="{{x}}" cy="{{y}}" r="10" fill="rgb(0,100,0)" stroke="black" stroke-width="1"/>
{{/each}}
</svg>
<svg height="640" width="240">
{{#each range(180) }}
{{ 120 + 100 * cos((5) * it * 0.02827) | assignTo: x }}
{{ 320 + 300 * sin((1) * it * 0.02827) | assignTo: y }}
<circle cx="{{x}}" cy="{{y}}" r="10" fill="rgb(0,{{it*1.4}},0)" stroke="black" stroke-width="1"/>
{{/each}}
</svg>
<svg height="640" width="240">
{{#each range(180) }}
{{ 120 + 100 * cos((5) * it * 0.02827) | assignTo: x }}
{{ 320 + 300 * sin((1) * it * 0.02827) | assignTo: y }}
<circle cx="{{x}}" cy="{{y}}" r="{{it*0.1}}" fill="rgb(0,{{it*1.4}},0)" stroke="black" stroke-width="1"/>
{{/each}}
</svg>
You can use
ALT+LEFT+ALT+RIGHTshortcut keys to navigate back and forward to the home page.
Great, hitting save again will show us the effects of each change side-by-size:
Multiplying
Now that we have the effect that we want, let's go back to the debug inspector and see what a number of different spirals look side-by-side by wrapping our last svg snippet in another each block:
<table>{{#each i in range(0, 4) }}
<svg height="640" width="240">
{{#each range(180) }}
{{ 120 + 100 * cos((1) * it * 0.02827) | assignTo: x }}
{{ 320 + 300 * sin((1+i) * it * 0.02827) | assignTo: y }}
<circle cx="{{x}}" cy="{{y}}" r="{{it*0.1}}" fill="rgb(0,{{it*1.4}},0)" stroke="black" stroke-width="1"/>
{{/each}}
</svg>
{{/each}}
We can prefix our snippet with <table> as a temp workaround to force them to display side-by-side in Debug Inspector. In order to
for spirals to distort we'll only change 1 of the axis, as they're tall & narrow lets explore along the y-axis:

We're all setup to begin our pattern explorer expedition where we can navigate across the range() index both incrementally and logarithmically across
to quickly discover new aesthetically pleasing patterns :)

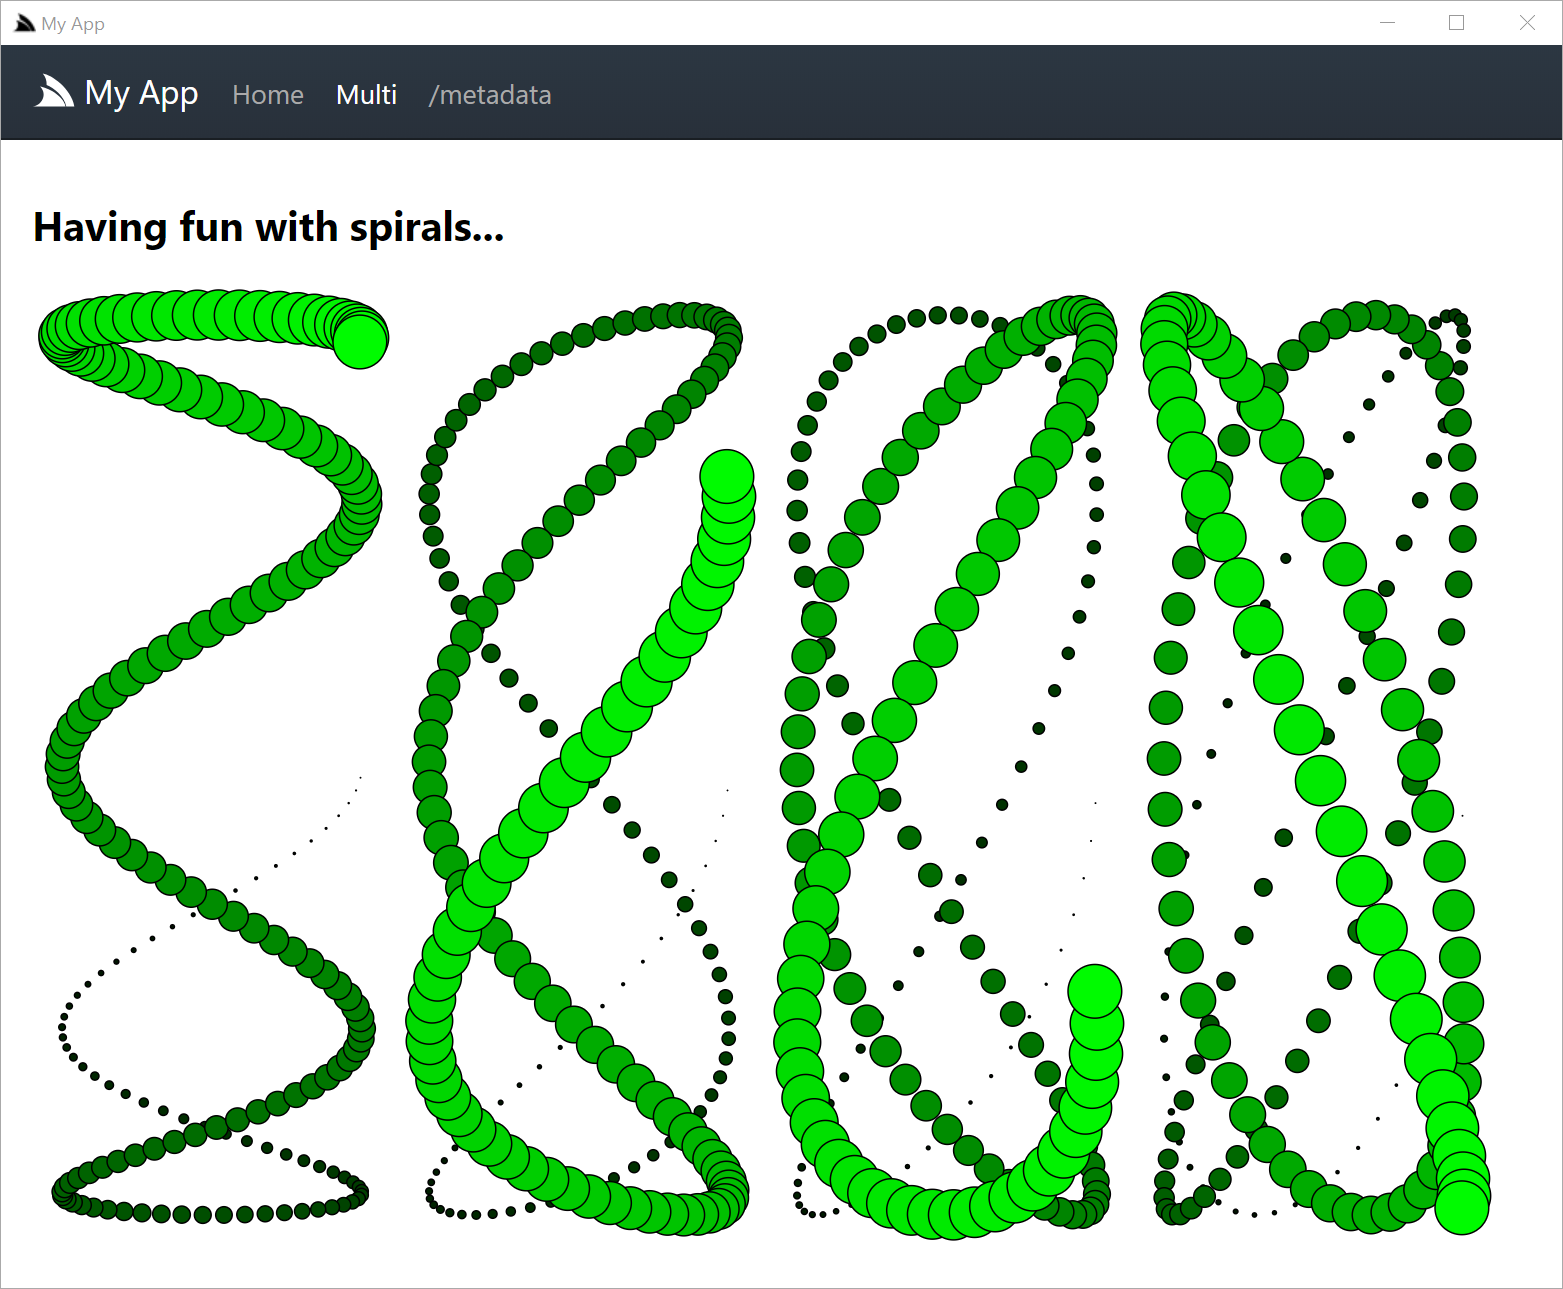
Let's go back to our App and embody our multi spiral viewer in a new multi.html page containing:
{{#each i in range(0, 4) }}
<svg height="640" width="240">
{{#each range(180) }}
{{ 120 + 100 * cos((5) * it * 0.02827) | assignTo: x }}
{{ 320 + 300 * sin((1+i) * it * 0.02827) | assignTo: y }}
<circle cx="{{x}}" cy="{{y}}" r="{{it*0.1}}" fill="rgb(0,{{it*1.4}},0)" stroke="black" stroke-width="1"/>
{{/each}}
</svg>
{{/each}}
Then make it navigable by adding a link to our new page in the _layout.html menu:
{{ 'menu' | partial({
'/': 'Home',
'/multi': 'Multi',
'/metadata': '/metadata',
})
}}
Where upon save, our creation will reveal itself in the App's menu:
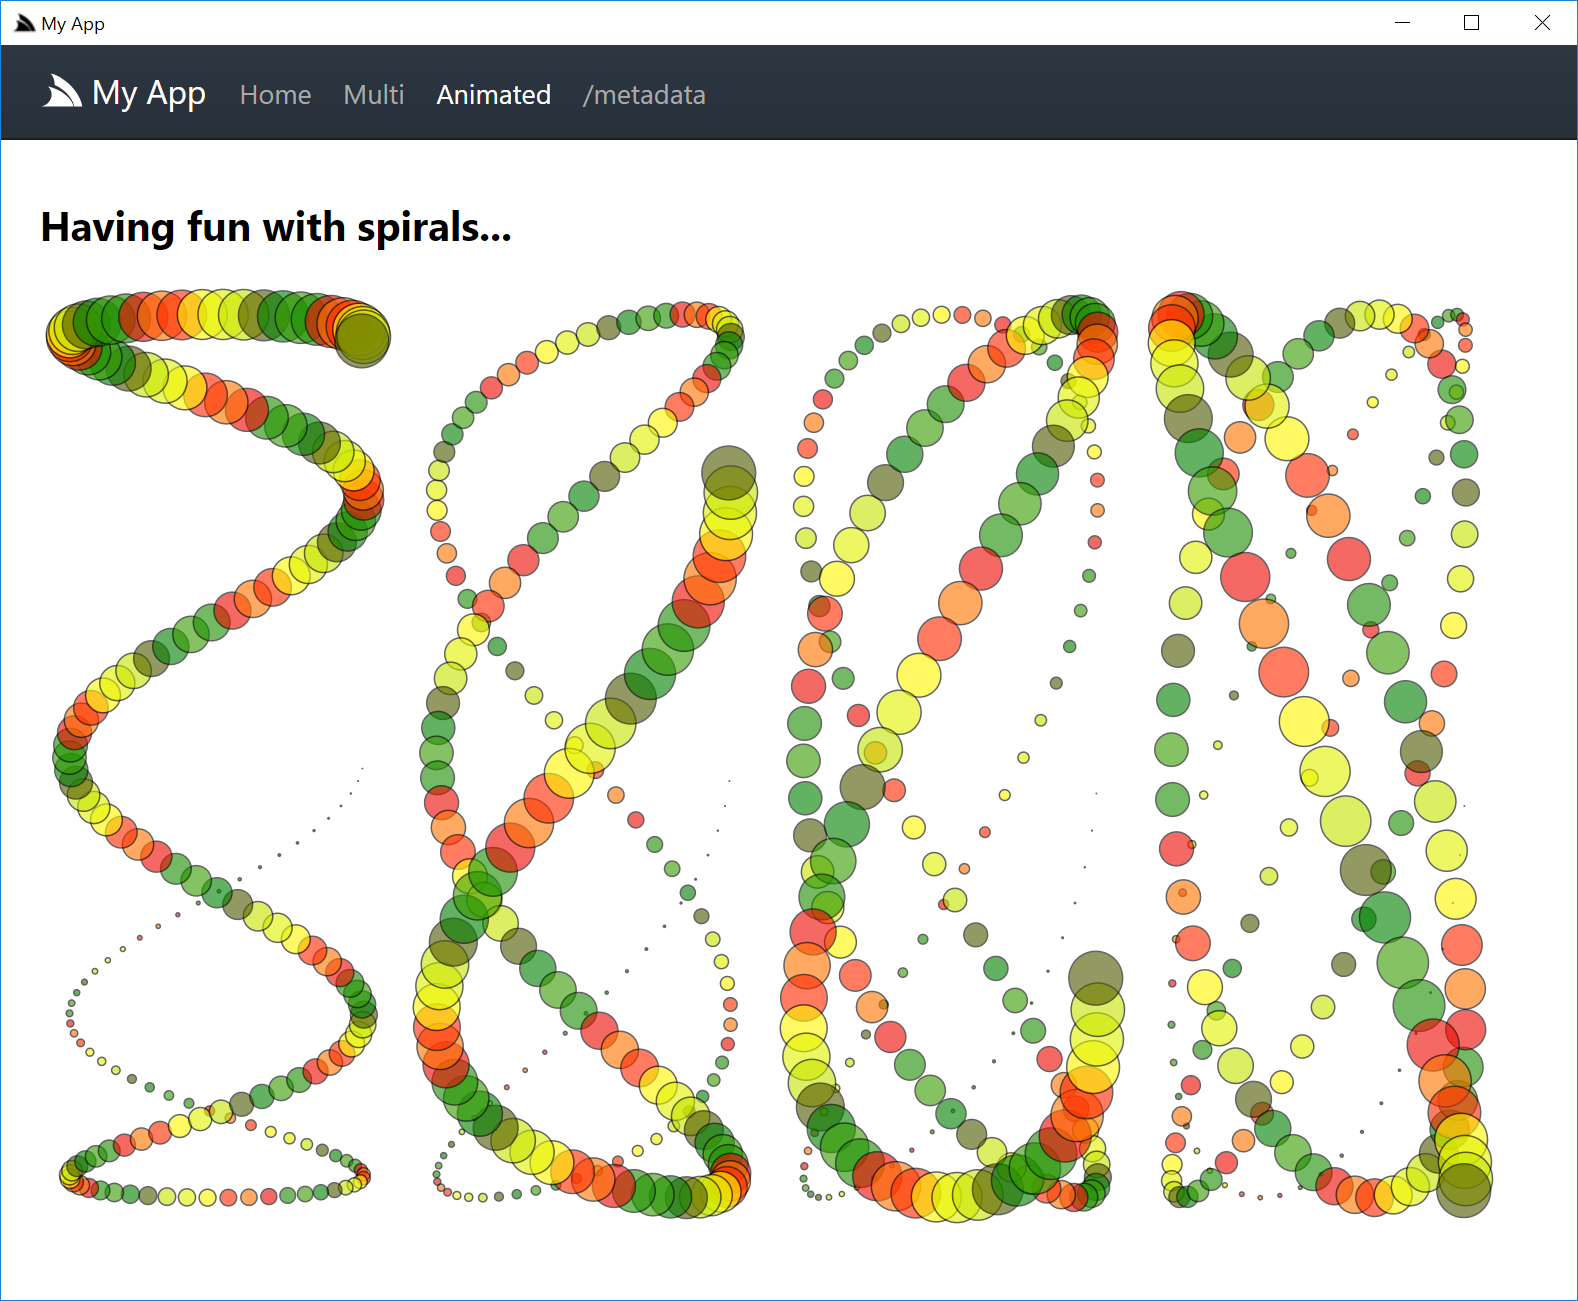
Animating
With the help of SVG's <animate> we can easily bring our spirals to life
by animating different properties on the generated SVG circles.
As we have to wait for the animation to complete before trying out different effects, we won't benefit from Debug Inspector's live REPL
so let's jump straight in and create a new animated.html and add a link to it in the menu:
{{ 'menu' | partial({
'/': 'Home',
'/multi': 'Multi',
'/animated': 'Animated',
'/metadata': '/metadata',
})
}}
Then populate it with a copy of multi.html and sprinkle in some <animate> elements to cycle through different <circle> property values.
We're entering the "creative process" of our App where we can try out different values, hit Save and watch the effects of our tuning eventually
arriving at a combination we like:
{{#each i in range(0, 4) }}
<svg height="640" width="240">
{{#each range(180) }}
{{ 120 + 100 * cos((5) * it * 0.02827) | assignTo: x }}
{{ 320 + 300 * sin((1+i) * it * 0.02827) | assignTo: y }}
<circle cx="{{x}}" cy="{{y}}" r="{{it*0.1}}" fill="rgb(0,{{it*1.4}},0)" stroke="black" stroke-width="1">
<animate attributeName="fill" values="green;yellow;red;green" dur="{{it%10}}s" repeatCount="indefinite" />
<animate attributeName="opacity" values="1;.5;1" dur="5s" repeatCount="indefinite" />
<animate attributeName="cx" values="{{x}};{{x*1.02}};{{x*0.98}};{{x}}" dur="3s" repeatCount="indefinite" />
<animate attributeName="cy" values="{{y}};{{y*1.02}};{{y*0.98}};{{y}}" dur="3s" repeatCount="indefinite" />
</circle>
{{/each}}
</svg>
{{/each}}
Although hard to capture in a screenshot, we can sit back and watch our living, breathing Spirals :)
Checkout spirals.web-app.io for the animated version.
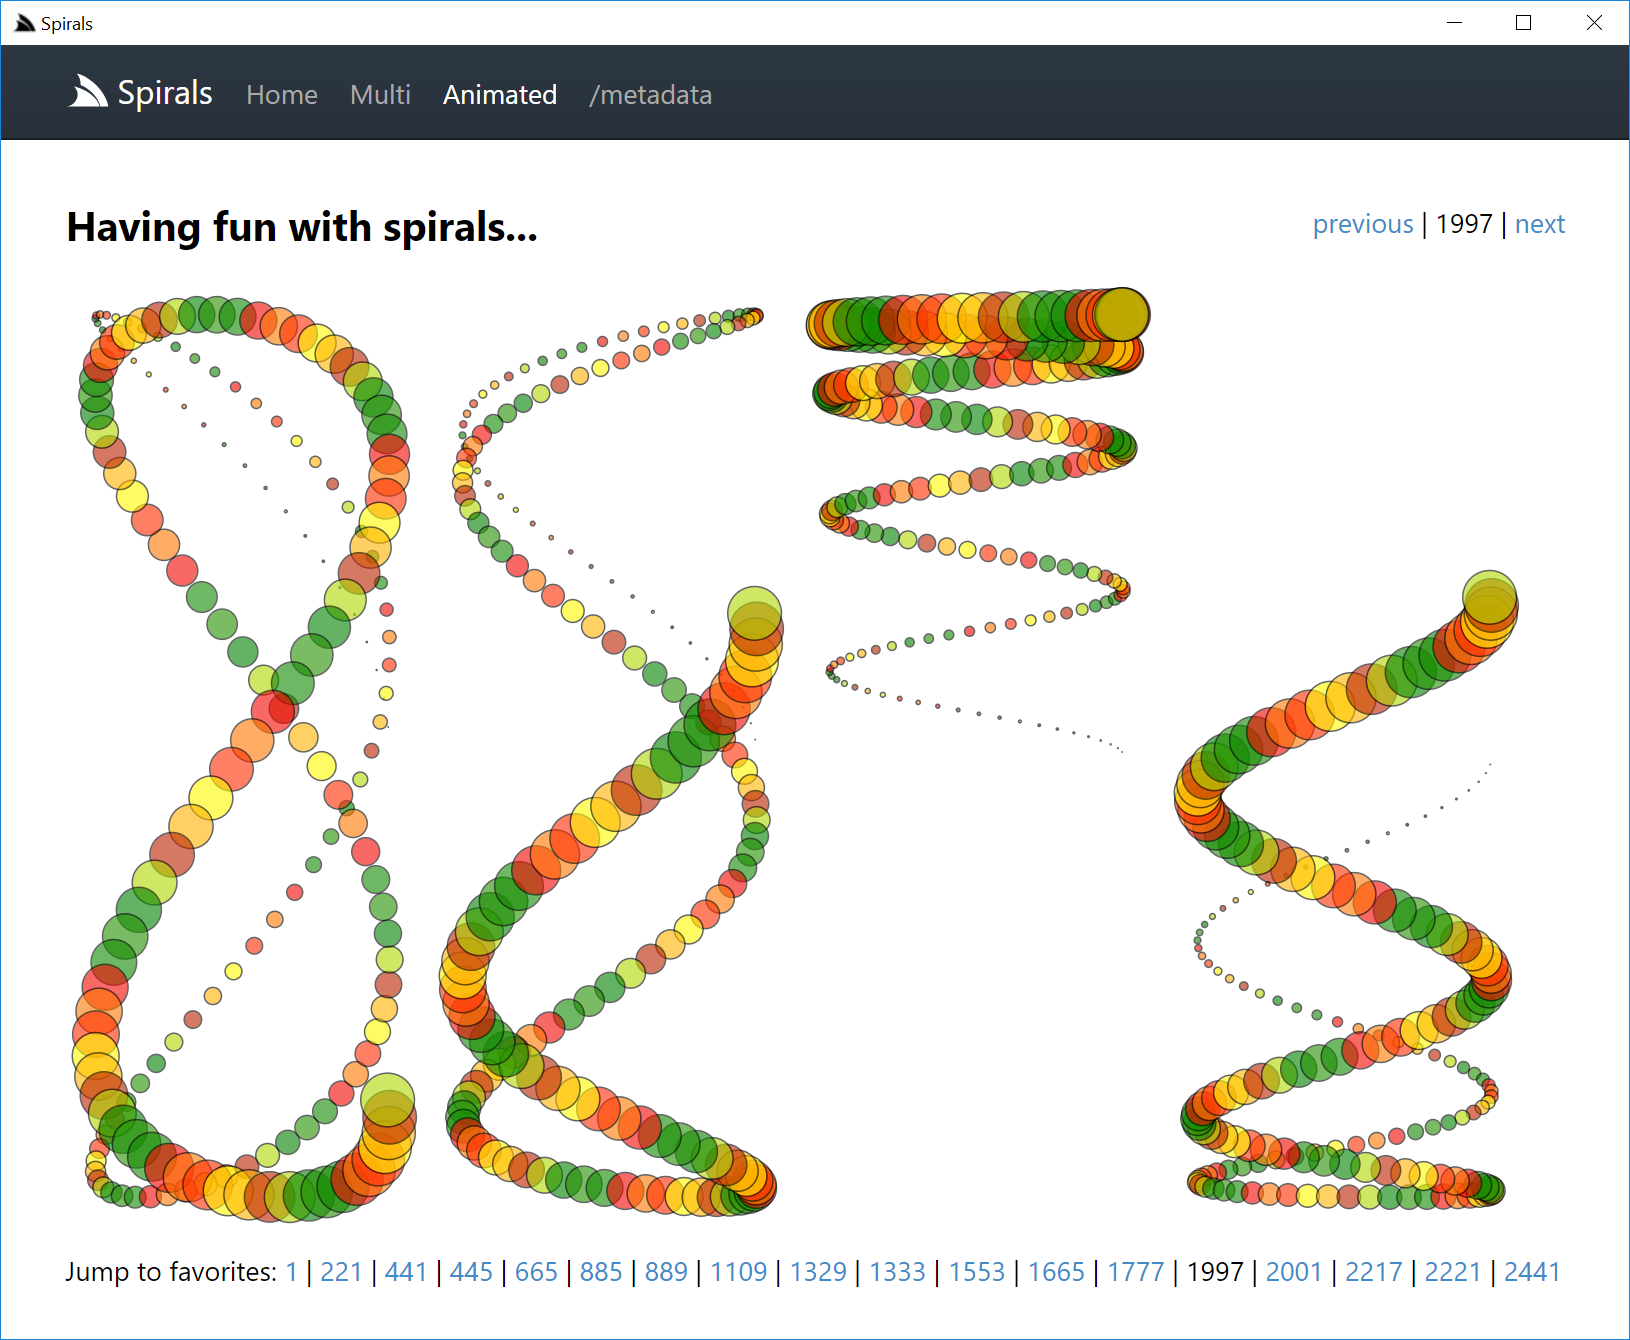
Navigating
Lets expand our App beyond these static Spirals by enabling some navigation, this is easily done by adding the snippet below on the top of the home page:
{{ from ?? 1 | toInt | assignTo: from }}
<div style="text-align:right;margin:-54px 0 30px 0">
{{#if from > 1}} <a href="?from={{ max(from-1,0) }}" title="{{max(from-1,0)}}">previous</a> |{{/if}}
{{from}} | <a href="?from={{ from+1 }}" title="{{max(from-1,0)}}">next</a>
</div>
Whilst the multi.html and animated.html pages can skip by 4:
{{ from ?? 1 | toInt | assignTo: from }}
<div style="text-align:right;margin:-54px 0 30px 0">
{{#if from > 1}} <a href="?from={{ max(from-4,0) }}" title="{{max(from-1,0)}}">previous</a> |{{/if}}
{{from}} | <a href="?from={{ from+4 }}" title="{{max(from-1,0)}}">next</a>
</div>
Then changing the index.html SVG fragment to use the from value on the y-axis:
<svg height="640" width="240">
{{#each range(180) }}
{{ 120 + 100 * cos((5) * it * 0.02827) | assignTo: x }}
{{ 320 + 300 * sin((from) * it * 0.02827) | assignTo: y }}
<circle cx="{{x}}" cy="{{y}}" r="10" fill="rgb(0,100,0)" stroke="black" stroke-width="1"/>
{{/each}}
</svg>
Whilst the multi.html and animated.html pages can use it in its range(from, 4) function:
{{#each i in range(from, 4) }}
<svg height="640" width="240">
{{#each range(180) }}
{{ 120 + 100 * cos((5) * it * 0.02827) | assignTo: x }}
{{ 320 + 300 * sin((1+i) * it * 0.02827) | assignTo: y }}
<circle cx="{{x}}" cy="{{y}}" r="{{it*0.1}}" fill="rgb(0,{{it*1.4}},0)" stroke="black" stroke-width="1"/>
{{/each}}
</svg>
{{/each}}
With navigation activated we can quickly scroll through and explore different spirals. To save ourselves the effort of finding them again lets catalog our favorite picks and add them to a bookmarked list at the bottom of the page. Here are some interesting ones I've found for the home page:
<div>
Jump to favorites:
{{#each [1,5,101,221,222,224,298,441,443,558,663,665,666,783,888] }}
{{#if index > 0}} | {{/if}} {{#if from == it }} {{it}} {{else}} <a href="?from={{it}}">{{it}</a> {{/if}}
{{/each}}
</div>
and my top picks for the multi.html and animated.html pages:
<div>
Jump to favorites:
{{#each [1,217,225,229,441,449,661,669,673,885,1338,3326,3338,4330,8662,9330,11998] }}
{{#if index > 0}} | {{/if}} {{#if from == it }} {{it}} {{else}} <a href="?from={{it}}">{{it}</a> {{/if}}
{{/each}}
</div>
If you've found more interesting ones, let me know!
Now it's just a matter of signing off our digital piece by giving it a name in your app.settings:
name Spirals
Which replaces the name in the menu and used in any shortcuts that are created, and with those finishing touches our App's journey
into the rich colorful world of SVG is complete:
Publishing your App
To share our digital masterpiece with the world we just need to publish it in a GitHub repo, which I've already done for my Spirals app at: github.com/mythz/spirals.
Anyone will then be able to install your App by first downloading the app tool themselves (.NET 6.0 Required):
dotnet tool install -g app
Then running install with the name of the repo and your GitHub User or Organization name in the --source argument:
app install spirals --source mythz
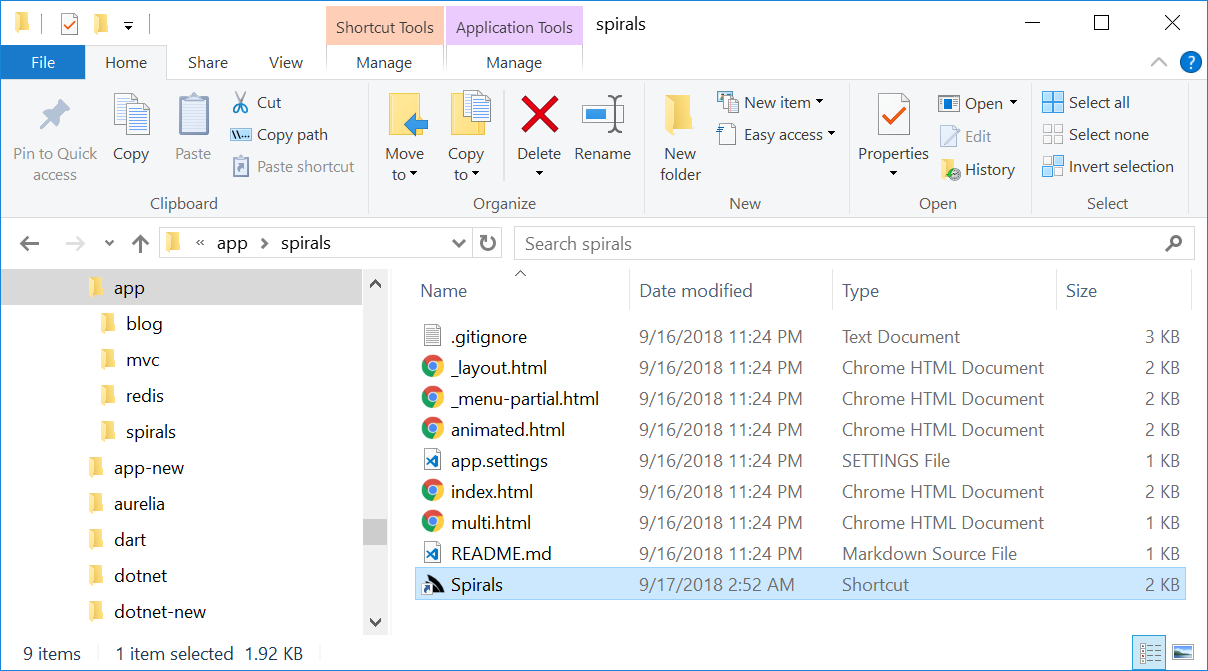
Which installs instantly thanks to the 7kb .zip download that can then be opened by double-clicking on the generated Spirals Desktop Shortcut:
Publishing Gist Apps
As Sharp Apps are so lightweight a flexible deployment option is to deploy it to GitHub gists where they can be launched directly from HTML links using the app:// URL scheme.
To create gists you'll need to generate a GitHub Access Token with gist scope and add it to your GITHUB_TOKEN Environment Variable (win, mac, linux). (alternative: use -token arg in each publish command)
Before publishing our App, our app.settings looks something like:
debug true
name Spirals
CefConfig { width:1100, height:900 }
To make your App listed in our Global App Directory, include the following metadata about your App:
appName     <app alias>    # required: alpha-numeric snake-case characters only, 30 chars max
description <app summary>  # required: 20-150 chars
tags        <app tags>     # optional: space delimited, alpha-numeric snake-case, 3 tags max
The appName is the globally unique short alias you want your App to be launched as, e.g:
app://my-alias
app open my-alias
If your app.settings contains the app metadata above, publishing the app will publish your App to a Gist & register your App's alias to the Global App Directory.
Then to publish your App to a new Gist, run:
app publish
Which will publish your app to a new gist:
published to: https://gist.github.com/gistlyn/4e06df1f1b9099526a7c97721aa7f69c

Run published App:

    app open spirals
To update your Gist run publish again:
app publish
When your App is published the first time, the created gist URL will be saved in a local .publish text file & used for subsequent App publishes.
After it's published anyone will now be able to run your App locally with the global alias (if specified):
app://spirals
app open spirals
The Gist Id:
app://4e06df1f1b9099526a7c97721aa7f69c
app open 4e06df1f1b9099526a7c97721aa7f69c
Or Gist URL:
Users that are not on Windows can use the x dotnet tool instead to launch your App in their preferred browser:
x open spirals
If preferred, Windows users can also launch your Gist Desktop App in their preferred browser (i.e. instead of a Chromium Desktop Shell) with the xapp:// URL Scheme:
xapp://spirals
Vue Desktop Template
To simplify the development UX we've created the vue-desktop .NET Core Desktop Project Template with integrated scripts for building, bundling and publishing Windows Desktop Apps:
YouTube youtu.be/kRnQSWdqH6U
The Vue Desktop Template allows for multiple deployment options, including:
- Publish to a Gist
- Publish to a GitHub Repo
- Publish to .zip and run with
apptool - Publish to self-contained .zip (bundled with app tool)
Our recommendation is to publish Sharp Desktop Apps to Gists (as done with ServiceStack Studio) so they can be launched with the Custom URL Scheme:
app://vuedesktop
Where it can be launched from a HTML <a/> link in a web page, directly in any browsers URL bar or File Explorer.
Desktop Apps published to GitHub repos can be opened using <user>/<repo>, e.g:
app://mythz/vuedesktop
Where it downloads & extracts the latest Release .zip archive (or master if none), before running the app, so can take a little longer to launch for small Apps.
All apps run the latest version by default so it's always up-to-date, but you can speed up App launch times by running the last installed app using the app: Custom URL Scheme:
app:vuedesktop
For Gist deployed Apps, it will run the last downloaded app or download & run the latest App gist if it's the first time it's run.
For GitHub repo Apps, you can download and install them locally with:
app install mythz/vuedesktop
Where the downloaded version can be run using its <repo> name, e.g:
app:vuedesktop
Both Gist and Desktop Apps can be uninstalled using app uninstall, e.g:
$ app uninstall vuedesktop

To view all installed Sharp Apps, run:

$ app uninstall
Creating Windows Shortcuts
The app: URL Scheme is a convenient way to launch Apps if you already have a Browser or Windows File Explorer already open where you can quickly launch Apps by typing CTRL+L shortcut to go to the Command Bar then type app://<name> to launch your App.
Although many users will prefer the familiar Windows Shortcut which they can create by going to the App's folder and running app shortcut
cd %USERPROFILE%.sharp-apps\vuedesktop
app shortcut
This will create a Windows Shortcut for the App which can be copied to the Desktop or pinned to the Taskbar for easy access.
Publishing Gist Apps
Publishing your App to a gist is our preferred option as you can use GitHub to host your App, built-in auto-updates with every each launch and if you publish to the Global App Registry users can download & install your App with a unique UX-friendly name like app://vuedesktop.
To create gists you'll need to generate a GitHub Access Token with gist scope and add it to your GITHUB_TOKEN Environment Variable (win, mac, linux). (alternative: use -token arg in each publish command)
Before publishing your App, its app.settings looks something like:
debug true
name vuedesktop
CefConfig { width:1100, height:900 }
Publish to the Global App Registry
To maximize reach and accessibility of your App you can publish it to our Global App Registry by including the following metadata about your App:
appName     <app alias>    # required: alpha-numeric snake-case characters only, 30 chars max
description <app summary>  # required: 20-150 chars
tags        <app tags>     # optional: space delimited, alpha-numeric snake-case, 3 tags max
The appName is the globally unique short alias you want your App to be launched as, e.g:
app://my-alias
app open my-alias
If your app.settings contains the app metadata above, publishing the app will publish your App to a Gist & register your App's alias to the Global App Directory.
Now you can build, bundle and publish your App to a gist with its publish-app npm script:
npm run publish-app
That returns the gist URL your app was published to:
published to: https://gist.github.com/gistlyn/48b2dcf9bccacab62ec9d8a073d5edb8
Which can now be opened via an URL scheme:
app://48b2dcf9bccacab62ec9d8a073d5edb8
Or via the command line:
app open 48b2dcf9bccacab62ec9d8a073d5edb8
When your App is published the first time, the created gist URL will be saved in a local .publish text file & used for subsequent App publishes.
Local Aliases
If the Gist App isn't published to the Global Registry, users can create their own UX-friendly local alias with:
app alias my-alias 48b2dcf9bccacab62ec9d8a073d5edb8
Where they'll be able to use their alias instead of the Gist Id:
app://my-alias
app open my-alias
Publishing to a GitHub Repo
The same /dist folder that's published to Gists can also be published to a GitHub Repo like github.com/mythz/vuedesktop which can be launched with the <user>/<repo> URL Scheme, e.g:
app://mythz/vuedesktop
Need to copy + paste URL in browser as GitHub markdown doesn't allow custom URL links
Or launched from the command-line:
app open mythz/vuedesktop
Users can also download and run a local copy launched with a Windows Shortcut with this 1-liner:
app download mythz/vuedesktop && cd vuedesktop && app shortcut
This will download this repo and create a Vue Desktop Windows Shortcut you can use to launch this App:
Publish to .zip
The /dist folder can also be zipped and distributed that way, by running:
npm run publish-zip
In which case it can be extracted and launched by running the app command in the App's folder:
$ cd AppDir
$ app
But if you're going to run from a local folder (where app:// isn't available), you'll likely want to create a Windows Shortcut:
app shortcut
That Users can copy to their Desktop or pin to their Taskbar for easy access.
Publishing self-encapsulated .zip
By having the app tool installed, users benefit from ultra small (e.g. 15kb) downloads whose tiny footprints allows for auto-updating with each App launch so they have access to new features as soon as they're available. Users will also be able to update to the Chromium version used to run all their Sharp Desktop Apps by updating the app tool:
dotnet tool update -g app
But if preferred, App's can also bundled and distributed with the app tool so they can be run without needing the app tool installed and distributed Apps are pinned to a specific Chromium version.
You can create self-encapsulated bundles with the publish-exe script:
npm run publish-exe
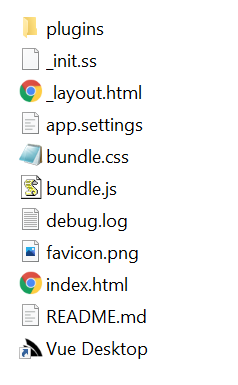
This will generate 2 files:
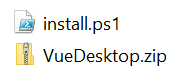
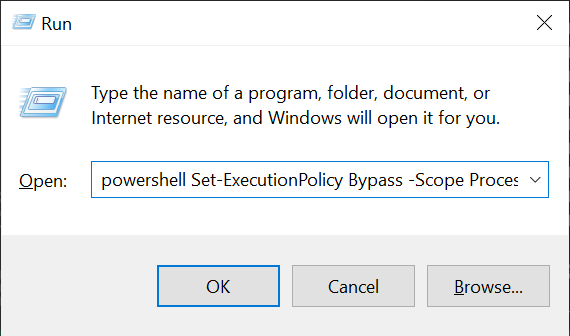
The *.zip contains both the /dist of your App and the app Chromium runtime as well as a convenience install.ps1 script that users can use to effortlessly install the App with the Win+R shortcut to bring up Windows Run dialog then pasting this powershell cmd-let with the URL of your install.ps1 script:
powershell Set-ExecutionPolicy Bypass -Scope Process -Force; iex ((New-Object System.Net.WebClient).DownloadString('https://org.example/install.ps1'))
Here's a copy of install.ps1 which downloads and extracts the App to the Users LocalApp Data and copies the Shortcut to the Desktop.
Before publishing you'll need to update $zipUrl to point to the URL with your *.zip:
$zipUrl  = "https://org.example/MyApp.zip"
$appName = "MyApp"

$TempFile = New-TemporaryFile
Invoke-WebRequest $zipUrl -OutFile $TempFile

$Zip = "$(Join-Path $TempFile.Directory.FullName $TempFile.BaseName).zip"
Move-Item $TempFile $Zip

Remove-Item $(Join-Path $TempFile.Directory.FullName $TempFile.BaseName) -Recurse -ErrorAction Ignore
Expand-Archive -Force $Zip $(Join-Path $TempFile.Directory.FullName $TempFile.BaseName)

$AppDir = $(Get-ChildItem -Path $(Join-Path $TempFile.Directory.FullName $TempFile.BaseName) | Select-Object -First 1)

Remove-Item "$env:LOCALAPPDATA\$appName" -Recurse -ErrorAction Ignore
Move-Item $AppDir.FullName "$env:LOCALAPPDATA\$appName"

# Copy Shortcut to Desktop
Copy-Item $env:LOCALAPPDATA\$appName\dist\*.lnk -Destination $env:USERPROFILE\Desktop

# Clean up
Remove-Item $Zip -Recurse -ErrorAction Ignore
Remove-Item $(Join-Path $TempFile.Directory.FullName $TempFile.BaseName) -Recurse -ErrorAction Ignore
Here's an example of an app we have published to our servers:
powershell Set-ExecutionPolicy Bypass -Scope Process -Force; iex ((New-Object System.Net.WebClient).DownloadString('https://files.sharpscript.net/VueDesktop/install.ps1'))