INFO
When using ServiceStack Auth refer to Admin Users UI instead
Registration
The Identity Auth Admin UI can be enabled when registering the AuthFeature Plugin by calling AdminUsersFeature():
public class ConfigureAuth : IHostingStartup
{
    public void Configure(IWebHostBuilder builder) => builder
        .ConfigureServices(services => {
            services.AddPlugin(new AuthFeature(IdentityAuth.For<ApplicationUser>(
                options => {
                    // options.SessionFactory = () => new CustomUserSession(); //optional
                    options.CredentialsAuth();
                    options.AdminUsersFeature();
                })));
        });
}
Which just like the ServiceStack Auth Admin Users UI enables a
Admin UI that's only accessible to Admin Users for managing Identity Auth users at /admin-ui/users.
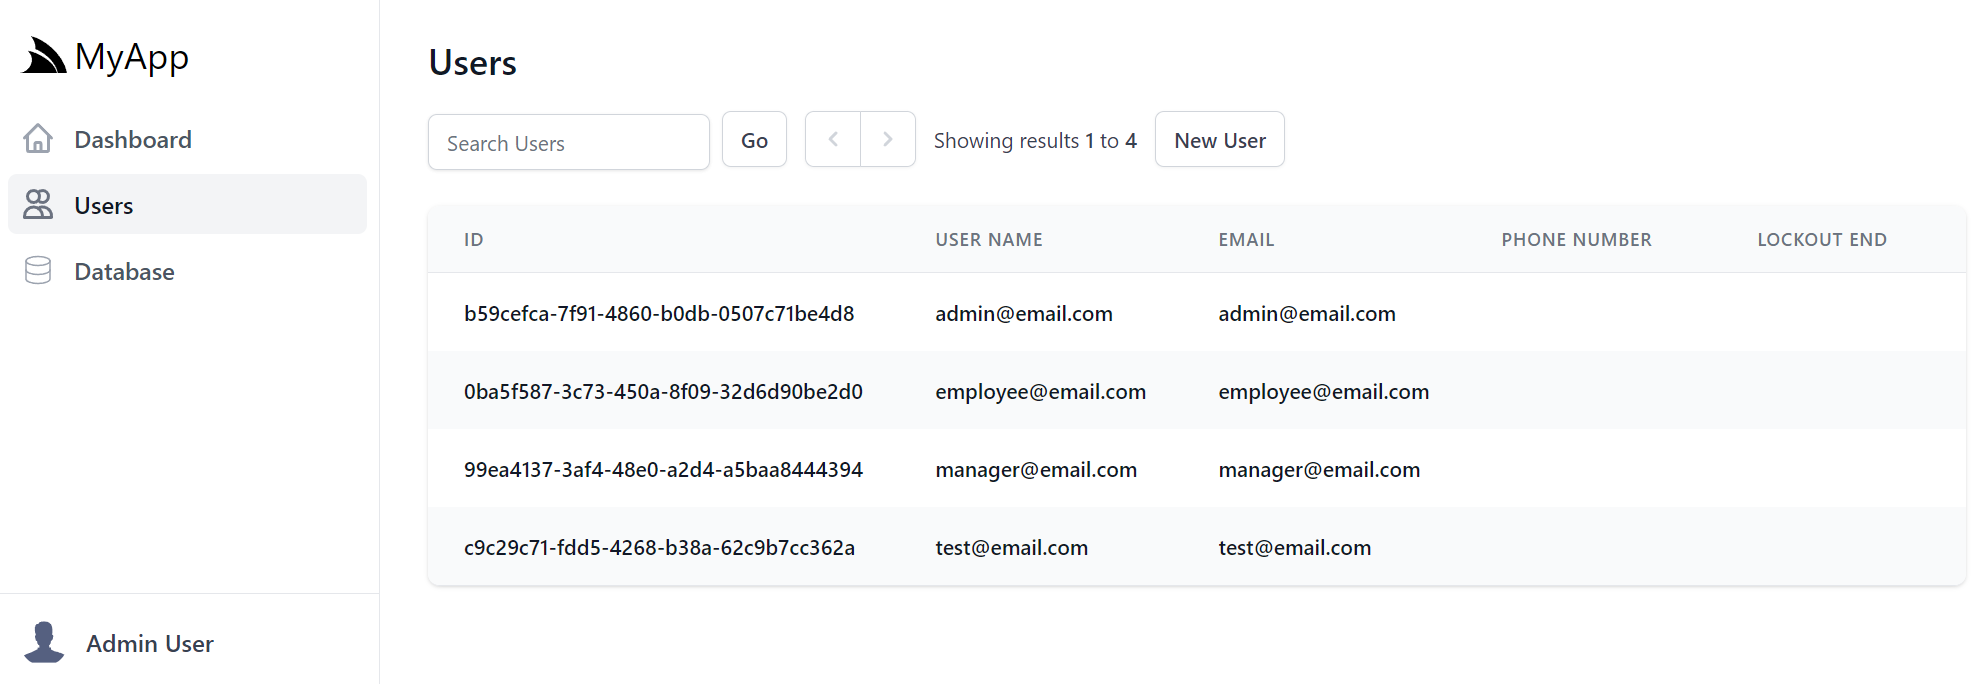
User Search Results
Which displays a limited view of a User's info due to the minimal properties on the default IdentityAuth model:
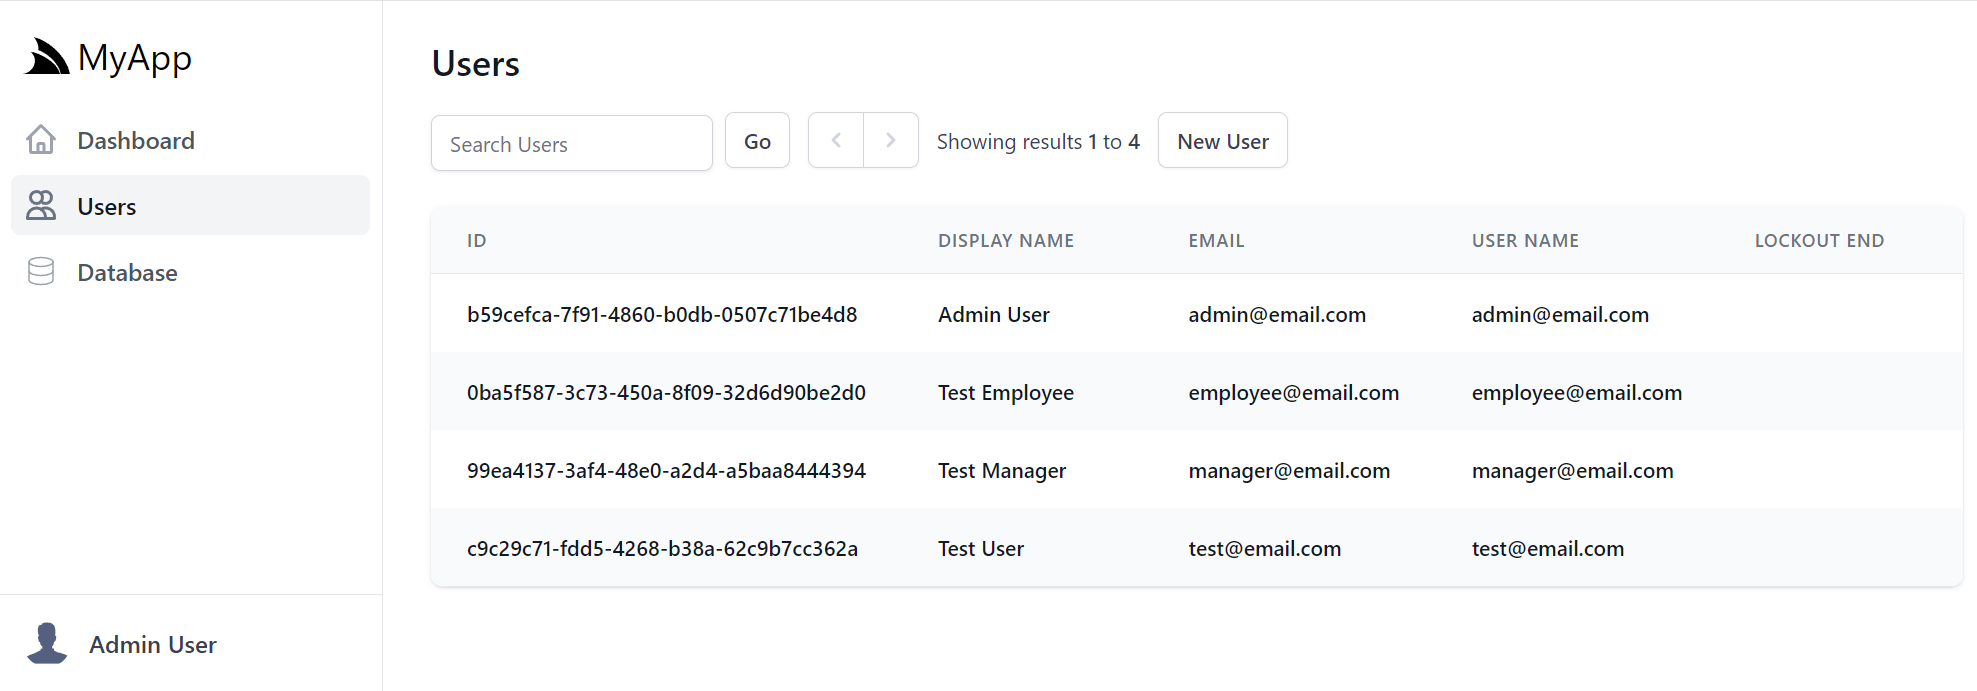
Custom Search Result Properties
These User Search results are customizable by specifying the ApplicationUser properties you want displayed instead:
options.AdminUsersFeature(feature =>
{
    feature.QueryIdentityUserProperties =
    [
        nameof(ApplicationUser.Id),
        nameof(ApplicationUser.DisplayName),
        nameof(ApplicationUser.Email),
        nameof(ApplicationUser.UserName),
        nameof(ApplicationUser.LockoutEnd),
    ];
});
Custom Search Result Behavior
The default display Order of Users is also customizable:
feature.DefaultOrderBy = nameof(ApplicationUser.DisplayName);
As well as the Search behavior which can be replaced to search any custom fields, e.g:
feature.SearchUsersFilter = (q, query) =>
{
    var queryUpper = query.ToUpper();
    return q.Where(x =>
        x.DisplayName!.Contains(query) ||
        x.Id.Contains(queryUpper) ||
        x.NormalizedUserName!.Contains(queryUpper) ||
        x.NormalizedEmail!.Contains(queryUpper));
};
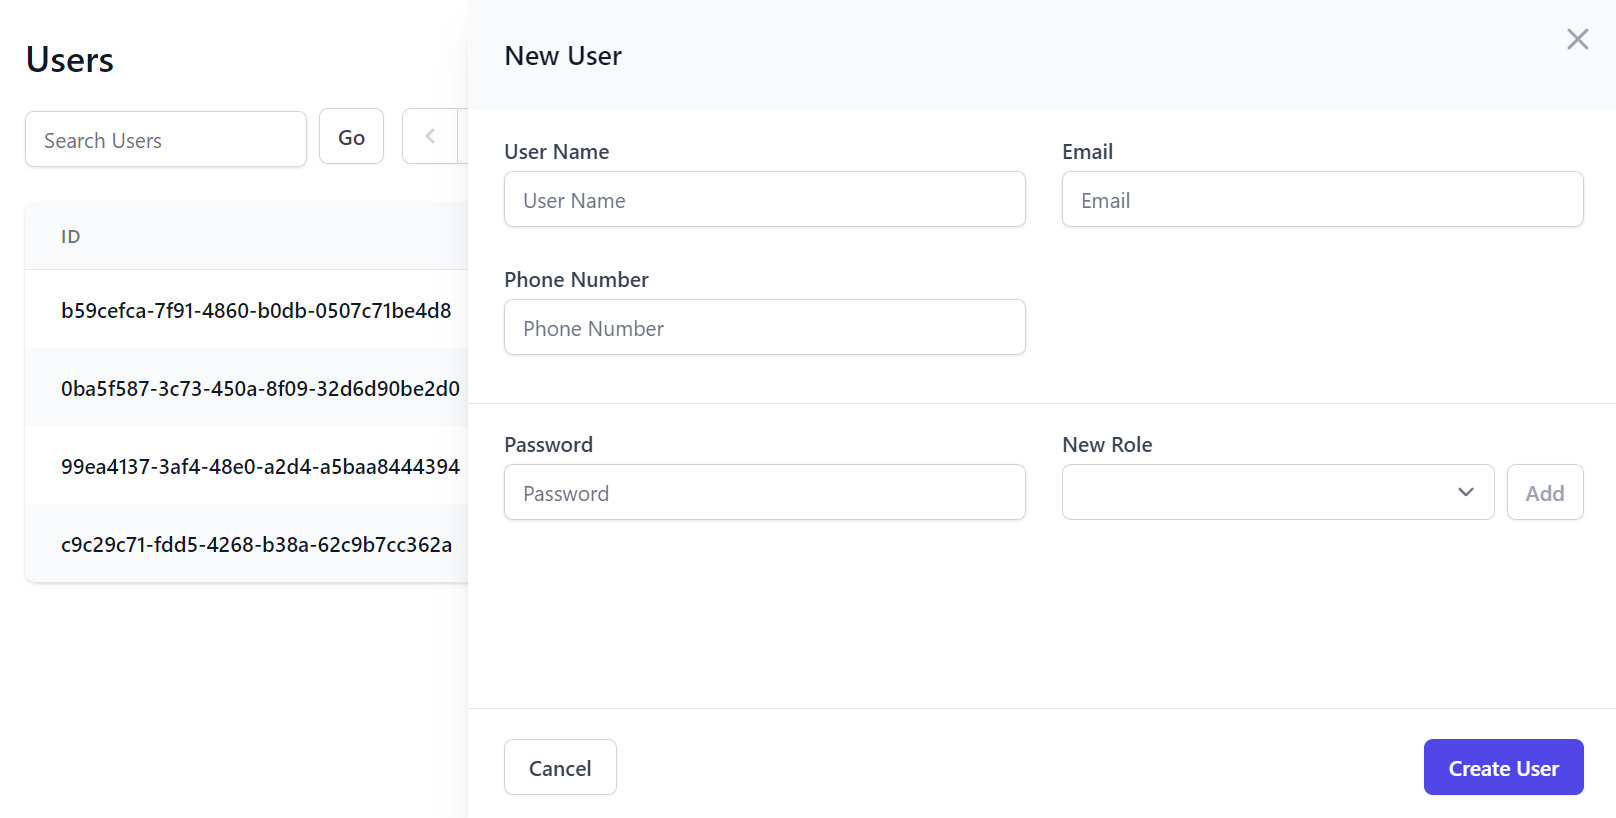
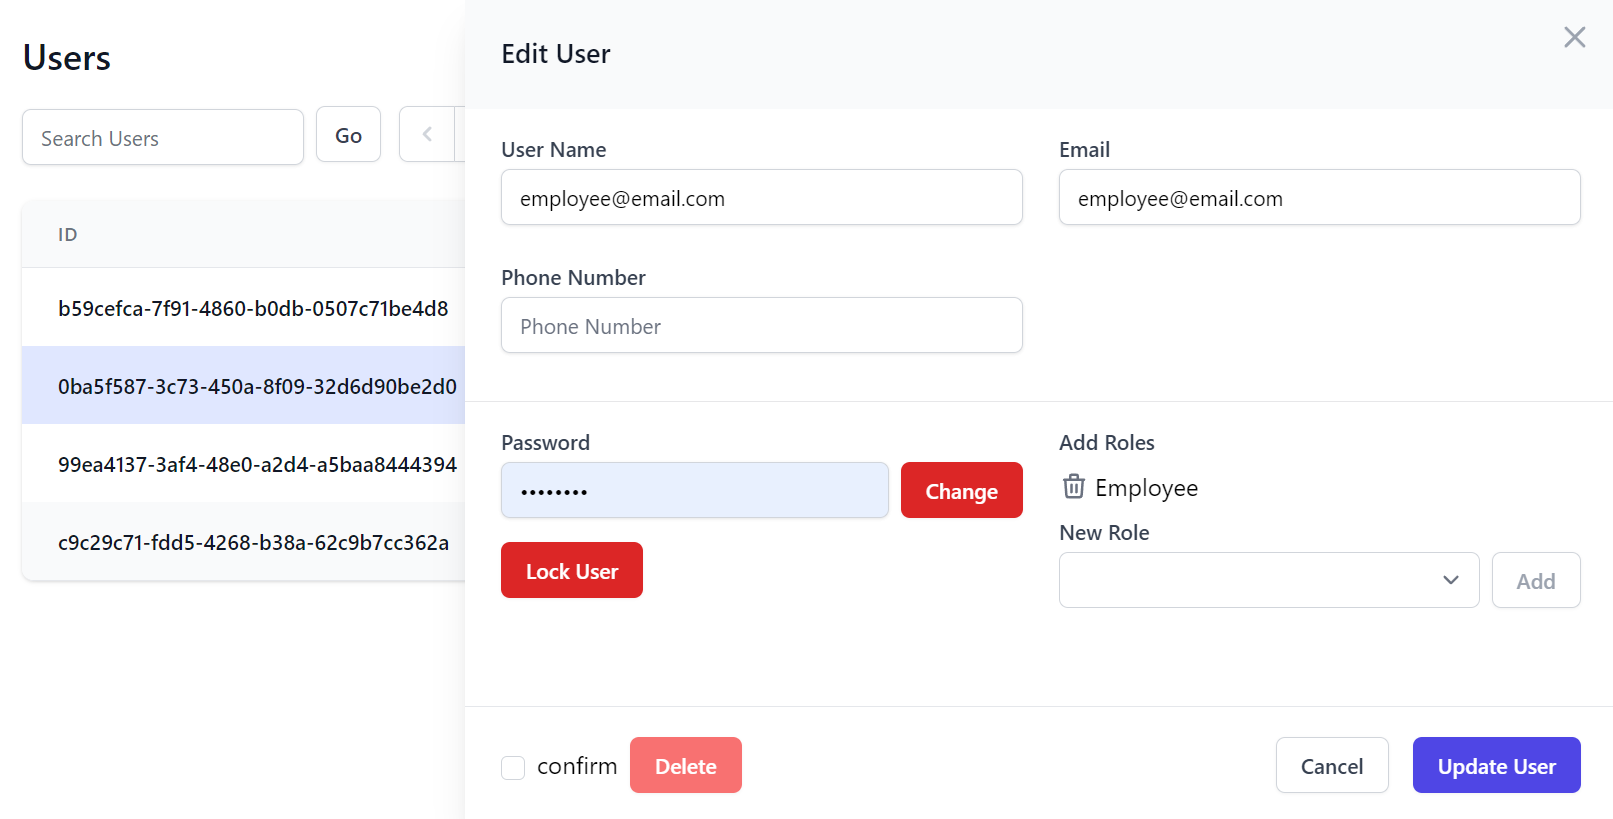
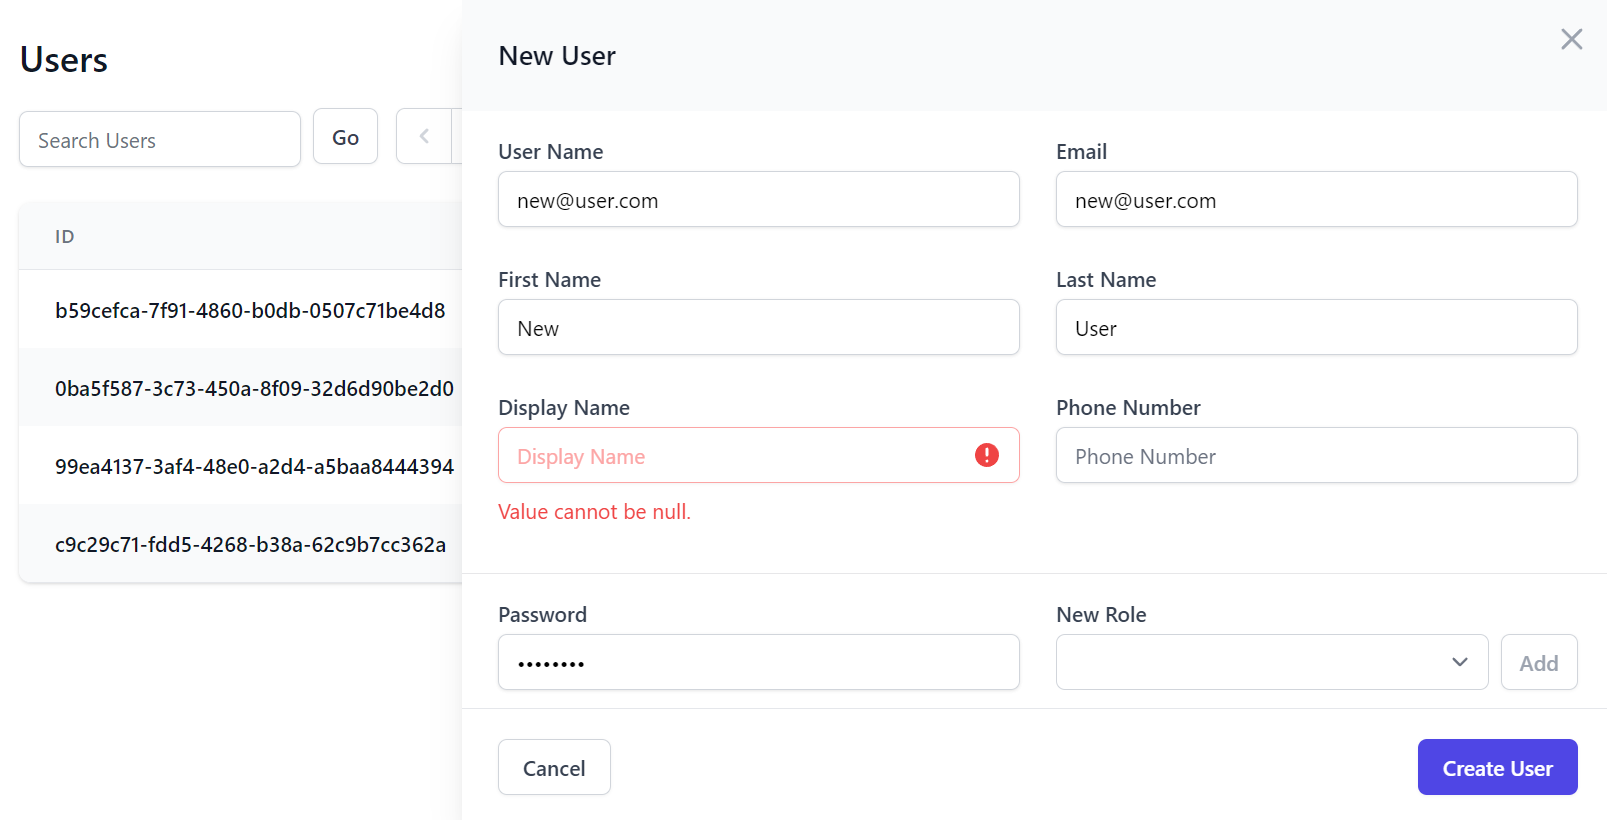
Default Create and Edit Users Forms
The default Create and Edit Admin Users UI are also limited to editing the minimal IdentityAuth properties:
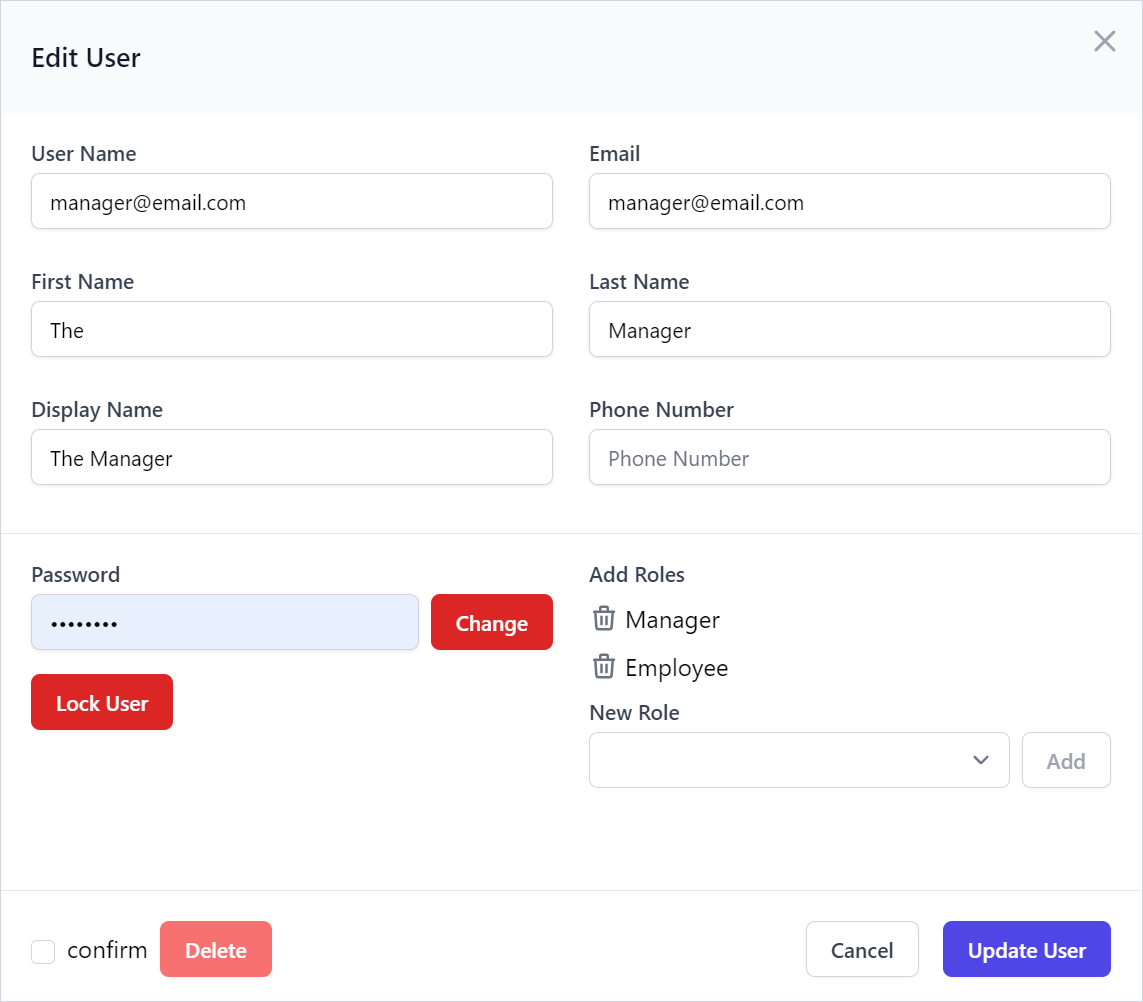
Whilst the Edit page includes standard features to lockout users, change user passwords and manage their roles:
Custom Create and Edit Forms
By default Users are locked out indefinitely, but this can also be changed to lock users out to a specific date, e.g:
feature.ResolveLockoutDate = user => DateTimeOffset.Now.AddDays(7);
The forms editable fields can also be customized to include additional properties, e.g:
feature.FormLayout =
[
    Input.For<ApplicationUser>(x => x.UserName, c => c.FieldsPerRow(2)),
    Input.For<ApplicationUser>(x => x.Email, c => {
        c.Type = Input.Types.Email;
        c.FieldsPerRow(2);
    }),
    Input.For<ApplicationUser>(x => x.FirstName, c => c.FieldsPerRow(2)),
    Input.For<ApplicationUser>(x => x.LastName, c => c.FieldsPerRow(2)),
    Input.For<ApplicationUser>(x => x.DisplayName, c => c.FieldsPerRow(2)),
    Input.For<ApplicationUser>(x => x.PhoneNumber, c =>
    {
        c.Type = Input.Types.Tel;
        c.FieldsPerRow(2);
    }),
];
That can override the new ApplicationUser Model that's created and any Validation:
Custom User Creation
feature.CreateUser = () => new ApplicationUser { EmailConfirmed = true };
feature.CreateUserValidation = async (req, createUser) =>
{
    await IdentityAdminUsers.ValidateCreateUserAsync(req, createUser);
    var displayName = createUser.GetUserProperty(nameof(ApplicationUser.DisplayName));
    if (string.IsNullOrEmpty(displayName))
        throw new ArgumentNullException(nameof(AdminUserBase.DisplayName));
    return null;
};
Admin User Events
Should you need to, Admin User Events can use used to execute custom logic before and after creating, updating and deleting users, e.g:
feature.OnBeforeCreateUser = (request, user) => { ... };
feature.OnAfterCreateUser  = (request, user) => { ... };
feature.OnBeforeUpdateUser = (request, user) => { ... };
feature.OnAfterUpdateUser  = (request, user) => { ... };
feature.OnBeforeDeleteUser = (request, userId) => { ... };
feature.OnAfterDeleteUser  = (request, userId) => { ... };
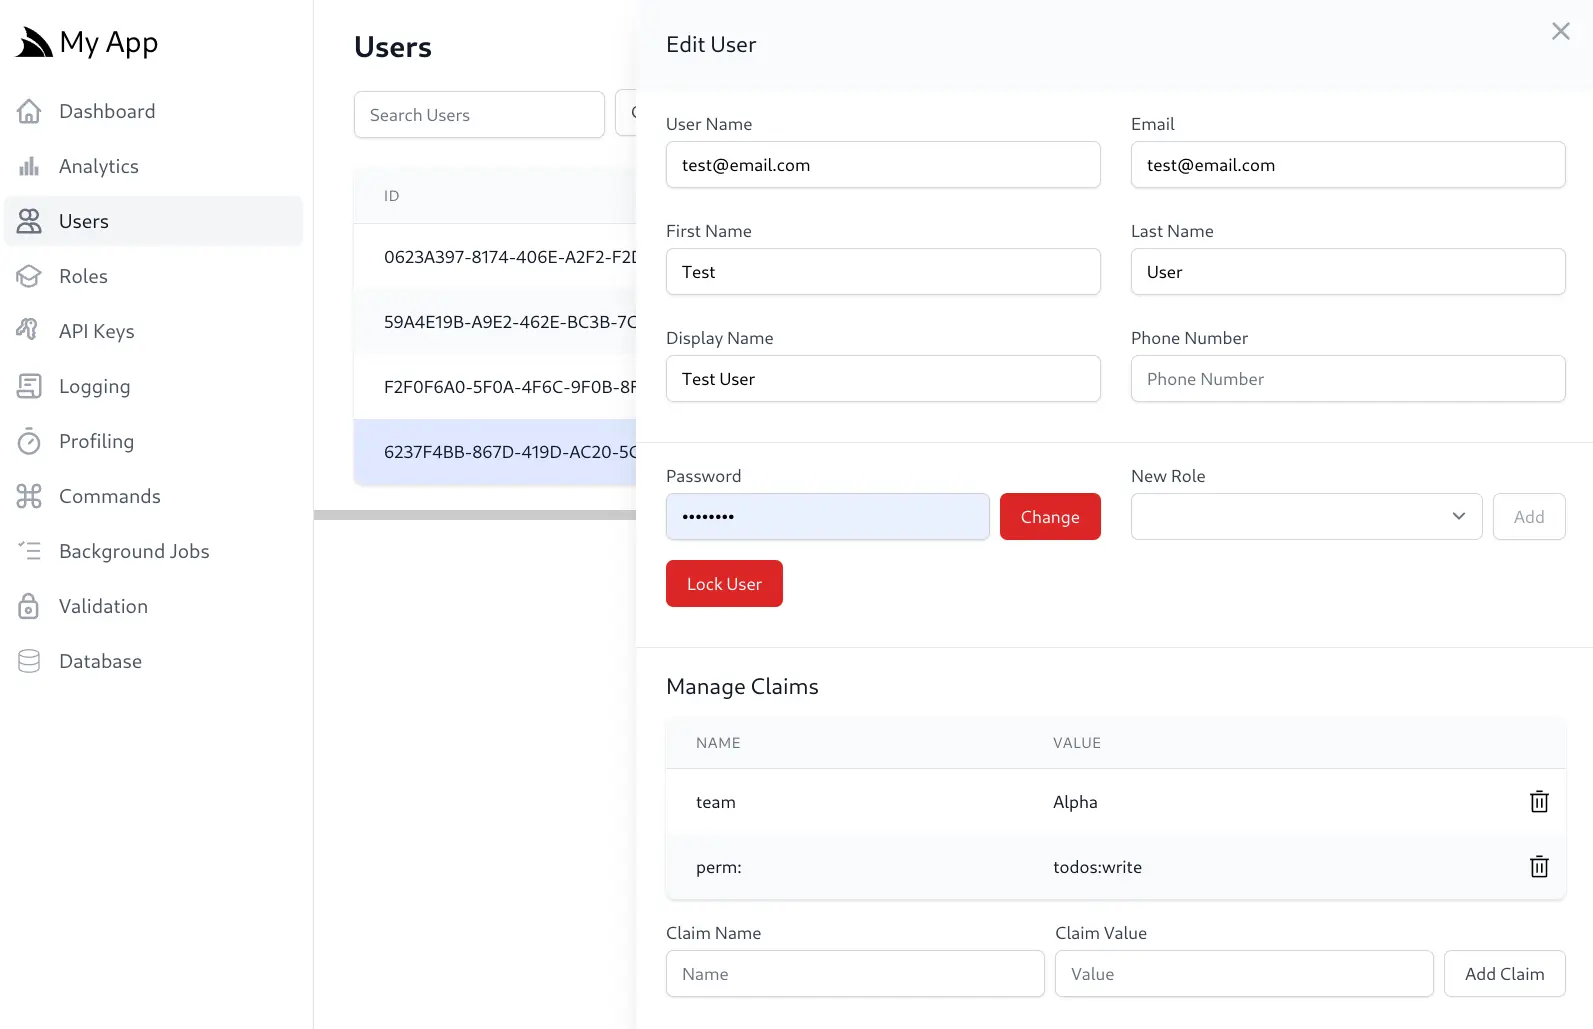
IdentityAuth User Claims
The User Claim Management UI can be used to assign Claims to individual Users:
Validating Claims
Claims are attestations or attributes about a User which we can use to restrict access to APIs to only Users who
have been assigned that claim. We could use this to implement a permission system that restricts usage with a
todos:write permission with something like:
[ValidateHasClaim("perm", "todos:write")]
class CreateTodo {}
Normally this would result in the generic missing claims error message:
But as the perm claim has a customized error message:
HasClaimValidator.ClaimErrorMessages["perm"]= "`${Value} Permission Required`";
It will generate that Error Response instead:
This is a good example for how to use HasClaimValidator.ClaimErrorMessages to add custom error messages
for your own custom claim validations.
Inspecting Claims inside Services
You can also inspect and validate a Users Claim by inspecting the Authenticated ClaimsPrincipal, e.g:
public class TodoServices : Service
{
    public object Any(CreateTodo request)
    {
        var user = Request.GetClaimsPrincipal();
        if (!user.HasClaim("perm", "todos:write"))
            throw HttpError.Forbidden("todos:write Permission Required");

        var allUserClaims = user.Claims.ToList();
        //...
    }
}