Due to the environmental pressures to use HTTPS everywhere with Browsers marking HTTP as not secure and operating systems and mobile platforms requiring all connections to be secure by default, it's become the defacto standard to both host production sites with HTTPS as well as developing locally under HTTPS with a Self-Signed Certificate.
In most cases it's sufficient to run .NET Core Apps on https://localhost:5001 for normal browser development and if you receive an invalid certificate
error you can run:
dotnet dev-certs https --trust
To trust the local development certificate and remove the SSL Certificate error in your browser.
When localhost is not allowed
However for Apps needing to support OAuth providers that don't allow localhost domains like Sign In with Apple you would need
to use a different domain. A popular workaround is to use a DNS name that resolves to 127.0.0.1 in which case you can use:
local.servicestack.com
Which you can use to view your local Web App typically on https://localhost:5001 at https://local.servicestack.com:5001 which
will allow you to register as valid domains & callback URLs in OAuth Apps you want to support. As this is a real DNS A record
it will also work in emulators & different environments like WSL.
When developing for Android
But to be able to access your local dev server from an Android Emulator you'd instead need to use the special 10.0.2.2 loopback
IP, which you could support by updating your Android Emulator /system/etc/hosts file
mapping to include:
10.0.2.2 local.servicestack.com
Which can be quite cumbersome to change, alternatively an easier solution is to use a DNS record that resolves to 10.0.2.2:
dev.servicestack.com
and instead update your OS hosts file (e.g. %SystemRoot%\System32\drivers\etc\hosts for Windows or /etc/hosts on macOS/Linux) to include:
127.0.0.1 dev.servicestack.com
Which will let you use the same dev.servicestack.com to access your local dev server in both Android Emulators and your Host OS
so you can have a single domain & callback URL you can use in your OAuth Apps configuration.
When developing for iOS
As iOS is a heavily locked down OS you wont have the same opportunity to modify iOS's hosts file, instead the easiest way to configure a custom address for a given domain is to configure it on the DNS Server. Fortunately this easy to setup in macOS with a lightweight, easy to configure DNS Server like Dnsmasq which lets you easily add custom DNS rules whilst falling back to use its default DNS resolution for non-configured addresses.
The easiest way to install Dnsmasq on macOS is to use Homebrew:
brew install dnsmasq
Once installed copy over the default configuration files:
cp $(brew list dnsmasq | grep /dnsmasq.conf.example$) /usr/local/etc/dnsmasq.conf
sudo cp $(brew list dnsmasq | grep /homebrew.mxcl.dnsmasq.plist$) /Library/LaunchDaemons/
Then configure Dnsmasq to start automatically by registering it with launchd:
sudo launchctl load /Library/LaunchDaemons/homebrew.mxcl.dnsmasq.plist
The easiest to configure the IP Address for a single domain is to still add it to /etc/hosts, e.g. if your local ASP.NET
dev server is on a different server to your macOS being used to develop/test iOS Apps, you would use that IP Address instead:
192.168.0.2 dev.servicestack.com
Alternatively you can maintain these rules in Dnsmasq's config which offers far greater flexibility:
sudo vi /usr/local/etc/dnsmasq.conf
address=/dev.servicestack.com/192.168.0.2
In which case you'll also want to update the OS's resolver config to query your local DNS Server when resolving these addresses.
Restart Dnsmasq to apply changes
After making changes to your DNS configuration, restart dnsmasq for it to take effect:
sudo launchctl stop homebrew.mxcl.dnsmasq
sudo launchctl start homebrew.mxcl.dnsmasq
Update iOS to use your custom DNS Server
First find out the current IP Address of your macOS instance:
ipconfig getifaddr en0
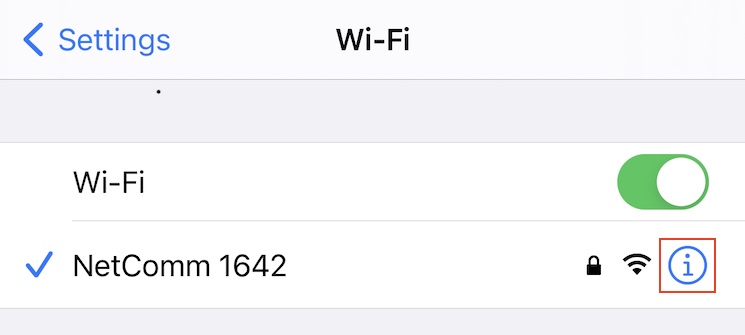
Which you can get your iOS development device to use by going into your Wi-Fi Network Info in iOS Settings:
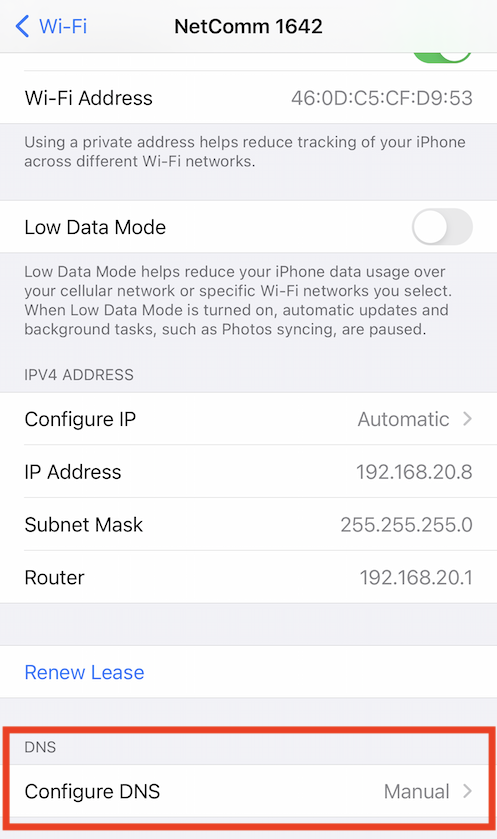
Going to Configure DNS:
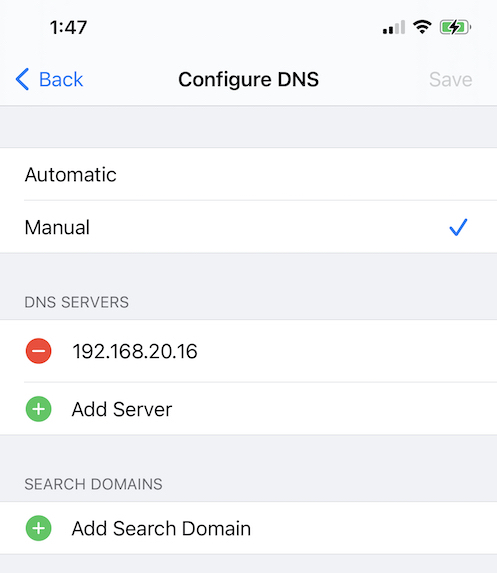
Then switching to use Manual DNS servers and adding your macOS IP Address where it will now be used to resolve DNS queries:
Generating self-signed SSL Certificates for Custom Domains
Whether you use local.servicestack.com or dev.servicestack.com or your own hostname, you'll need to create and trust
a self-signed certificate to be able to view it in a browser without certificate errors.
To simplify creation of self-signed certificate for *.servicestack.com you can use the dotnet mix tool
to download the openssl script and running it:
npx add-in gen-dev-crt.sh
bash gen-dev-crt.sh
Which will write this script below to your projects HOST project:
PASSWORD=dev
if [ $# -ge 1 ]
  then
    PASSWORD=$1
fi

openssl req -x509 -out dev.crt -keyout dev.key -days 825 \
  -newkey rsa:2048 -nodes -sha256 \
  -subj '/CN=*.servicestack.com' -extensions EXT -config <( \
   printf "[dn]\nCN=*.servicestack.com\n[req]\ndistinguished_name = dn\n[EXT]\nsubjectAltName=DNS:*.servicestack.com\nkeyUsage=digitalSignature\nextendedKeyUsage=serverAuth")

openssl pkcs12 -export -out dev.pfx -inkey dev.key -in dev.crt -password pass:$PASSWORD
Which uses OpenSSL to generate a self-signed certificate dev.crt, private key dev.key and a PKCS #12 dev.pfx certificate in macOS, Linux & Windows using WSL.
Trust self-signed certificate
After generating a new self-signed certificate you'll need to trust it in your OS's certificate store so it's recognized & treated as a valid certificate.
Windows
On Windows you can trust certificates by running the powershell command below in Administrator mode:
Import-Certificate -FilePath dev.crt -CertStoreLocation Cert:\CurrentUser\Root
Where it will import the Certificate into the Current User Certificate Store which you can view/remove in regedit.msc at:
Computer\HKEY_CURRENT_USER\SOFTWARE\Microsoft\SystemCertificates\Root\Certificates\
macOS
In macOS you can add a trusted root certificate to your System.keychain with:
sudo security add-trusted-cert -d -r trustRoot -k "/Library/Keychains/System.keychain" dev.crt
Linux
Unfortunately it's not as cohesive in Linux where different Distro's & Apps handle it differently, however this existing answer covers installation in Debian/Ubuntu distributions.
Configure in .NET Core
You can configure the .NET Core to use this self-signed certificate during development by specifying the path to dev.pfx and the password used
in your appsettings.Development.json:
{
  "Kestrel": {
    "Endpoints": {
      "Http": {
        "Url": "https://*:5001",
        "Protocols": "Http1",
        "Certificate": {
          "Path": "dev.pfx",
          "Password": "dev"
        }
      }
  }
}
Accessing from Browsers
Now after restarting your browser to reset its SSL caches you'll be able to use either *.servicestack.com domains to view your local development without SSL Errors:

Accessing from C# Clients
As .NET has access your OS's trusted certificates you'll be able to access the custom domains without additional configuration:
var client = new JsonApiClient("https://dev.servicestack.com:5001"); //.NET HttpWebRequest
var response = await client.GetAsync(new Hello { Name = "World" });

var client = new JsonHttpClient("https://dev.servicestack.com:5001");    //.NET HttpClient
var response = await client.GetAsync(new Hello { Name = "World" });
Accessing from Native Applications
Something you want to avoid is including your certificate & private key with your Native application which is considered a compromise of your private key that attackers can use to implement a successful MitM attack.
Flutter Android
Instead you'll want to either install the self-signed certificate on your local device/emulator where it wont be trusted by anyone else.
Otherwise a far easier solution is to ignore SSL certificates when accessing your local dev server which you can do with Dart/Flutter using the HttpClient
badCertificateCallback property:
var httpClient = new HttpClient()
    ..badCertificateCallback =
        ((X509Certificate cert, String host, int port) => host == 'dev.servicestack.com' && port == 5001);
Although ideally you'd use a constant value like kDebugMode so that
the badCertificateCallback pass-through doesn't make it into production builds. Here's an example configuring a ServiceStack Dart Service Client
to use development or production APIs:
var client = kDebugMode
    ? ClientFactory.createWith(ClientOptions(baseUrl:'https://dev.servicestack.com:5001', ignoreCert:true))
    : ClientFactory.create('https://prod.app');

var response = await client.get(Hello()..name=='World');
Removing Certificate Artifacts
If you're only using Windows you'll typically only end up using the PKCS #12 dev.pfx certificate combining both certificate & private key
which can be safely removed to clear unnecessary generated artifacts & clear-text copy of the private key:
del dev.key
del dev.crt
Where as other OS's predominantly use Certificates & Private Keys, which if needed can be later extracted from the dev.pfx:
Extract Certificate
openssl pkcs12 -in dev.pfx -clcerts -nokeys -out dev.crt
Extract Private Key
openssl pkcs12 -in dev.pfx -nocerts -nodes | openssl rsa -out dev.key