Jupyter Notebooks provide a rich set of interactive computing tools that can be used for many different use cases. Incorporating data from web services means you can rerun/update your notebooks for ease of reuse for things like generating reports and testing.
For reporting tasks, we want to have the ability to save the output of our notebooks as a PDF, so there are a few setup steps that are needed to get Jupyter working with PDF using LaTeX. LaTeX has quite a few implicit dependencies that need to be installed locally to get this output to work. One way to make this a bit easier to repeat your results is by using a Docker environment setup to be used by the hosted MyBinder.org service.
MyBinder
The JupyterHub team maintain their public Jupyter notebooks service at mybinder.org for anyone who wants to share their interactive GitHub repositories publicly. Behind the scenes Notebooks are executed on a collection of BinderHub Federated services using resources donated by Google Cloud, OVH, GESIS Notebooks and the Turing Institute.
To run your Notebooks on Binder head over to https://mybinder.org and paste the URL of your public GitHub repo containing your Jupyter Notebooks to retrieve the generated URL for your repo.
E.g. our ServiceStack/jupyter-notebooks GitHub repo is available from:
https://mybinder.org/v2/gh/ServiceStack/jupyter-notebooks/HEAD
Where behind-the-scenes Binder will build and host a Docker image of your repo and launch a dedicated notebook Web App instance to view an execute your repo's Notebooks.
This Docker image is built has on a Dockerfile in the root of the repository. Starting with a base image from the Jupyter Docker docs
# LaTeX dependencies (as root)
RUN apt-get install -y texlive-xetex \
        texlive-fonts-recommended \
        texlive-latex-recommended \
        texlive-latex-extra \
        texlive-plain-generic

# Install nbconvert (as user)
RUN pip install nbconvert
A full example of a Dockerfile which also includes support for .NET notebooks can be found in our mix repository, this can be built and run locally as well as used with MyBinder by creating a new GitHub repository and committing it in the root of the repository.
To run this locally, build the Dockerfile first using docker build . -t <my-tag>, followed by running the docker image using docker run.
Running locally, it is most useful to edit notebooks on the local host machine rather than the docker containers storage. To do this, we want to use a few options when using docker run. For example, the following command can run and expose local notebooks within /mnt/c/projects/my-notebooks.
docker run -it --rm -p 8888:8888 -v /mnt/c/projects/my-notebooks:/home/jovyan/Notebooks -e CHOWN_HOME=yes <my-tag>
Once running, use the 127.0.0.1 url in the command line output and open the full link with your browser. Editing and saving notebooks will update your notebooks on your host file system allowing you to iterate quickly.
Combining local and MyBinder workflow
Being able to run the same Docker container locally to iterate on host notebooks that are in the same GitHub repository and then commit those changes to share with others and to run on MyBinder creates a great way of getting the most out of the repeatability that is a part of the Binder solution as well as having the same functionality locally to generate reports and share as PDF without needing to regularly rebuild the docker image which will slow down iteration.
Things you will need
- ServiceStack dotnet tool
x. - Docker
- GitHub Account
Setup
We've created a mix template to setup this workflow more straight forward.
All command line utils used are available in the latest dotnet tool which can be installed from:
dotnet tool install --global x
Or if you had a previous version installed, update with:
dotnet tool update -g x
Create a new GitHub repository
To work with MyBinder.org service, you will need to create a public GitHub repository so the service can build and host your notebook environment.
INFO
For private repositories to work, you will need to host and run your own infrastructure for your BinderHub environment. More information can be found on the steps required for this on the BinderHub docs "Zero to BinderHub"
Clone your newly created public GitHub repository locally and run the following command in the root directory of the repository.
npx add-in docker-jupyter-reports
Commit the generated Dockerfile and push your changes to GitHub.
Build the Docker image locally
Since we want to be able to work on notebook reports both locally and on MyBinder, we will need to build the Docker image locally.
From the root of your local git repository, run the following command where jupyter-reports can be replaced with your preferred tag.
docker build . -t jupyter-reports
INFO
This will likely take a few minutes locally due to all the required packages and size of the numerous dependencies
[+] Building 572.3s (25/25) FINISHED
 => [internal] load build definition from Dockerfile                                                               0.1s
 => => transferring dockerfile: 3.68kB                                                                             0.0s
 => [internal] load .dockerignore                                                                                  0.0s
 => => transferring context: 2B                                                                                    0.0s
 => [internal] load metadata for docker.io/jupyter/base-notebook:latest                                            7.2s
 => [auth] jupyter/base-notebook:pull token for registry-1.docker.io                                               0.0s
 => [ 1/19] FROM docker.io/jupyter/base-notebook:latest@sha256:5a942551e592d9ee167c353dec8015f5781fa69fece97a093  15.6s
 => => resolve docker.io/jupyter/base-notebook:latest@sha256:5a942551e592d9ee167c353dec8015f5781fa69fece97a0934f6  0.0s
...
 => => extracting sha256:67bf56c81c699383f5a229fdc62a2664c94a7798d35511454e29df1c6a1afd05                          0.0s
 => [internal] load build context                                                                                  0.0s
 => => transferring context: 3.67kB                                                                                0.0s
 => [ 2/19] WORKDIR /home/jovyan                                                                                   1.4s
 => [ 3/19] RUN apt-get update                                                                                    73.9s
 => [ 4/19] RUN apt-get install -y curl                                                                           22.2s
 => [ 5/19] RUN apt-get install -y texlive-xetex         texlive-fonts-recommended         texlive-latex-recomm  375.2s
 => [ 6/19] RUN apt-get update     && DEBIAN_FRONTEND=noninteractive apt-get install -y --no-install-recommends    5.1s
 => [ 7/19] RUN dotnet_sdk_version=5.0.102     && curl -SL --output dotnet.tar.gz https://dotnetcli.azureedge.net  8.2s
 => [ 8/19] COPY ./ /home/jovyan/Notebooks/                                                                        0.3s
 => [ 9/19] RUN echo "<configuration>  <solution>    <add key="disableSourceControlIntegration" value="true" />    0.5s
 => [10/19] RUN echo "<Project Sdk="Microsoft.NET.Sdk.Web">  <PropertyGroup>    <TargetFramework>net5.0</TargetFr  0.6s
 => [11/19] RUN chown -R 1000 /home/jovyan                                                                         1.0s
 => [12/19] RUN pip install nteract_on_jupyter                                                                    14.6s
 => [13/19] RUN dotnet tool install -g Microsoft.dotnet-interactive                                               12.8s
 => [14/19] RUN dotnet tool install -g x                                                                           6.5s
 => [15/19] RUN dotnet restore /home/jovyan/preload.csproj                                                        16.4s
 => [16/19] RUN echo "/opt/conda/bin:/usr/local/sbin:/usr/local/bin:/usr/sbin:/usr/bin:/sbin:/bin:/home/jovyan/.d  0.3s
 => [17/19] RUN dotnet interactive jupyter install                                                                 2.7s
 => [18/19] RUN pip install nbconvert                                                                              1.1s
 => [19/19] WORKDIR /home/jovyan/Notebooks/                                                                        0.0s
 => exporting to image                                                                                             6.2s
 => => exporting layers                                                                                            6.2s
 => => writing image sha256:ab54b9fd600007d3badbd7e99927e4c2bfa2dcc2334586c1e76619d1a0e56cbd                       0.0s
To run your newly built Docker image, use the following command where <absolute-path-of-git-repo> is the location of your local git repository. This can't be a relative.
docker run -it --rm -p 8888:8888 -v <absolute-path-of-git-repo>:/home/jovyan/Notebooks -e CHOWN_HOME=yes jupyter-reports
INFO
Jupyter will generate working directory called .ipynb_checkpoints which you can add to your .gitignore
Running this will output a local 127.0.0.1 address to use in your browser with an authentication toke you will need to copy and paste to your preferred browser.

Example notebook report
Now that we have our environment built and running, we want to create a report that is sharable in multiple ways. That is a nice PDF output we can attach and share as well as a working notebook so others can see and run the full version of our report to review or make changes themselves.
Creating a new notebook using the x tool
To jump start the process of getting the data you need to create your report in a notebook, we can use the ServiceStack x tool to generate the plumbing code we need to fetch data from a specific ServiceStack host and service.
For example, working with the Chinook sample application which has details of orders from all over the world, we can produce a report based on invoice data.
Running the following command from a new notebooks directory in our local git repository, we can generate a working notebook that already integrates with the Chinook sample web services, specifically the QueryInvoices service.
x jupyter-python https://chinook.locode.dev QueryInvoices
Once generated, we can navigate to this notebook in the jupyter environment using our browser.
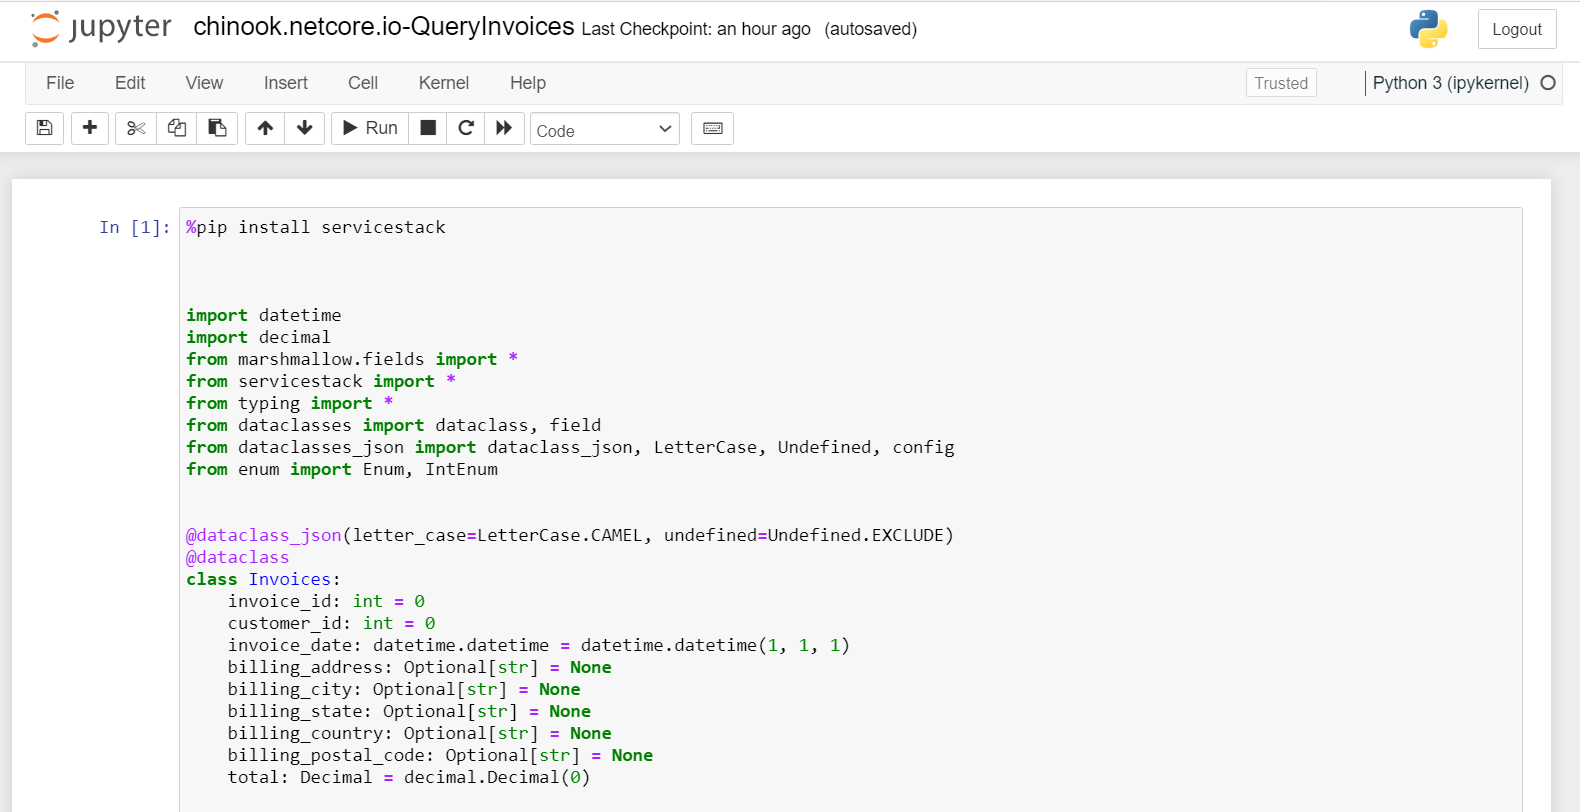
The first cell contains all the typed code for our integration with the Chinook service and initializes the JsonServiceClient with the ServiceStack host.
The second cell performs the query, we can provide more details here based on the specific service. If you are unsure of how you can use a specific service you can use Instant Client Apps to explore the service or use x inspect <host> <api name>.
response = client.send(QueryInvoices())
In our example, we are going to query all invoices and filter locally to generate some different visuals.
The last two cells display the data is the response in different ways. Since we will want to visualize the data ourselves to produce a report, we can delete these cells and install some dependencies we will need to generate some more useful plots.
%pip install pandas
%pip install matplotlib
import pandas as pd
import matplotlib.pyplot as plt
The above code will use the pip magic to install pandas and matplotlib libraries and import them for use.
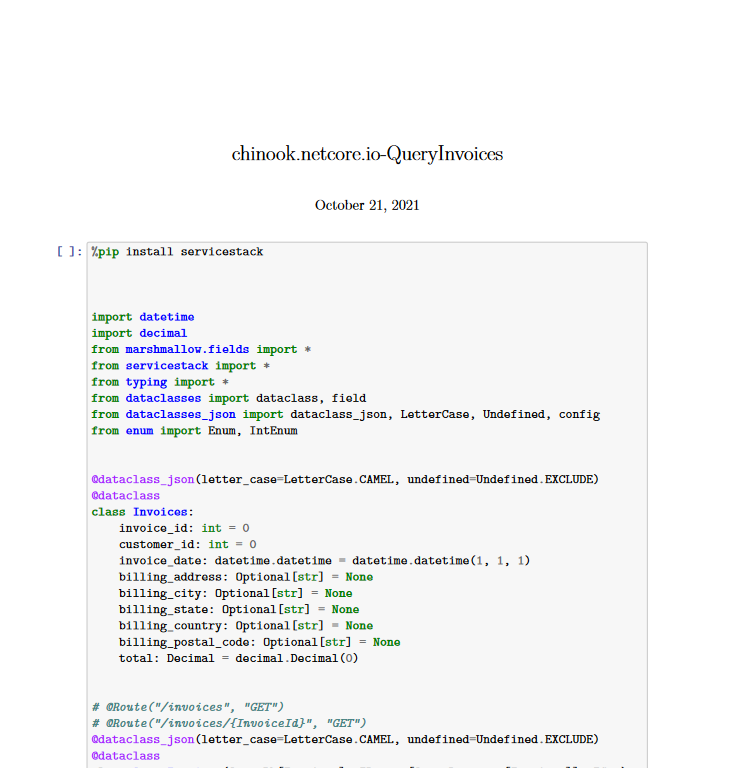
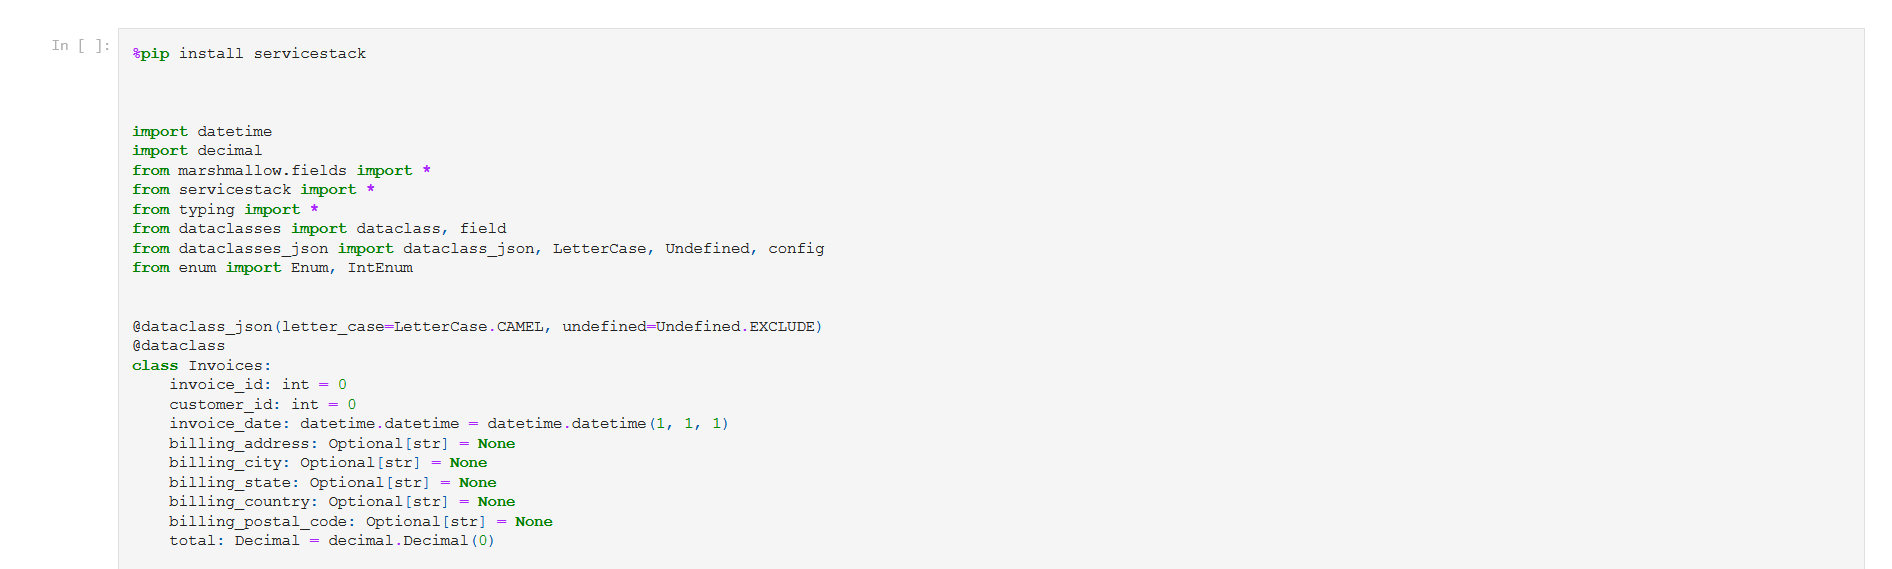
We know the structure of the data returning from the service based on the response Data Transfer Objects (DTOs) declared in the first cell.
@dataclass_json(letter_case=LetterCase.CAMEL, undefined=Undefined.EXCLUDE)
@dataclass
class Invoices:
    invoice_id: int = 0
    customer_id: int = 0
    invoice_date: datetime.datetime = datetime.datetime(1, 1, 1)
    billing_address: Optional[str] = None
    billing_city: Optional[str] = None
    billing_state: Optional[str] = None
    billing_country: Optional[str] = None
    billing_postal_code: Optional[str] = None
    total: Decimal = decimal.Decimal(0)
Next, we want to load our response data into a pandas DataFrame for ease of plotting.
df = pd.DataFrame(response.results)
And since we will be looking at sales over time, we will create an index column to our data for year based on the existing invoice_date column.
df['year'] = pd.DatetimeIndex(df['invoice_date']).year
Jupyter Notebooks have different types of cells that change the way they behave when they are run. Markdown cells can be used for presentation of code results, making the notebook ideal for generating output that has a clean layout and is well described.
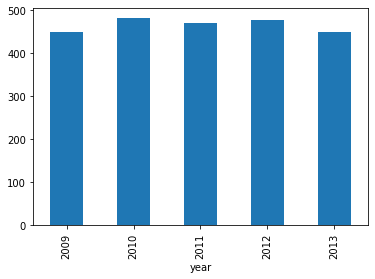
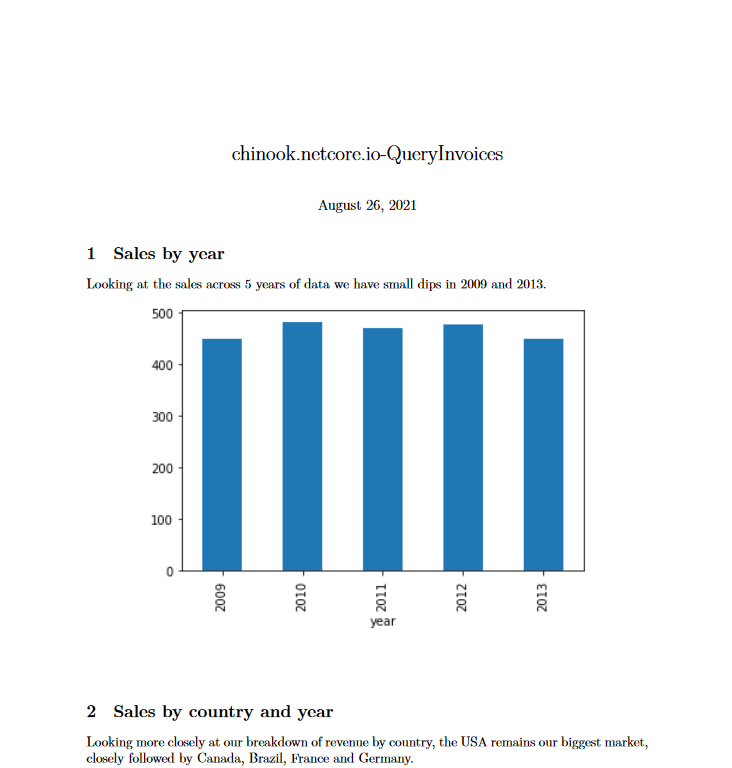
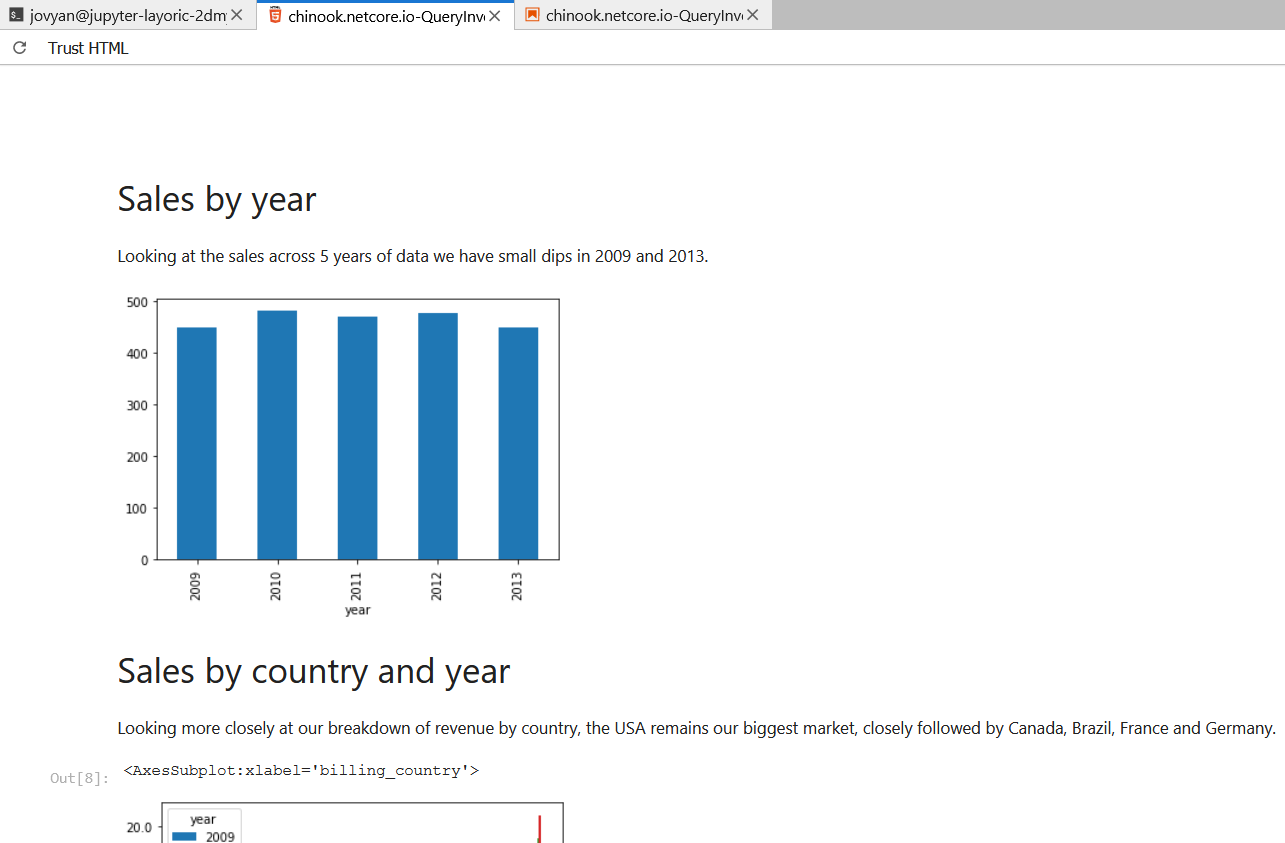
# Sales by year
Looking at the sales across 5 years of data we have small dips in 2009 and 2013.
Now we have given the context for a visual, lets generate the visual itself by using the following code.
df.groupby('year')['total'].sum().astype(float).plot.bar();
INFO
For statements generating plots, remember to end the statement with a semicolon as to avoid unwanted metadata about the statement return type
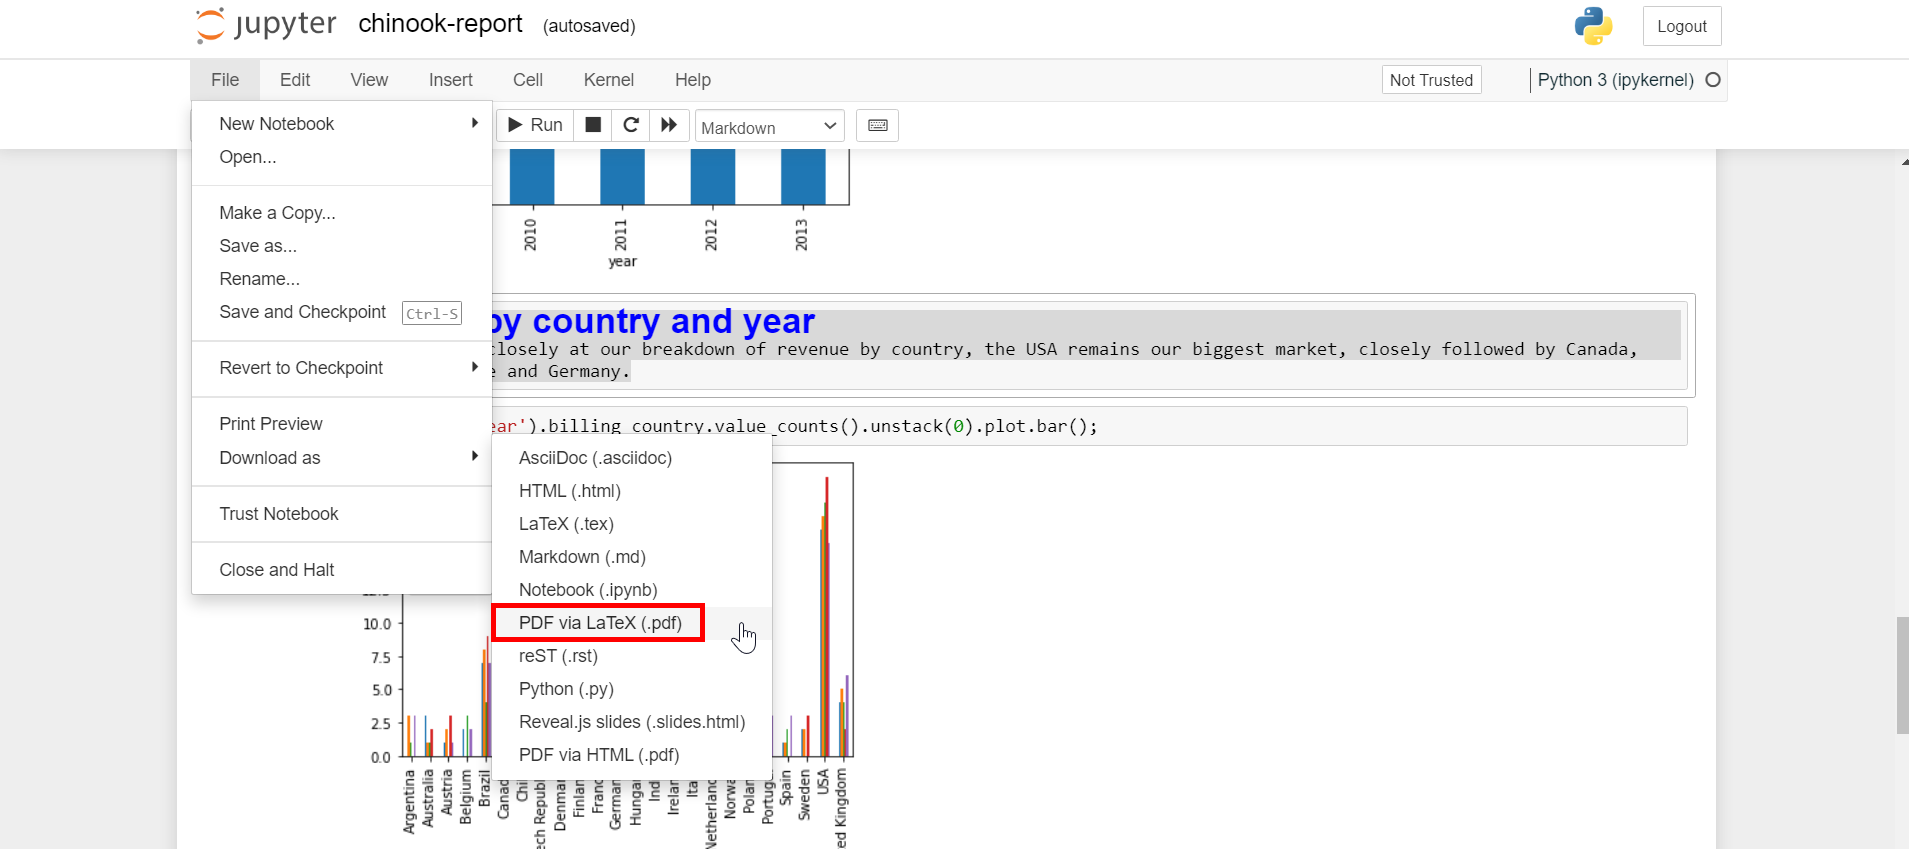
Working through the breakdown of data by generating additional plots with headings we end up with a basic report we can present to someone not familiar with python development. To export to PDF we can use the web UI of Jupyter by going to File->Download as->PDF via LaTeX (.pdf).
Looking at the resultant PDF, we can see we can still see the code related input and output.
If this was something we would present to people not familiar with software development or python, this is unnecessary noise that we can filter out while still leaving the notebook in a state that is runnable for those working on it.
First, clear the cell output you don't want to include in your final result PDF. This will include from cells that install dependencies using %pip install and anything else which you think doesn't add value to the final report. This can be done by selecting the cell in the web UI, going to the Cell menu and clicking Current Outputs->Clear.
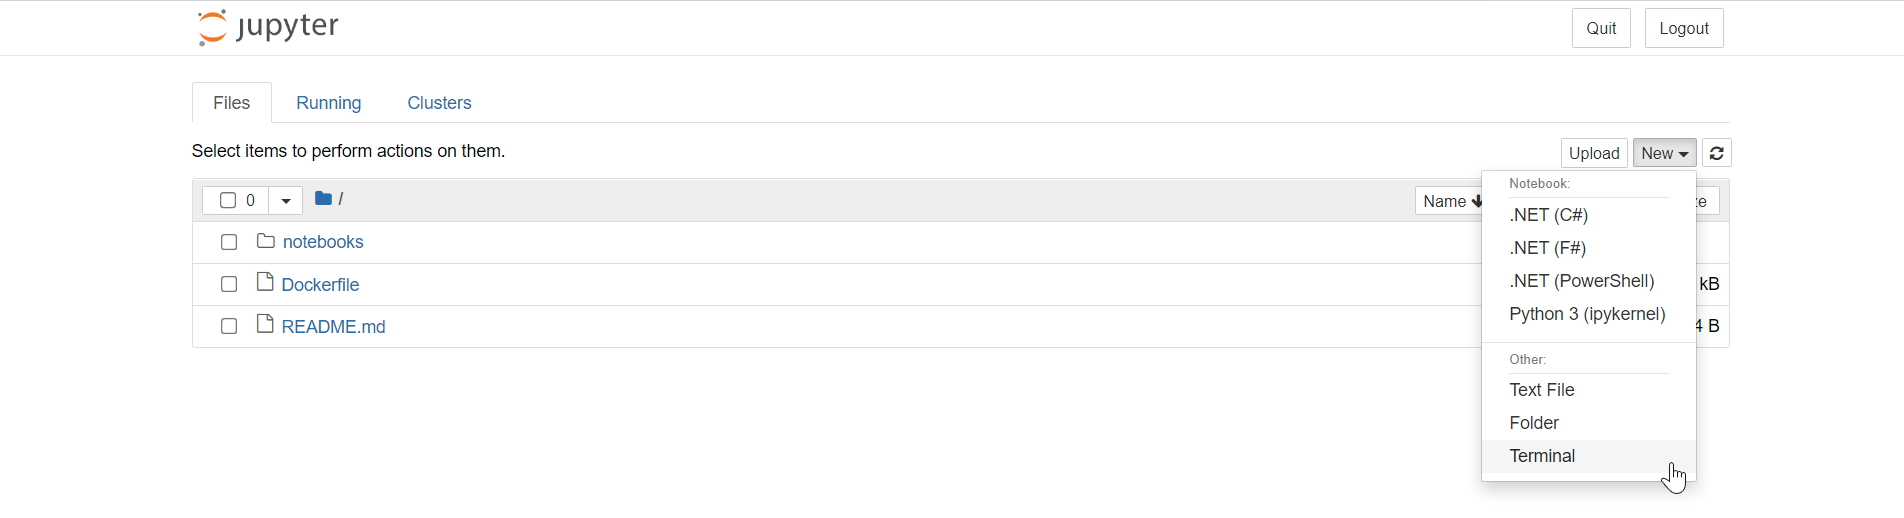
Once this is done, we will need to run a command from a Terminal in the context of our running Docker container. The easiest way to do this is to use the Jupyter web UI itself. From the file explorer view, at the top right a menu button called New can be dropped down and a Terminal option can be selected.
Navigating to the folder of your notebook report, you can use a utility called nbconvert to run a similar command to what is happening when using the Download as menu, but this time with additional arguments to further refine the output. Specifically, the --TemplateExporter.exclude_input=True option.
jupyter nbconvert --to pdf chinook.locode.dev-QueryInvoices.ipynb --TemplateExporter.exclude_input=True
The generated PDF will be visible in the Jupyter file explorer web UI so you can open and download the result.
HTML Output
The same process can be done for outputing straight HTML for easy sharing on a static site. Using the Export Notebook As menu, selecting HTML we get what we can see in our Jupyter environment with all the context and code.
Using the terminal again to produce HTML, we can strip the code away to produce a clean report.
jupyter nbconvert --to html chinook.locode.dev-QueryInvoices.ipynb --TemplateExporter.exclude_input=True
Using MyBinder.org
Now that we have finished the report we wanted to write, we might want a colleague review the work in a managed environment they can access straight from a browser. MyBinder.org is limited to only public GitHub repositories but the same workflow work be applicable to your own managed BinderHub environment.
Reviewing notebooks is convenient using services like MyBinder, but changes are ephemeral, so while reviews can be done using this workflow, changes need to be made in an environment where files can be committed back to the remote GitHub repository.