Jupyter Commands lets you generate F# Jupyter Notebooks for calling ServiceStack APIs in a single command.
All command line utils used are available in the latest dotnet tool which can be installed from:
dotnet tool install --global x
Or if you had a previous version installed, update with:
dotnet tool update -g x
Generate F# Jupyter Notebooks
Use x jupyter-fsharp to display different usage examples for generating F# Jupyter Notebooks:
Usage: x jupyter-fsharp <base-url>
       x jupyter-fsharp <base-url> <request>
       x jupyter-fsharp <base-url> <request> {js-object}
       x jupyter-fsharp <base-url> <request> < body.json

Options:
 -out <file>            Save notebook to file
 -include <pattern>     Include Types DTOs pattern
The same syntax for invoking APIs with the Post Command HTTP Utils can also be used to generate F# Jupyter Notebooks, e.g:
x jupyter-fsharp https://techstacks.io FindTechStacks "{Ids:[1,2,3],VendorName:'Google',Take:5}"
Output:
Saved to: techstacks.io-FindTechStacks.ipynb
INFO
Jupyter Notebooks can also be created with the API Explorer UI at apps.servicestack.net
Setup Jupyter for F# locally
To get working with JupyterLabs to run locally with a F# kernel, there are a few things you'll need to have installed.
- Latest dotnet 5.0+ SDK
- Python 3.7+ with pip
With both dotnet SDK and Python installed, you can then install JupyterLab, Dotnet Interactive and register the dotnet kernels with the following commands.
# Install jupyterlab to default Python interpreter
pip install jupyterlab
# Install Dotnet Interactive dotnet tool
dotnet tool install -g Microsoft.dotnet-interactive
# Get Dotnet Interactive to register kernels with Jupyter
dotnet interactive jupyter install
To verify these have been installed successfully, you can list the currently registered kernels using the command.
jupyter kernelspec list
This should list .net-fsharp as one of the kernels which is what the F# notebooks will use.
Running JupyterLab
With everything setup, navigate to a local directory with your notebooks and run:
jupyter-lab
The context of where this command is run from matter as JupyterLab will mount list files in the same directory is was run, so make sure your running the jupyter-lab command from where your notebooks are located or where you new notebooks to be saved.
Example generated notebook
From your notebook directory that JupyterLab is using, open a new command prompt/terminal and run:
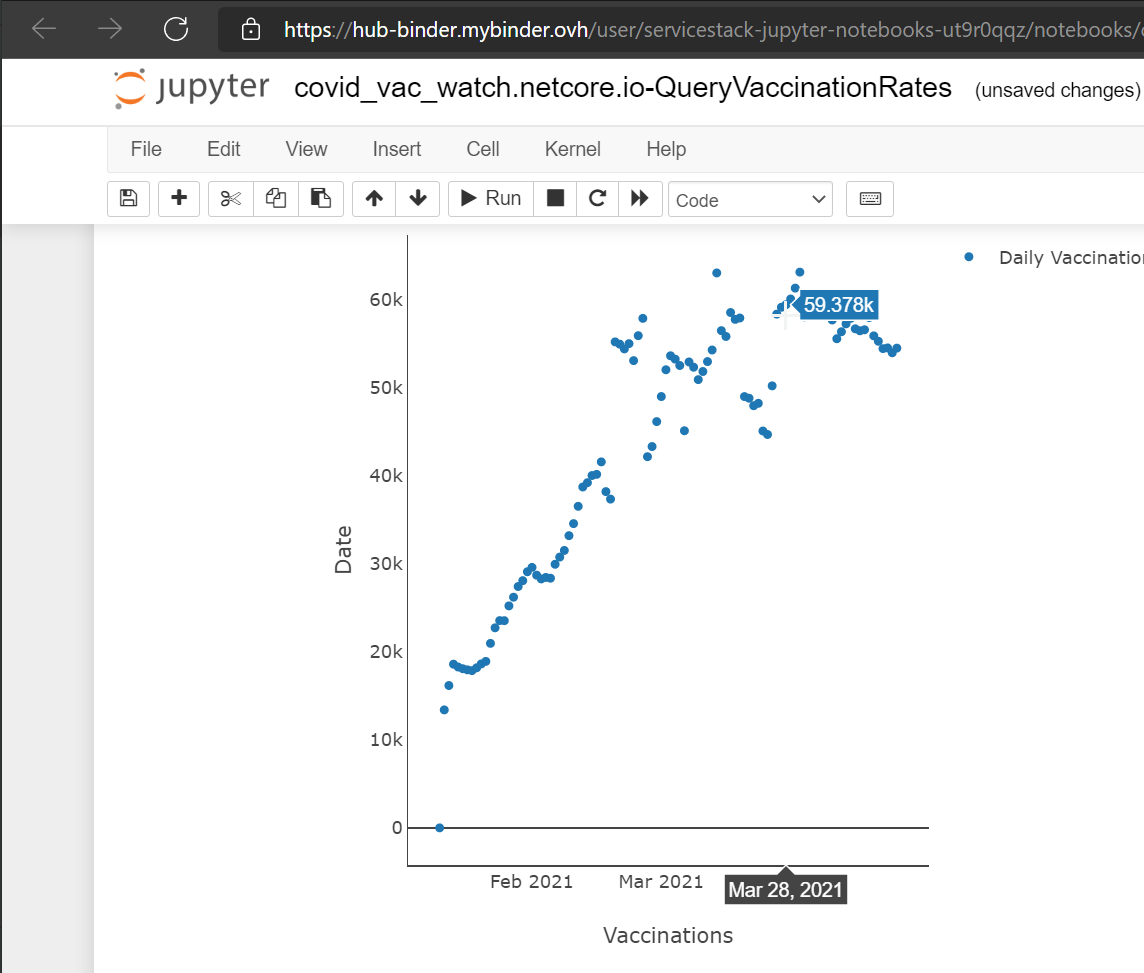
x jupyter-fsharp https://covid-vac-watch.netcore.io QueryVaccinationRates
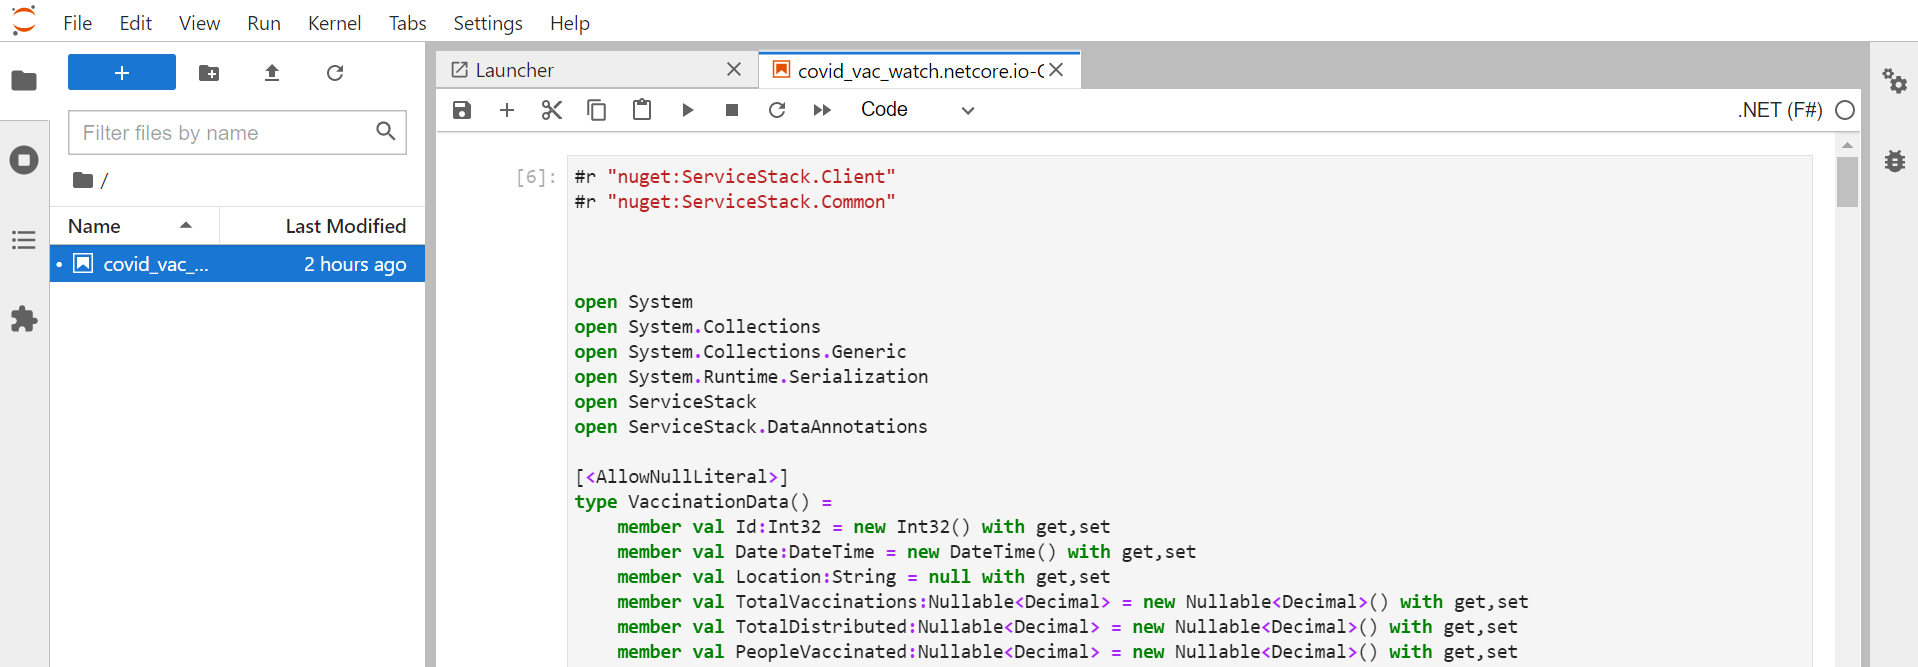
This will generate the file covid_vac_watch.netcore.io-QueryVaccinationRates.ipynb in that directory. This file has everything that is needed to call the QueryVaccinationRates service and display data in the response.
Visualize the data
These generated notebooks are designed to be a starting point with all the data plumbing setup done for you. Taking this example further, we can visualize the data using Plotly.NET, a NuGet library that generates plotly.js visuals using .NET. Run at least the first two cells and then add a new cell at the bottom of the generated notebook with the following code.
#r "nuget: Plotly.NET, 2.0.0-preview.6"
#r "nuget: Plotly.NET.Interactive, 2.0.0-preview.6"

open Plotly.NET

let xData = response.Results.Map(fun (x:VaccinationData) -> x.Date)
let yData = response.Results.Map(fun (x:VaccinationData) -> x.DailyVaccinations.GetValueOrDefault())

let chart =
    Chart.Point(xData,yData)
        |> Chart.withTitle "Daily Vaccinations"
        |> Chart.withX_AxisStyle ("Date", Showgrid=false)
        |> Chart.withY_AxisStyle ("Vaccinations", Showgrid=false)
display(chart)
The code above does several things.
- Import the 2 required Plotly.NET NuGet dependencies.
- Declares
usingstatement. - Transforms response data into 2 equal list of primitive data.
- Generates a plot with
Dateon the X axis andDailyVaccinationson the Y axis.
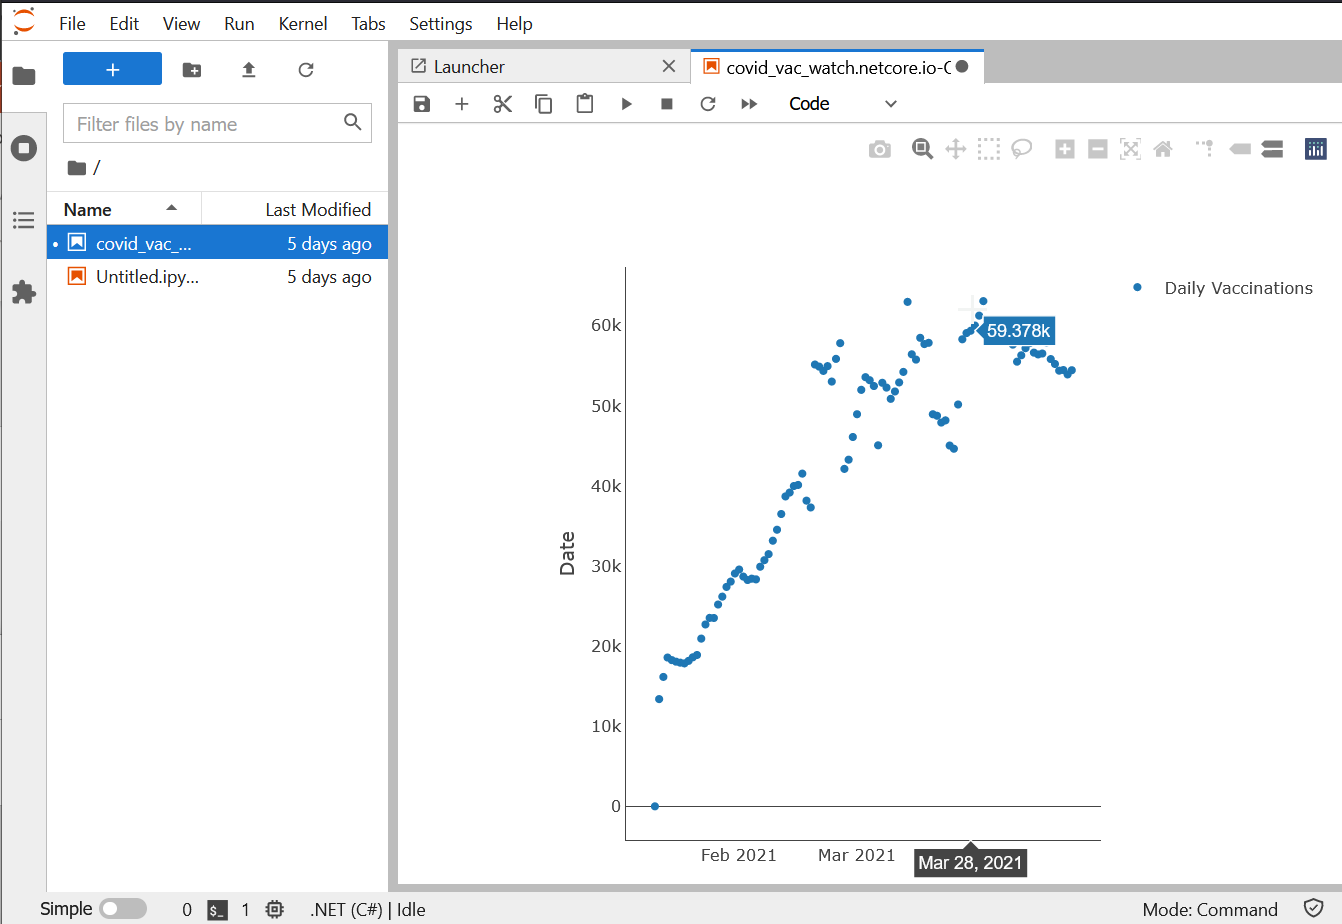
Try it out yourself using MyBinder with generated notebooks
Another way to work with Jupyter, F# and ServiceStack generated notebooks is to do with via MyBinder. MyBinder is a free hosted service that gives you an isolated docker container to run your notebooks if you are just trying something out.
![]()
- Click on the
Launch Binderbadge above and wait for it to launch into a Jupyter web UI (it can take a min or two sometimes) - Goto
Newand selectTerminal. - In the terminal use the ServiceStack
xtool to generate a new F# notebook like beforex jupyter-fsharp https://covid-vac-watch.netcore.io QueryVaccinationRates
- Navigate back to Jupyter file explorer and see your generated notebook.
- Open the new notebook and run the generated cells.
- Add a new cell with the same code for Plotly.NET as above and run