New TanStack Start Template
We're excited to add a new React template built with TanStack Start, the full-stack React framework from the creators of TanStack Query, Table and Router, as a modern alternative to Next.js for building statically exported React Apps with a .NET backend:
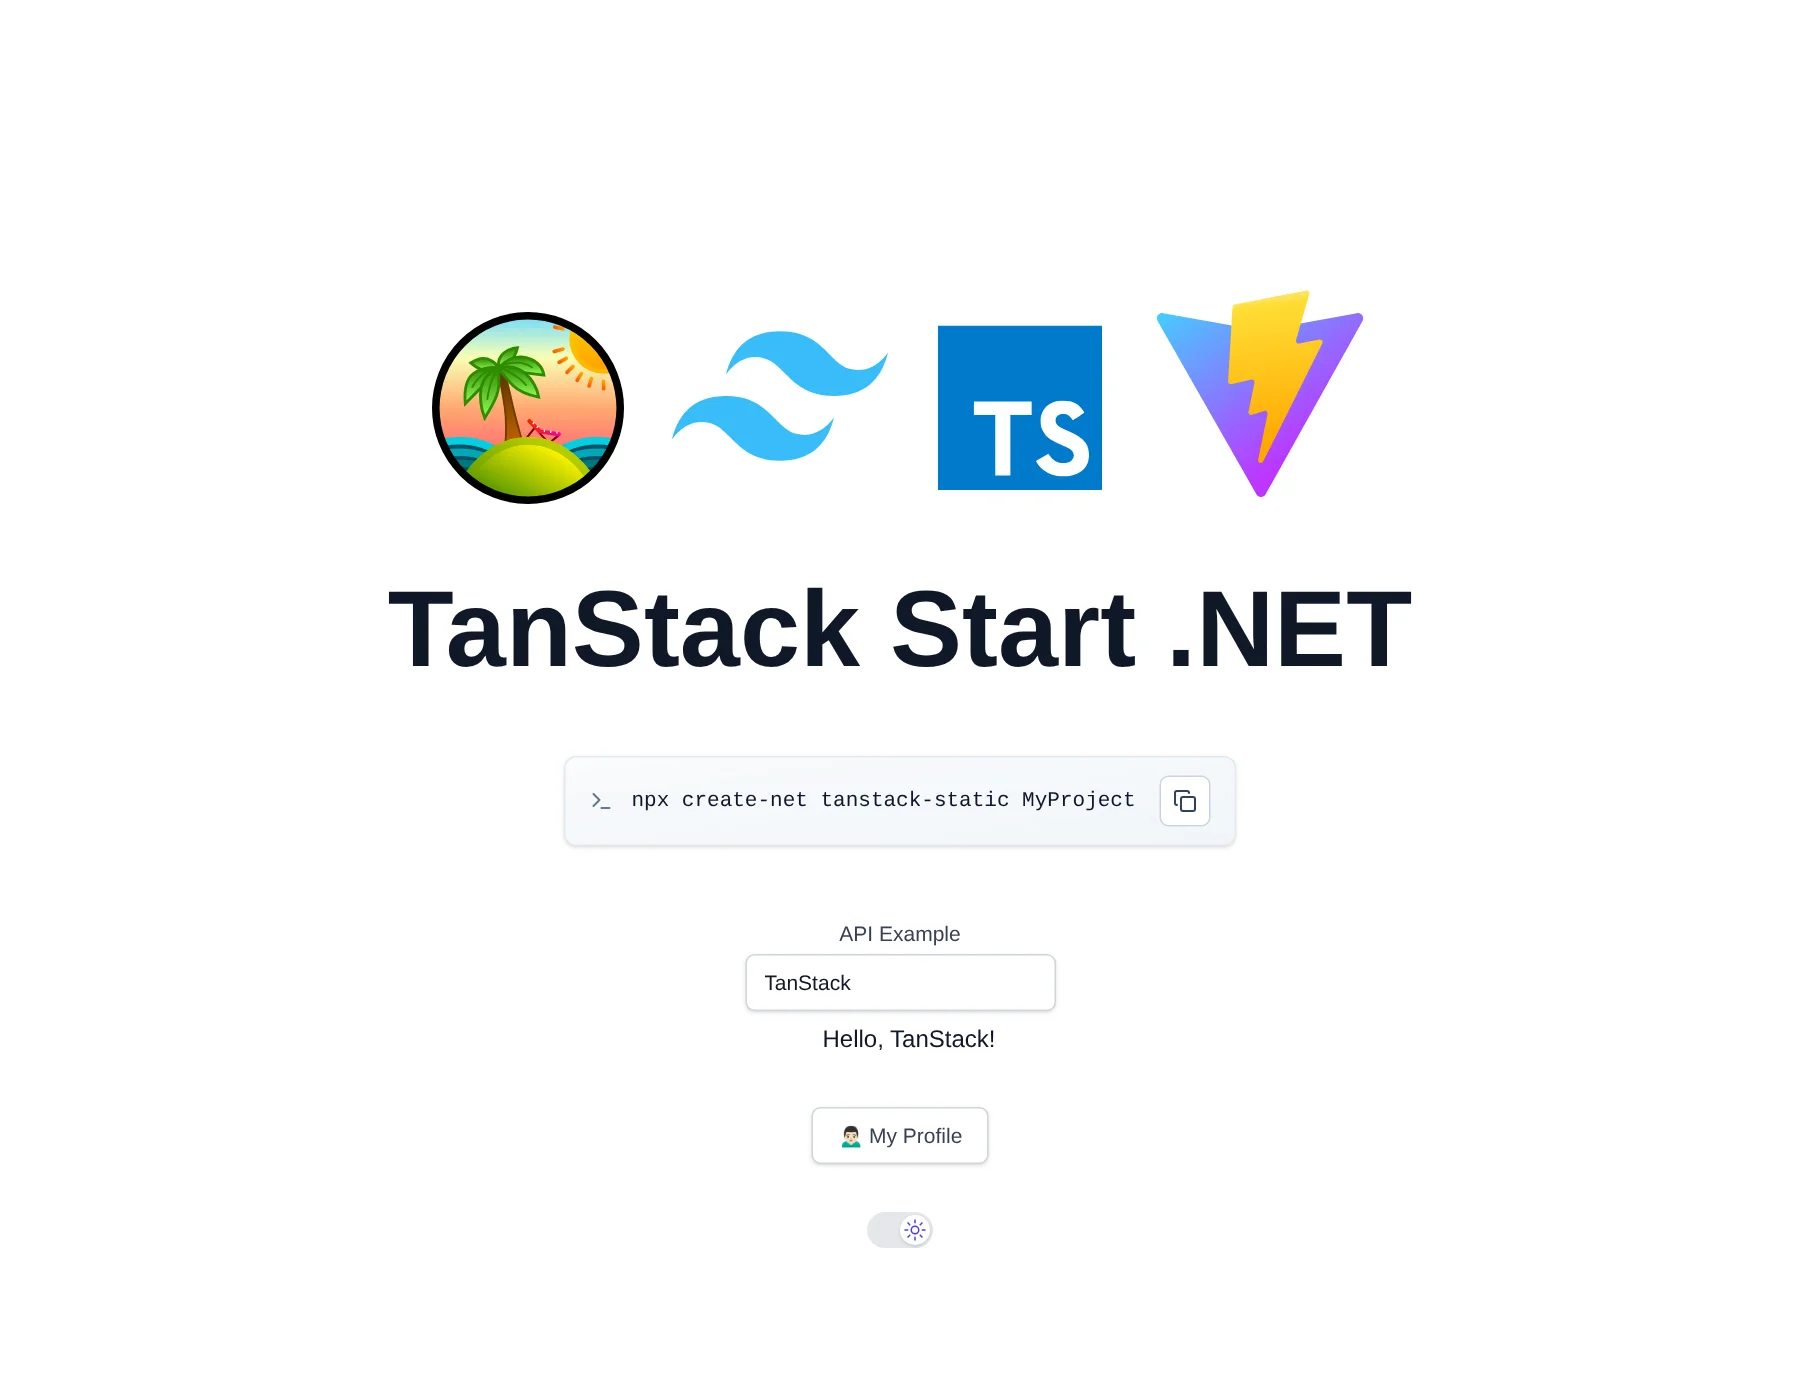
Like our next-static template, every page is prerendered to static HTML at build time and served directly by ASP.NET Core, so there's no Node.js server to deploy, run or secure in production - your .NET App is the only thing serving your App.
Why TanStack Start?
- 100% Type-safe Routing - TanStack Router generates a fully typed route
tree from your file-based routes, so
<Link to>paths, path params and search params are all type checked, where renaming or removing a route is a compile error instead of a broken link discovered in production - Built on Vite - it's just a Vite plugin, so unlike Next.js it uses the same Vite+ toolchain as our other Vite templates for its dev server, HMR and production builds, as well as checking, linting, formatting and testing
- Just React - no React Server Components,
"use client"boundaries or server/client component rules to learn. Routes are plain React components, making it simpler to reason about and easier for AI Agents to get right - Dynamic Routes in Static Exports - routes with path params like
/posts/$idare prerendered for every value linked from other pages, with all other values falling back to a generated_shell.htmlSPA shell which renders them in the browser. Next.js static exports instead require every dynamic route value to be known at build time withgenerateStaticParams() - Prerendered Pages, SPA Navigation - pages load instantly from prerendered HTML for fast first loads and SEO, then hydrate into a SPA with client-side navigation between pages
- Less Magic, More Explicit - the
<html>document, head tags, providers and router are all defined in regular code you own, e.g. per-route page titles and meta tags are declared with a route'shead()function - Vendor Neutral - TanStack Start isn't designed around any hosting platform, and with static prerendering it's deployed as part of your .NET App with the template's existing Docker and Kamal deployments
Type-safe File-based Routes
Pages are added by creating files in src/routes/ with createFileRoute(), e.g. routes/about.tsx => /about
and routes/posts.$id.tsx => /posts/$id. The route tree is regenerated by vp dev and vp build, e.g. the
auth protected /profile page:
import { createFileRoute } from '@tanstack/react-router'
import { appAuth, ValidateAuth } from '@/lib/auth'

export const Route = createFileRoute('/profile')({
    head: () => ({ meta: [{ title: 'Profile' }] }),
    // Prerendered as a loading page, the profile is rendered in the browser once the signed-in user is known
    component: ValidateAuth(Profile),
})

function Profile() {
    const { user, signOut } = appAuth()
    //...
}
Static Prerendering
Static export is configured with the tanstackStart() Vite plugin in vite.config.ts, which starts from / and
crawls every linked page, skipping links to pages served by .NET like /api, /ui, /admin-ui and /Identity:
tanstackStart({
    // Static export: prerender every route to MyApp.Client/dist/client, which is served from MyApp/wwwroot
    prerender: {
        enabled: true,
        crawlLinks: true,         // prerender every page linked from a prerendered page
        autoSubfolderIndex: false, // /about => about.html, served by MapCleanUrls() in Program.cs
        filter: ({ path }) => !isServerPath(path), // skip links to .NET pages
    },
    // Also write _shell.html, the fallback page for routes not prerendered (e.g. /posts/$id)
    spa: {
        enabled: true,
        maskPath: '/spa-shell',
    },
}),
How it works
The template uses the same hybrid development model as our other React templates:
- Development -
dotnet watchstarts both the .NET App and the TanStack Start Vite dev server, with ASP.NET Core proxying page requests to Vite which renders each page on request, with full HMR support - Production -
npm run buildprerenders every route to HTML which is published toMyApp/wwwrootand served with clean URLs, with any route that wasn't prerendered falling back to_shell.html
As there's no Node.js server in production, the App calls ServiceStack APIs from the browser with the typed
JsonServiceClient instead of using TanStack Start server functions, whilst per-user data is fetched in components
after hydration. The template's AGENTS.md documents these static export rules so AI Agents know which TanStack
Start features to use and which to avoid.
New Astro Template
We're also adding a new template built with Astro, the web framework for content-driven websites, as an alternative to Next.js for content-first Apps like blogs, docs, marketing and product sites that still need interactive features, ServiceStack APIs and authentication from a .NET backend:
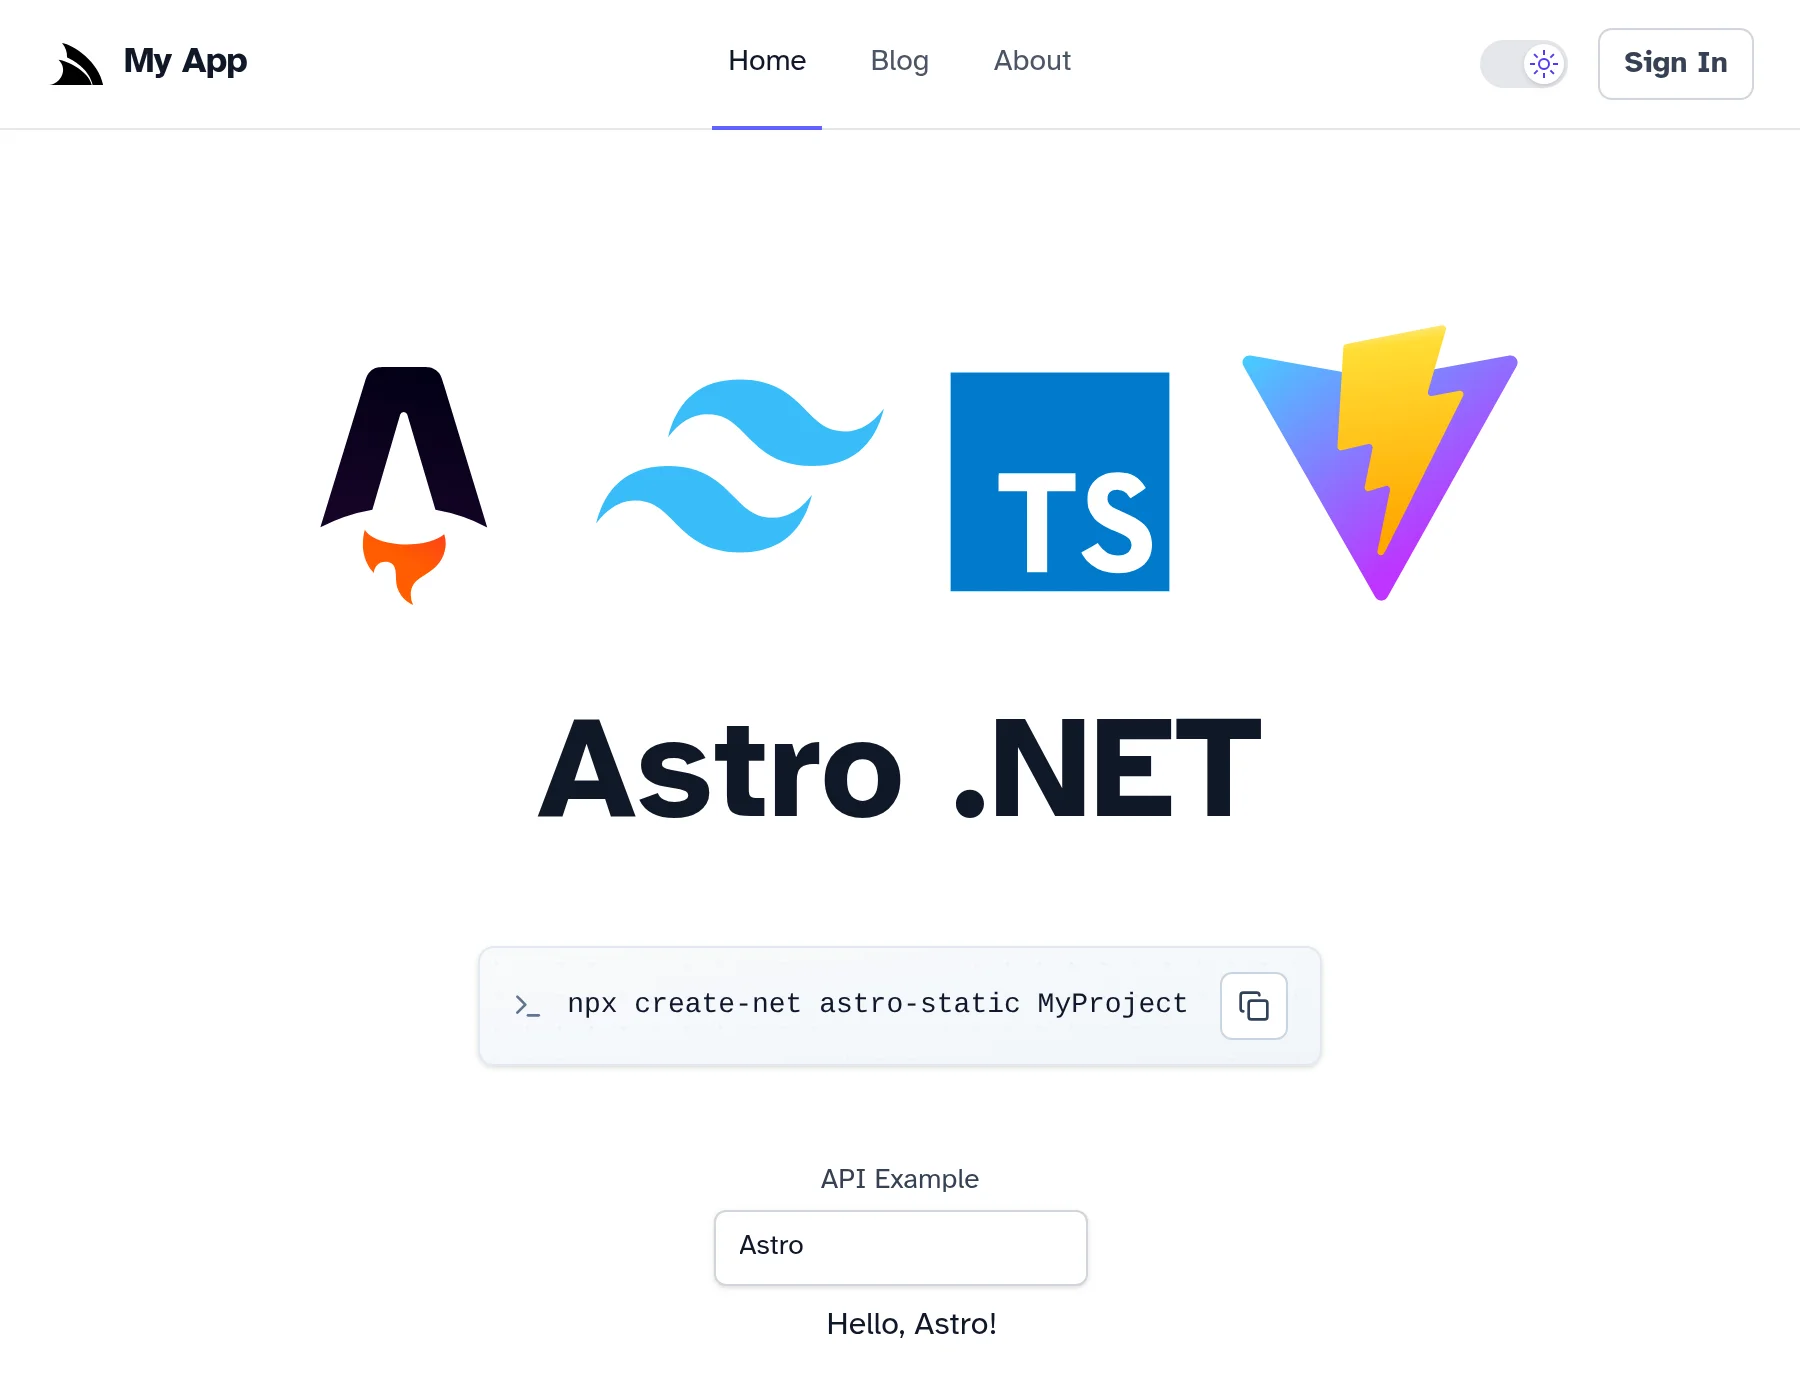
Every page is prerendered to static HTML at build time and served directly by ASP.NET Core, so like our other static templates there's no Node.js server to deploy, run or secure in production.
Why Astro?
- Zero JavaScript by default - pages are rendered to plain HTML and CSS with no JavaScript shipped to the browser unless a component needs it, giving you small pages, fast first loads and great SEO and Core Web Vitals scores without having to optimize for them
- Islands Architecture - interactive React components are hydrated as independent "islands" in an otherwise
static page, where you choose when each one loads, e.g.
client:loadto hydrate immediately,client:visiblewhen scrolled into view orclient:onlyto only render in the browser - Content-first - Markdown and MDX are first-class pages, whilst Content Collections validate each post's frontmatter against a typed schema, so a missing title or invalid date is a build error instead of a broken page
- Just HTML, plus components -
.astrocomponents are HTML templates with a frontmatter script that runs at build time, so there are no React Server Components,"use client"boundaries or server/client component rules to learn, making pages simpler to reason about and easier for AI Agents to get right - Built on Vite - Astro uses Vite for its dev server, HMR and production builds, and the template uses the same Vite+ toolchain as our other templates for checking, linting, formatting and testing
- Static by default - static output is Astro's default rather than an export mode with features to avoid, so there are no unsupported APIs to work around when serving your site from your .NET App
- Batteries included - official integrations for MDX, RSS feeds, sitemaps and optimized images, with React
support provided by the
@astrojs/reactintegration, letting you reuse React components and the @servicestack/react component library - Vendor Neutral - Astro isn't designed around any hosting platform, and with static output it's deployed as part of your .NET App with the template's existing Docker and Kamal deployments
What's included
- Blog - a Markdown/MDX blog with a typed content collection, an index page, a page per post, an RSS feed
at
/rss.xmland a generated sitemap - React Islands - interactive React 19 components calling typed ServiceStack APIs with
JsonServiceClient - ASP.NET Core Identity Auth - sign in, sign up and account management with an auth protected
/profilepage - Dark Mode - with a toggle that remembers the user's preference
- AutoQuery CRUD - the same Bookings AutoQuery APIs as our other templates, which can be managed from the built-in Admin UI and explored in the API Explorer
Astro Pages and React Islands
Pages are .astro, .md or .mdx files in src/pages/, where React components without a client:*
directive are rendered to static HTML at build time, whilst components with one are hydrated in the browser.
For example the home page renders <ShellCommand> as static HTML and hydrates the <HelloApi> island which
calls a ServiceStack API as you type:
---
import { ShellCommand } from 'react-net-templates'
import { HelloApi } from '../components/islands'
import Layout from '../layouts/Layout.astro'
---

<Layout>
    <!-- Rendered to static HTML at build time, with no JS -->
    <ShellCommand>npx create-net astro-static MyProject</ShellCommand>

    <!-- Interactive React island, hydrated in the browser -->
    <HelloApi client:load value="Astro" />
</Layout>
As each island is its own React root, interactive components are wrapped with withApp() which provides the
ServiceStack ClientContext and loads the signed-in user once per page load, so it's shared by every island on
the page:
import { withApp } from '@/lib/app'
import HelloApiComponent from './HelloApi'

export const HelloApi = withApp(HelloApiComponent)
How it works
The template uses the same hybrid development model as our other templates:
- Development -
dotnet watchstarts both the .NET App and the Astro dev server, with ASP.NET Core proxying page requests to Astro which renders each page on request. React islands update in place with HMR, whilst changes to.astroand Markdown files reload the page - Production -
npm run buildprerenders every page to HTML, e.g./blog/first-post=>blog/first-post.html, which is published toMyApp/wwwrootand served with clean URLs, with any unknown path returning the prerendered404.html
As there's no Node.js server in production, code in an .astro file's frontmatter only runs at build time, so
per-user data and authenticated APIs are called from React islands in the browser instead. Likewise dynamic routes
like blog/[...slug].astro need to list every value in getStaticPaths() at build time, so data that changes at
runtime should be fetched from a ServiceStack API in an island. The template's AGENTS.md documents these rules
so AI Agents know which Astro features to use and which to avoid.
React, Next.js & Vue Templates upgraded to Vite+
All our React, Next.js and Vue project templates have been migrated to Vite+, the new unified JavaScript toolchain from VoidZero - the team behind Vite, Vitest, Rolldown and Oxc.
Instead of stitching together separate tools, each with their own dependencies, config files and CLIs, Vite+ provides
a single vp CLI for developing, building, linting, formatting, type checking and testing, all configured from
a single vite.config.ts:
Converted Templates
The following templates have all been converted to the Vite+ toolchain. Pick one and enter your project name to copy the command to create it, or download it as a ready-to-run .zip:
For the Vite-based React and Vue templates, Vite+ also runs the dev server and production build, whilst for the
Next.js templates Next.js continues to run the dev server and build, with vp used for checking, linting,
formatting and testing.
Why Vite+?
- Much Faster - Vite+ is built on the Rust-powered Oxc and Rolldown toolchain, where Oxlint and Oxfmt are orders of magnitude faster than ESLint and Prettier, and Vite 8's Rolldown bundler replaces both Rollup and esbuild for faster production builds
- One Tool, One Config - lint, fmt and test configuration all lives in
vite.config.ts, replacing separateeslint.config.js,vitest.config.tsandpostinstallscripts, with a lot fewerdevDependenciesto maintain - Type-aware Linting & Type Checking - Oxlint runs type-aware rules powered by TypeScript Go, so
vp checkformats, lints and type checks your entire App in a single pass. The React and Next.js templates have also been upgraded to TypeScript 7 with no separatetscstep, whilst Vue templates usevue-tscto type check.vueSFCs - Consistent Formatting - all templates are now formatted with Oxfmt, ensuring consistent code style for both
humans and AI Agents, with the formatting commit added to
.git-blame-ignore-revsto keepgit blameuseful - Simpler CI - GitHub Actions use setup-vp to install Node and
npm dependencies with caching, and a new
clientjob runsnpm run check,vp test runandnpm run buildon every push - No global install needed -
vpis installed locally as a dev dependency so all npm scripts work out-of-the-box, or optionally install the global CLI to runvpcommands directly:
curl -fsSL https://vite.plus | bash
Common Commands
All templates share the same npm scripts which can be run from the MyApp.Client folder:
npm run dev         # Start the dev server
npm run check       # Format + lint + type check
npm run lint        # Lint with Oxlint
npm run fmt         # Format with Oxfmt
npm run test        # Run tests in watch mode
npm run test:ui     # Run tests with the Vitest UI
npm run test:run    # Run tests once
npm run outdated    # Check for outdated dependencies
npm run upgrade     # Upgrade dependencies
VS Code Workspace
In addition to better tooling and a superior developer experience, every template now also includes a
MyApp.code-workspace VS Code Workspace. VS Code has become the most popular text editor & IDE for good reason,
it's free, cross-platform, has a rich extension ecosystem and has the best support for AI Agents, which are
increasingly how new Apps are being built.
Open the workspace from File > Open Workspace from File... or from the command-line with:
code MyApp.code-workspace
The workspace adds the MyApp.Client front-end as its own root folder alongside the .NET solution, letting you
develop, run and debug both your UI and C#/.NET App from within the same sidebar UI, with each root getting
its own tooling:
- Format & Fix on Save - JS/TS (and
.vue) files are formatted with Oxfmt and auto-fixed with Oxlint on save, using the samevite.config.tsrules asvp checkand CI, whilst C# and Razor files keep their own formatters - Recommended Extensions - VS Code prompts to install the Vite+ Extension Pack (Oxc + Vitest), the C# Dev Kit for .NET, plus Vue (Official) for Vue templates or the TypeScript 7 Native Preview language server for React & Next.js templates
- Integrated Testing - run and debug both Vitest front-end tests and NUnit .NET tests from VS Code's Testing sidebar
{
  "folders": [
    { "name": "MyApp", "path": "." },
    { "name": "MyApp.Client", "path": "MyApp.Client" }
  ],
  "settings": {
    "files.exclude": { "MyApp.Client": true },
    "[javascript][javascriptreact][typescript][typescriptreact]": {
      "editor.defaultFormatter": "oxc.oxc-vscode",
      "editor.formatOnSave": true,
      "editor.formatOnSaveMode": "file",
      "editor.codeActionsOnSave": { "source.fixAll.oxc": "explicit" }
    }
  },
  "extensions": {
    "recommendations": [
      "VoidZero.vite-plus-extension-pack",
      "TypeScriptTeam.native-preview",
      "ms-dotnettools.csdevkit"
    ]
  }
}
Updated AI Agent Guidance
The AGENTS.md instructions in each template have also been updated with the new Vite+ commands, so AI Agents
know to use npm run check to validate their changes and that dtos.ts is automatically regenerated on .NET App startup.
ServiceStack.Redis
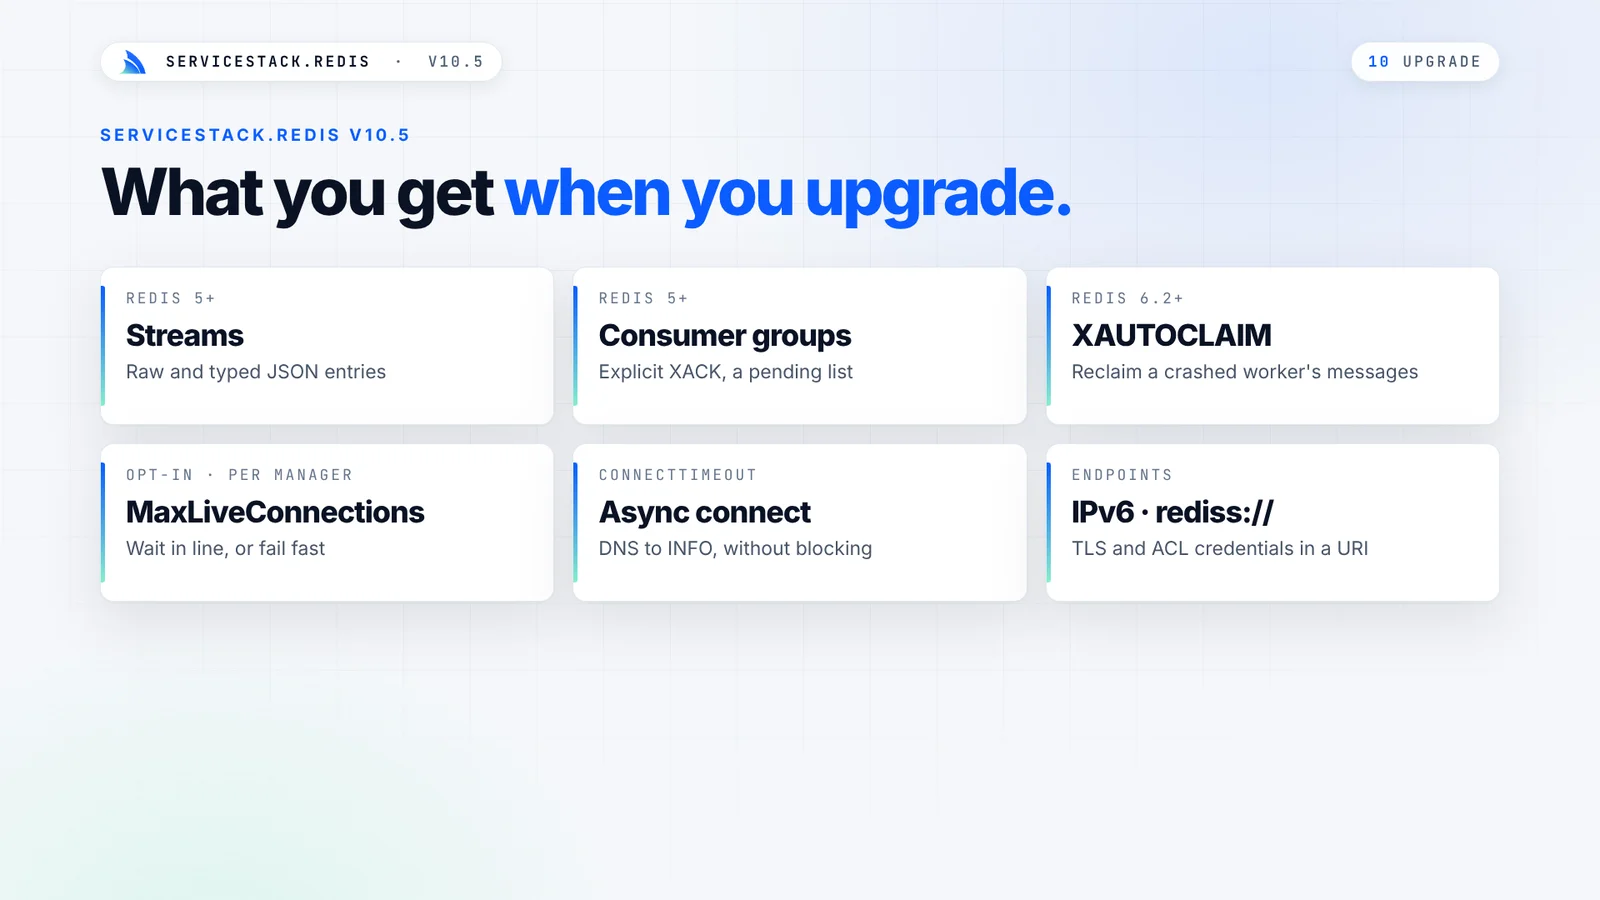
This release adds several new features to ServiceStack.Redis:
- IDistributedCache & HybridCache - use ServiceStack.Redis as the Redis backend for ASP.NET Core's caching APIs on .NET 10
- Redis Streams - sync and async Streams APIs, typed JSON entries, consumer groups and pending-message recovery
- Hash field expiration - expire individual fields of a hash on Redis 7.4+ or Valkey 9+
- Atomic key commands -
GETEX,GETDELandUNLINK, plusUnlinkByPatternfor cleaning up keys without blocking Redis - Fully async connections - DNS, TCP, TLS and Redis handshakes no longer block threads in async APIs
- Connection limits - optionally cap
RedisManagerPoolconnections and cancel pool waits - IPv6 and
rediss://URIs - IPv6 hosts and standard Redis URIs with ACL credentials - Atomic cache expiration - fixes
DateTimeand asyncTimeSpancache expirations - Reliability fixes - safer failover and pipeline timeouts. Empty values in pipelines and transactions now return
""
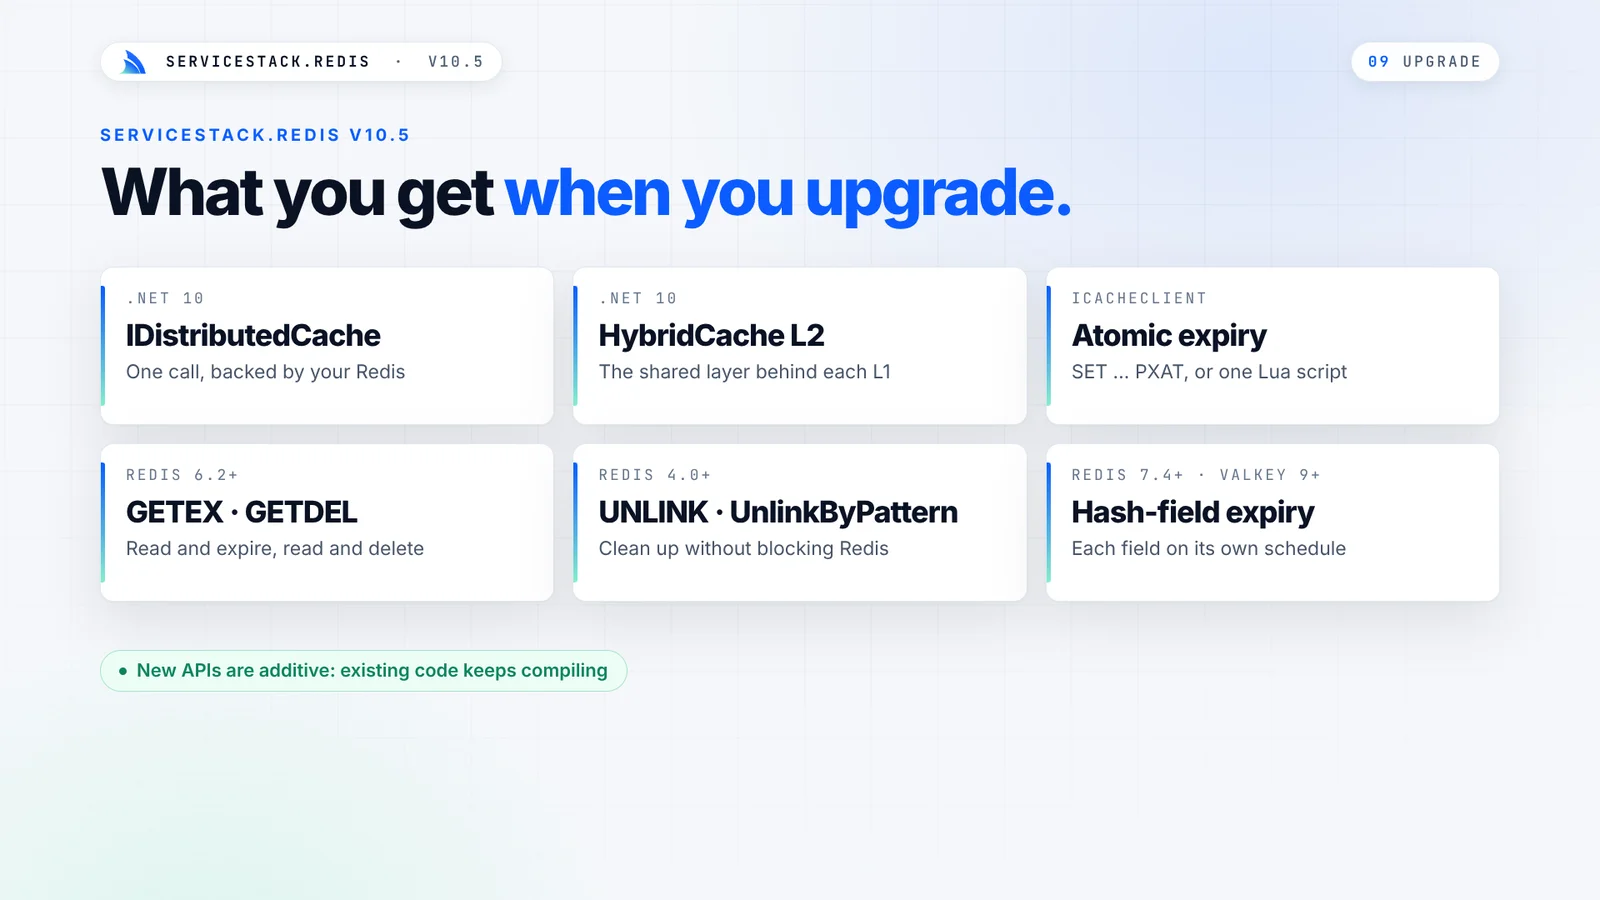
All new APIs are additive. They're implemented as extension methods over new optional interfaces, so existing
IRedisClient interfaces don't gain any required members.
Upgrade notes
- Empty values in pipelines and transactions now return
""instead ofnull, matching non-queued calls. SetRedisConfig.PipelineEmptyValuesAsNull = trueto keep the old behavior while you update== nullchecks. See Empty values in pipelines and transactions. - Restricted ACLs: the new
IDistributedCacheadapter needs permission for bothEVALandEVALSHA.
Microsoft IDistributedCache and HybridCache
On .NET 10, ServiceStack.Redis can now back Microsoft's IDistributedCache. ASP.NET Core features and
libraries that use the standard caching abstractions can then share your Redis client managers. You don't need
an extra package. The adapter and its Microsoft dependencies are only included in the net10.0 build:
builder.Services.AddServiceStackRedisCache("localhost:6379", options => {
    options.KeyPrefix = "myapp:cache:v1:";
});
If you already register an IRedisClientsManager, the cache can reuse it:
builder.Services.AddSingleton<IRedisClientsManager>(c => new RedisManagerPool("localhost:6379"));
builder.Services.AddServiceStackRedisCache();
Values are stored as raw bytes, so empty values are kept as is. Absolute and sliding expiration are both supported. Get, Set and Refresh each run as an atomic Lua script, which means a refresh can never push an entry past its absolute expiration.
It also works as the distributed L2 cache for Microsoft's HybridCache:
builder.Services.AddServiceStackRedisCache("localhost:6379");
builder.Services.AddHybridCache();
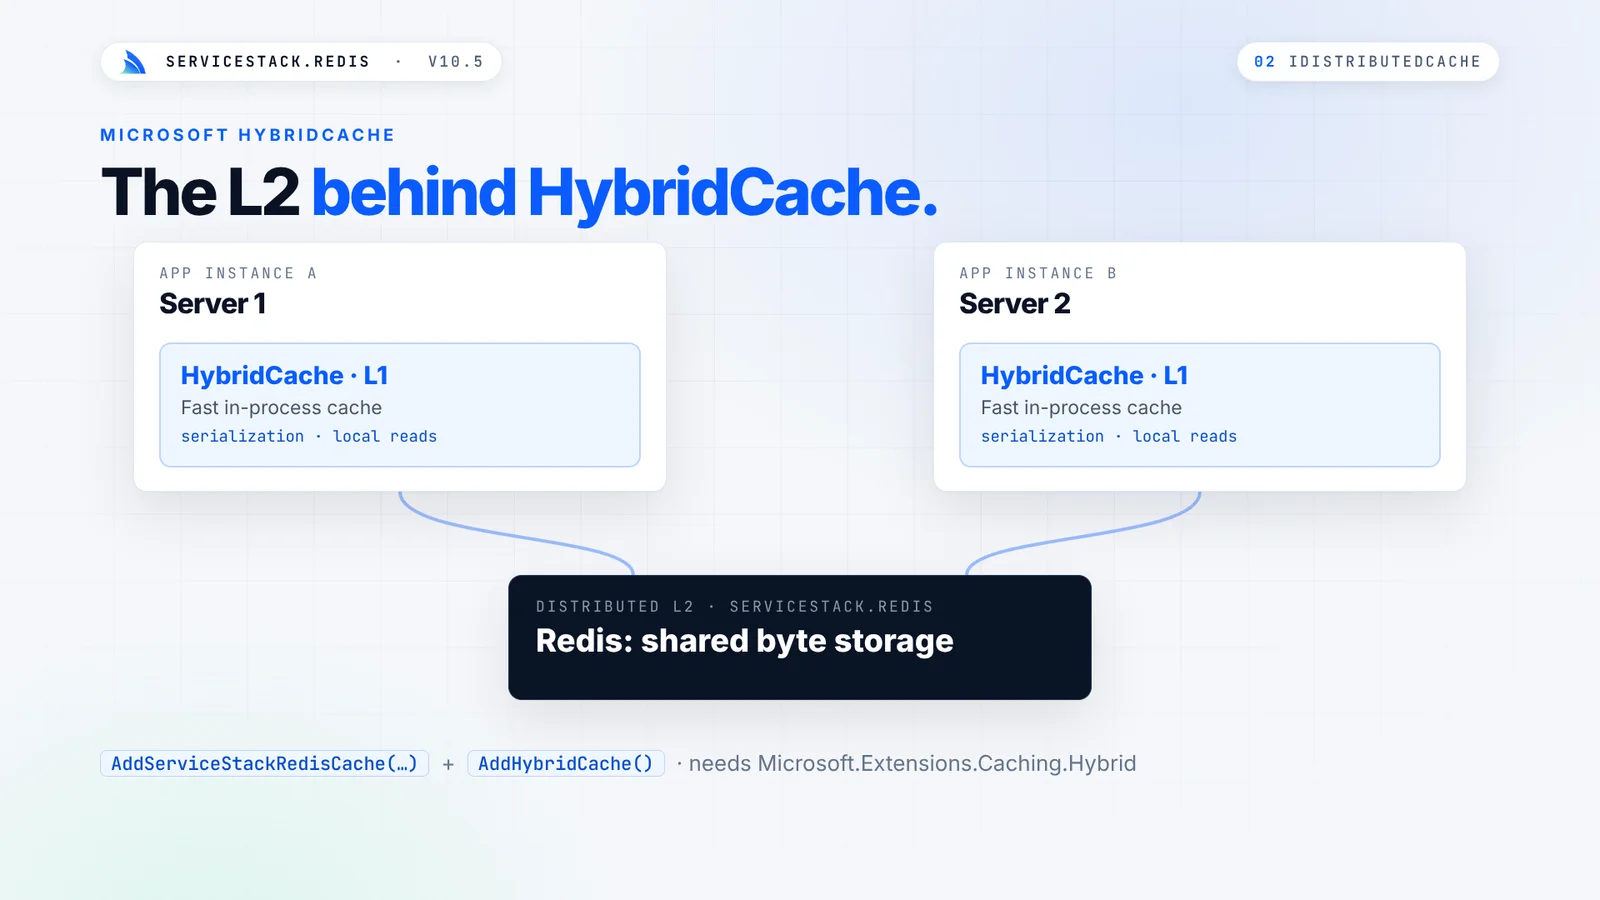
The scripts are cached on the server and run by their SHA1 hash, so each call sends only the arguments.
It requires Redis 5+ (or Valkey) with permission to run EVAL and EVALSHA. See the
IDistributedCache docs for manager ownership, expiration rules and the required
ACL permissions.
Redis Streams and Consumer Groups
ServiceStack.Redis now supports Redis Streams. It has sync and async APIs for appending, reading, trimming and deleting entries, and consumer group APIs for reading, acknowledging, inspecting and reclaiming pending messages.
The typed APIs store your POCO as JSON, so a work queue takes only a few lines:
// One-time setup: create the consumer group (and stream if it doesn't exist)
await redis.XGroupCreateAsync("orders", "workers", makeStream: true, token: token);

string id = await redis.AddStreamEntryAsync("orders", new OrderEvent { OrderId = 1 }, token: token);

var entries = await redis.ReadStreamGroupEntriesAsync<OrderEvent>("workers", "worker-1",
    new[] { new RedisStreamPosition { Stream = "orders", Id = ">" } },
    count: 100, blockMilliseconds: 1000, token: token);

foreach (var entry in entries) {
    if (!entry.HasValue) continue;
    await ProcessOrder(entry.Value);
    await redis.XAckAsync("orders", "workers", new[] { entry.Id }, token);
}
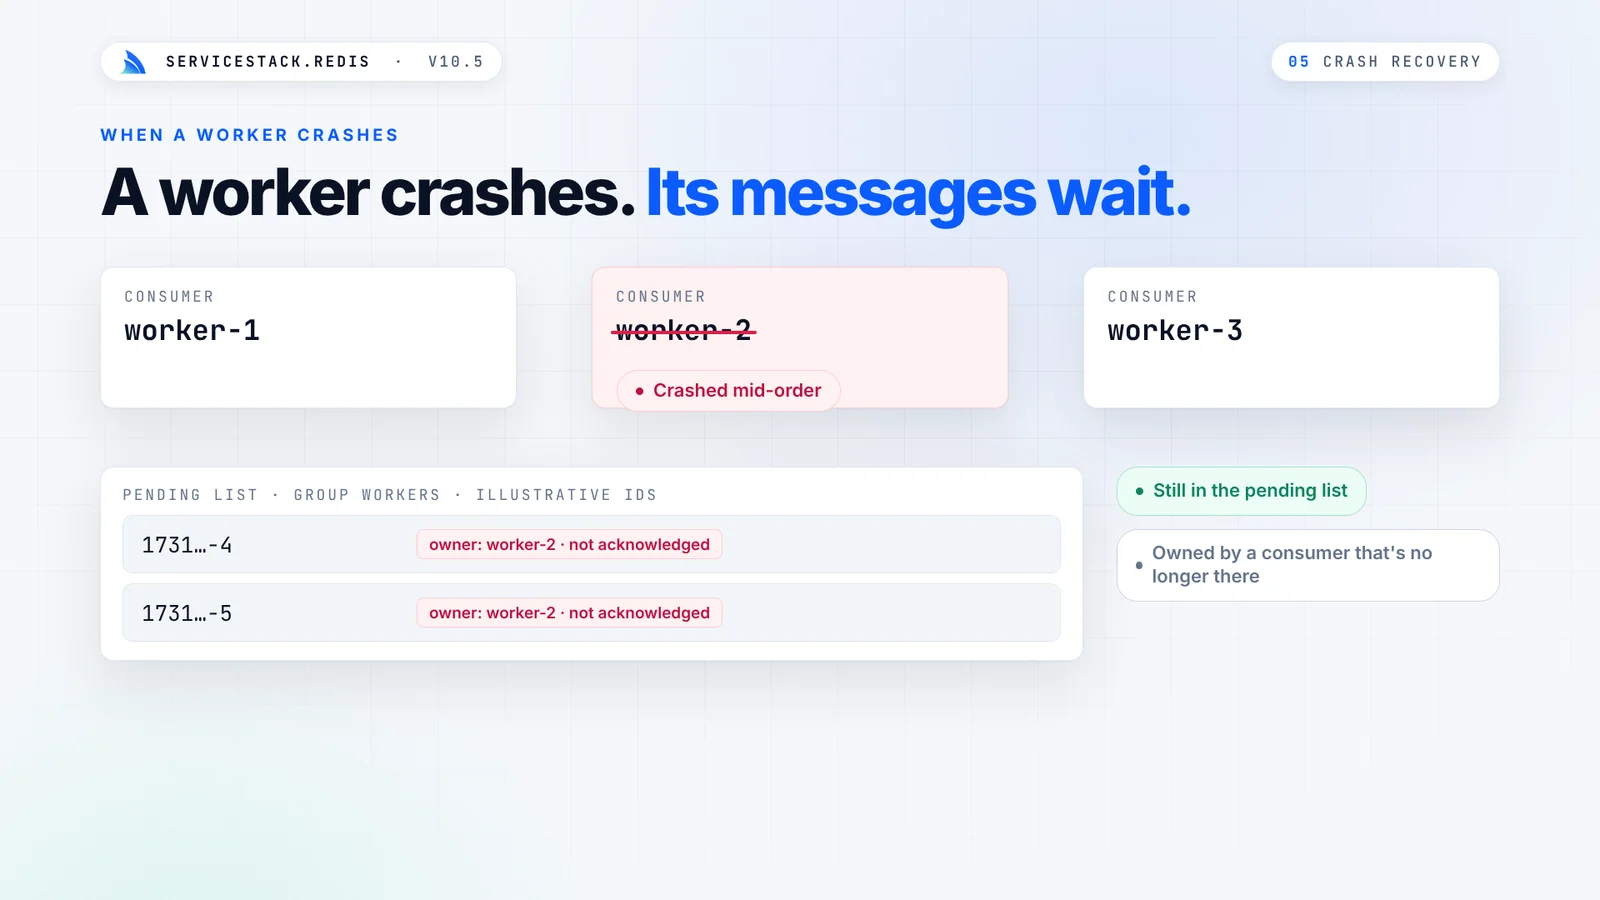
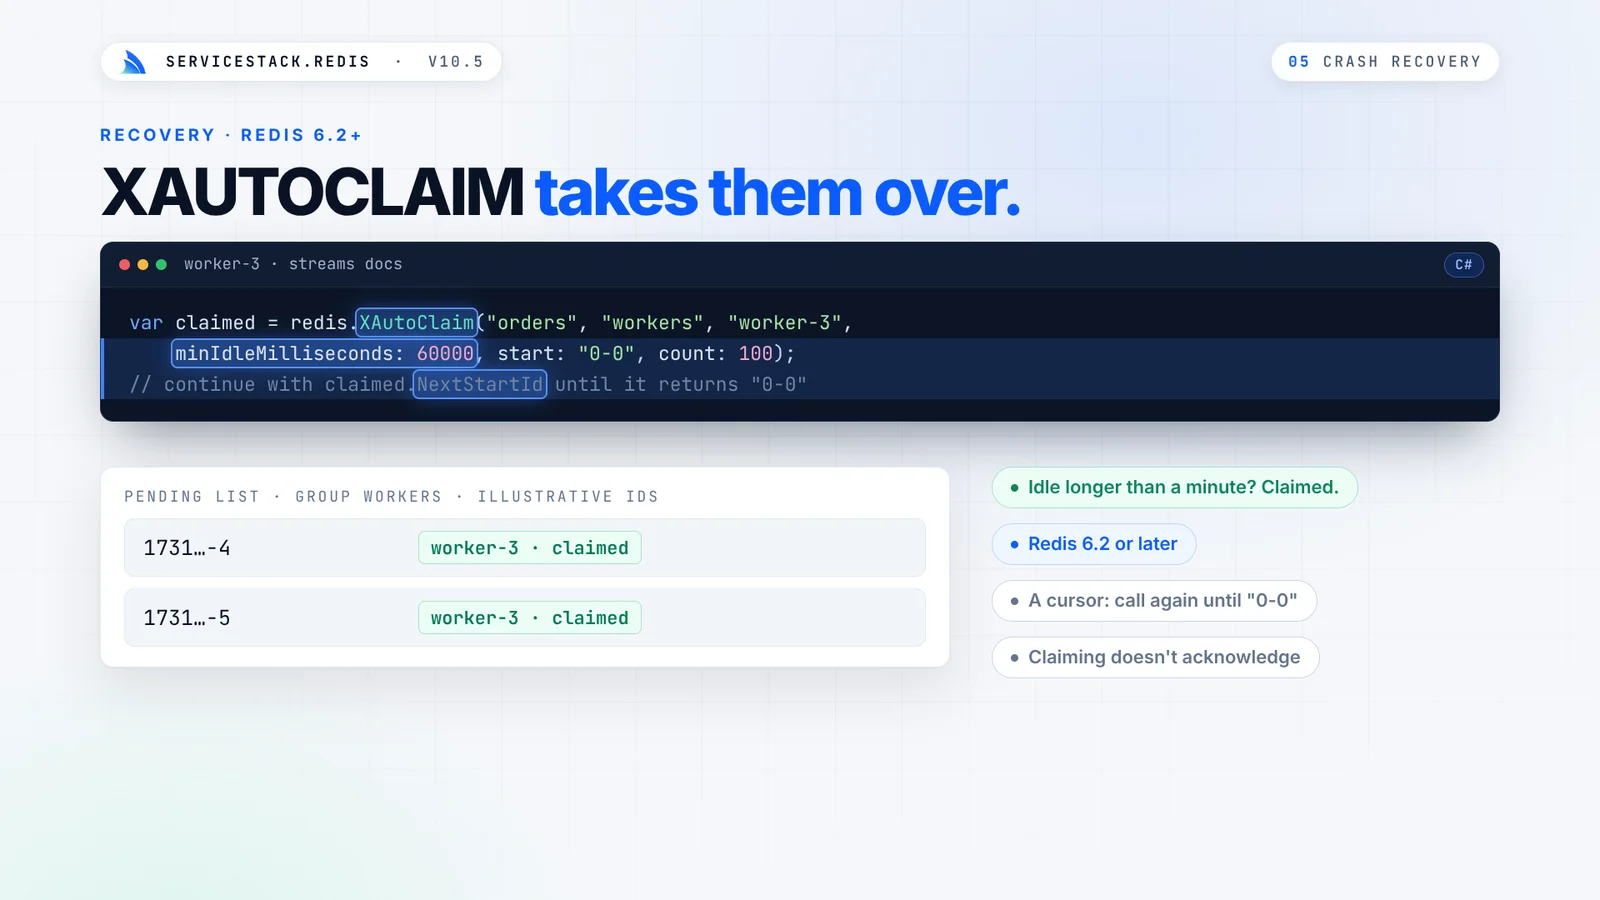
Messages are only acknowledged when you call XAck. Messages from a consumer that crashed stay pending until
another worker claims them with XAutoClaim. A message can be delivered more than once, so handlers should be
idempotent.
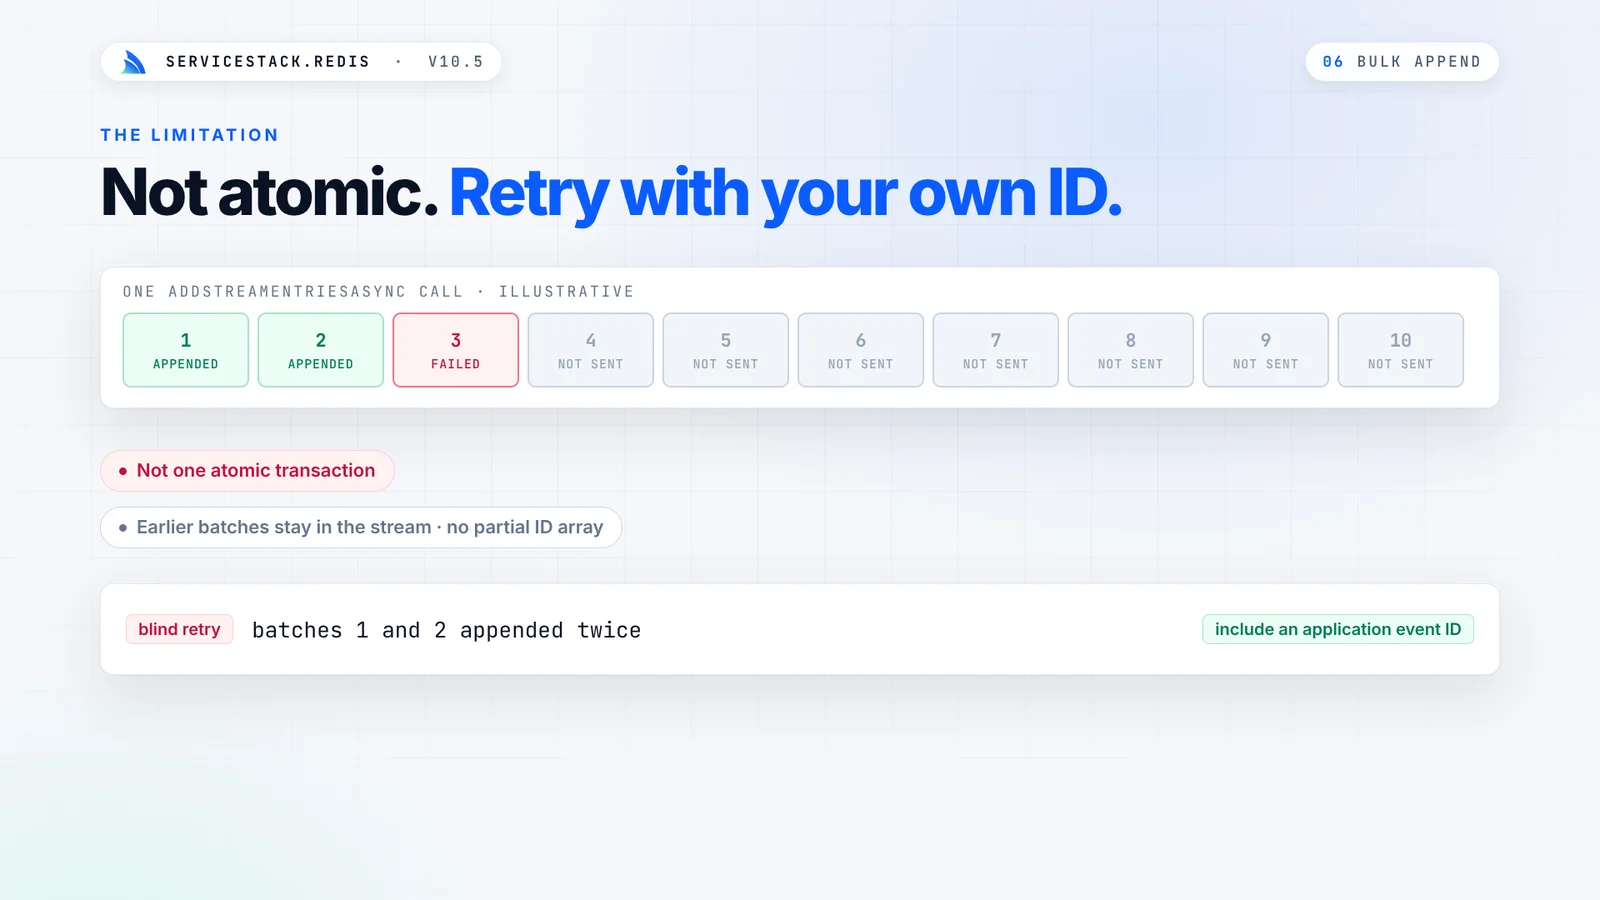
Use AddStreamEntries to append many entries at once. It sends them in pipelined batches and returns the
generated IDs in input order:
string[] ids = await redis.AddStreamEntriesAsync("orders", orderEvents,
    batchSize: 100, maxLength: 10_000, token: token);
Bulk appends are pipelined, not atomic: if a batch fails, earlier batches stay in the stream, so include your own event ID when you need to retry safely.
XAdd, XAck, XDel, XTrim and XLen can also be queued in Redis pipelines. Streams require Redis 5+,
and XAutoClaim requires Redis 6.2+. See the Redis Streams docs for the native byte APIs,
pending-message recovery and failure semantics.
Hash Field Expiration
Redis 7.4 added expiration for individual hash fields, and ServiceStack.Redis now supports it with sync and async APIs. You can keep related values together in one hash while letting each field expire on its own schedule, e.g. a user's online presence or a short-lived one-time code:
await redis.SetEntryInHashAsync("users:42", "presence", "online", token);

long[] results = await redis.HPExpireAsync("users:42", 30_000,
    new[] { "presence", "missing" }, RedisHashExpiryCondition.NX, token);
// [1, -2]: "presence" now expires in 30s, "missing" doesn't exist
| API | Redis Command | Description |
|---|---|---|
HExpire / HPExpire |
HEXPIRE / HPEXPIRE |
Expire fields after a number of seconds / milliseconds |
HExpireAt / HPExpireAt |
HEXPIREAT / HPEXPIREAT |
Expire fields at a Unix timestamp |
HTtl / HPTtl |
HTTL / HPTTL |
Get each field's remaining time to live |
HExpireTime / HPExpireTime |
HEXPIRETIME / HPEXPIRETIME |
Get each field's expiration timestamp |
HPersist |
HPERSIST |
Remove each field's expiration |
Each API returns one status code per field, in the order you passed them, so you can tell which fields were
updated, which were missing and which were skipped by a NX, XX, GT or LT condition. Expiring a field
doesn't change the TTL of the hash itself.
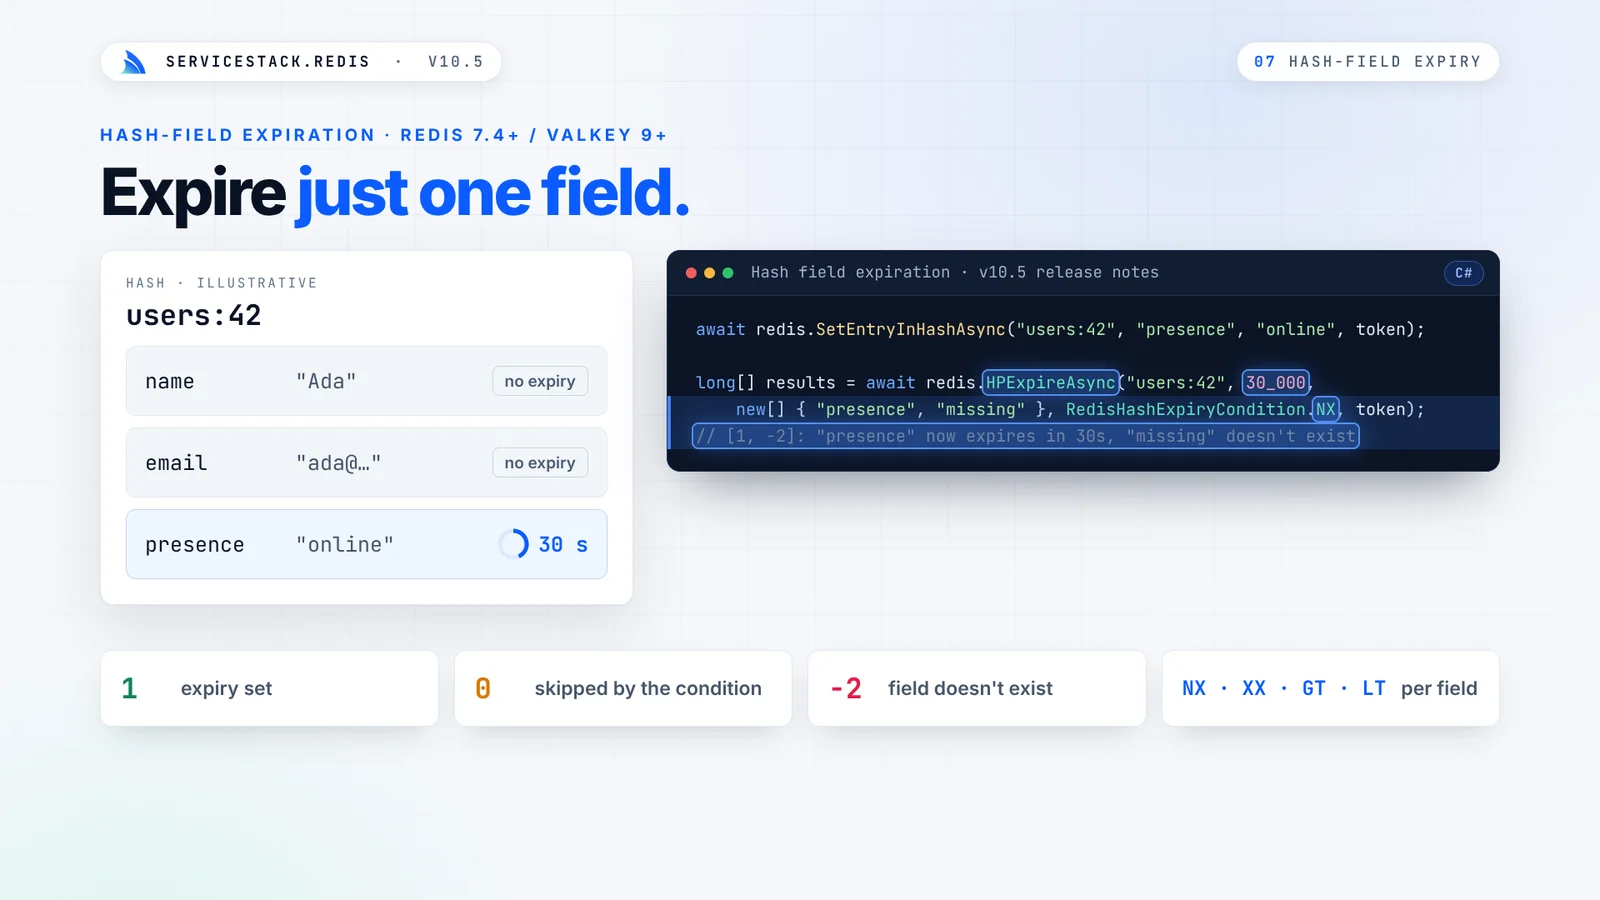
Hash field expiration requires Redis 7.4+ or Valkey 9+. These commands can't be queued in pipelines or transactions yet. See Hash Field Expiration for the status codes and the binary APIs.
GETEX, GETDEL and UNLINK
New sync and async APIs for Redis's atomic key commands:
| API | Redis Command | Description |
|---|---|---|
GetAndExpireValue |
GETEX |
Return a value and update its expiration in one command |
GetAndDeleteValue |
GETDEL |
Return a value and delete it in one command |
Unlink |
UNLINK |
Remove keys immediately, freeing their memory in the background |
using var redis = redisManager.GetClient();

string value = redis.GetAndExpireValue("session:1", new RedisGetExOptions { ExpirySeconds = 60 });
string token = redis.GetAndDeleteValue("one-time-token:1");
long removed = redis.Unlink("large:key", "another:key");
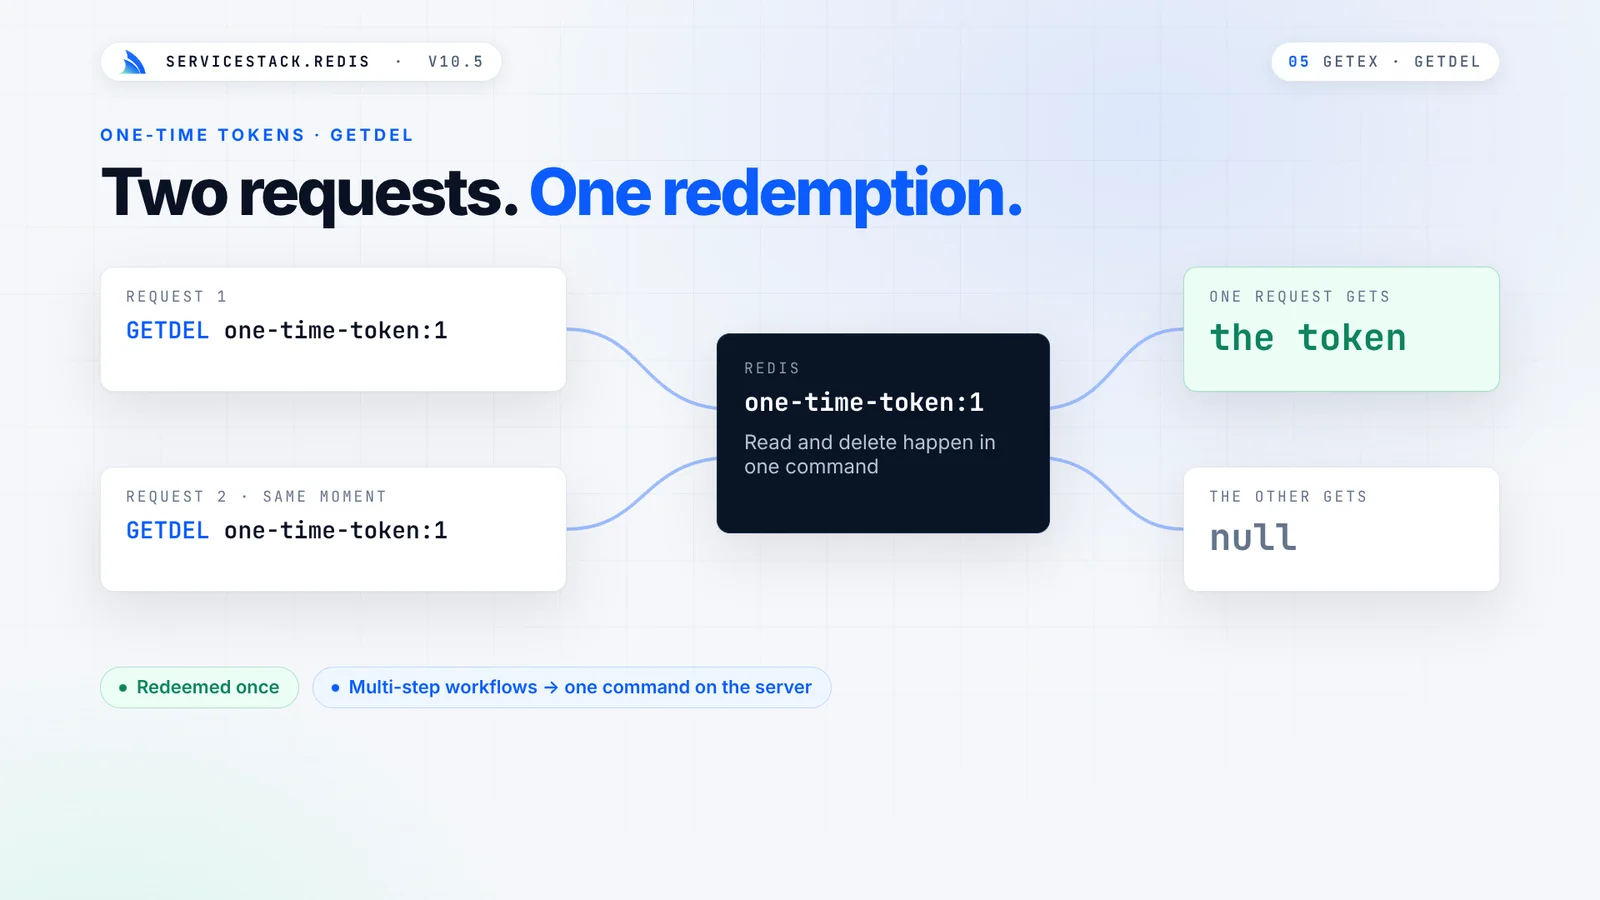
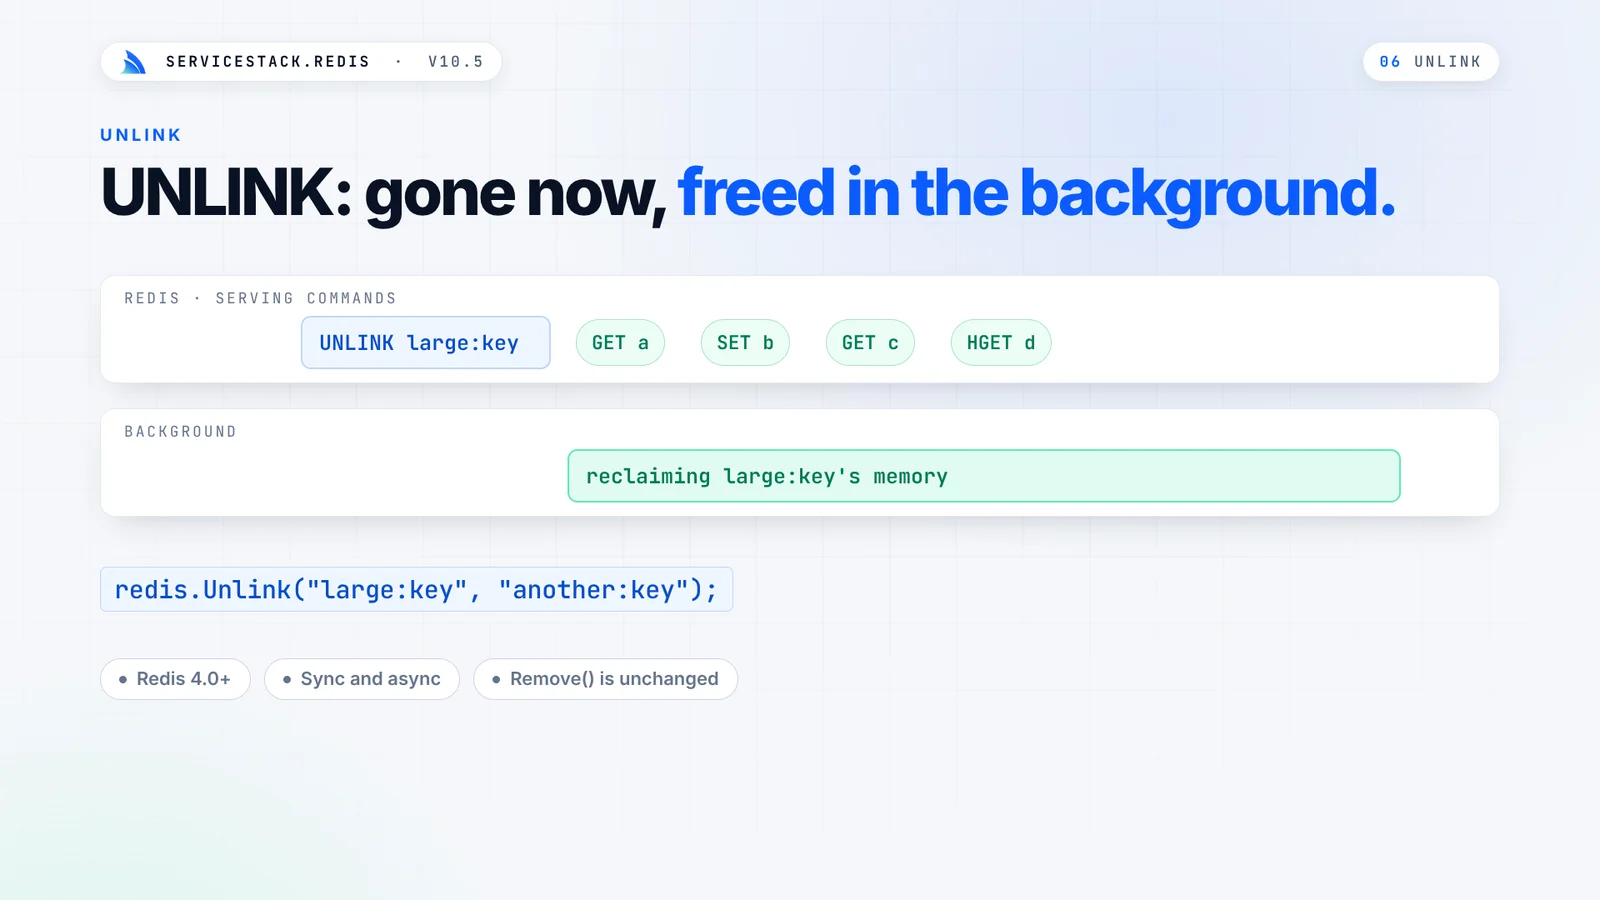
RedisGetExOptions can set a relative or absolute expiration, or remove it with Persist = true. If you don't
pass any options, the key keeps its existing TTL. GETEX and GETDEL require Redis 6.2+.
Pattern Cleanup with SCAN + UNLINK
UnlinkByPattern removes every key matching a pattern in bounded UNLINK batches. Because it uses SCAN
instead of KEYS, it doesn't block Redis while it runs:
long removed = await redis.UnlinkByPatternAsync("cache:reports:*", batchSize: 512, token: token);
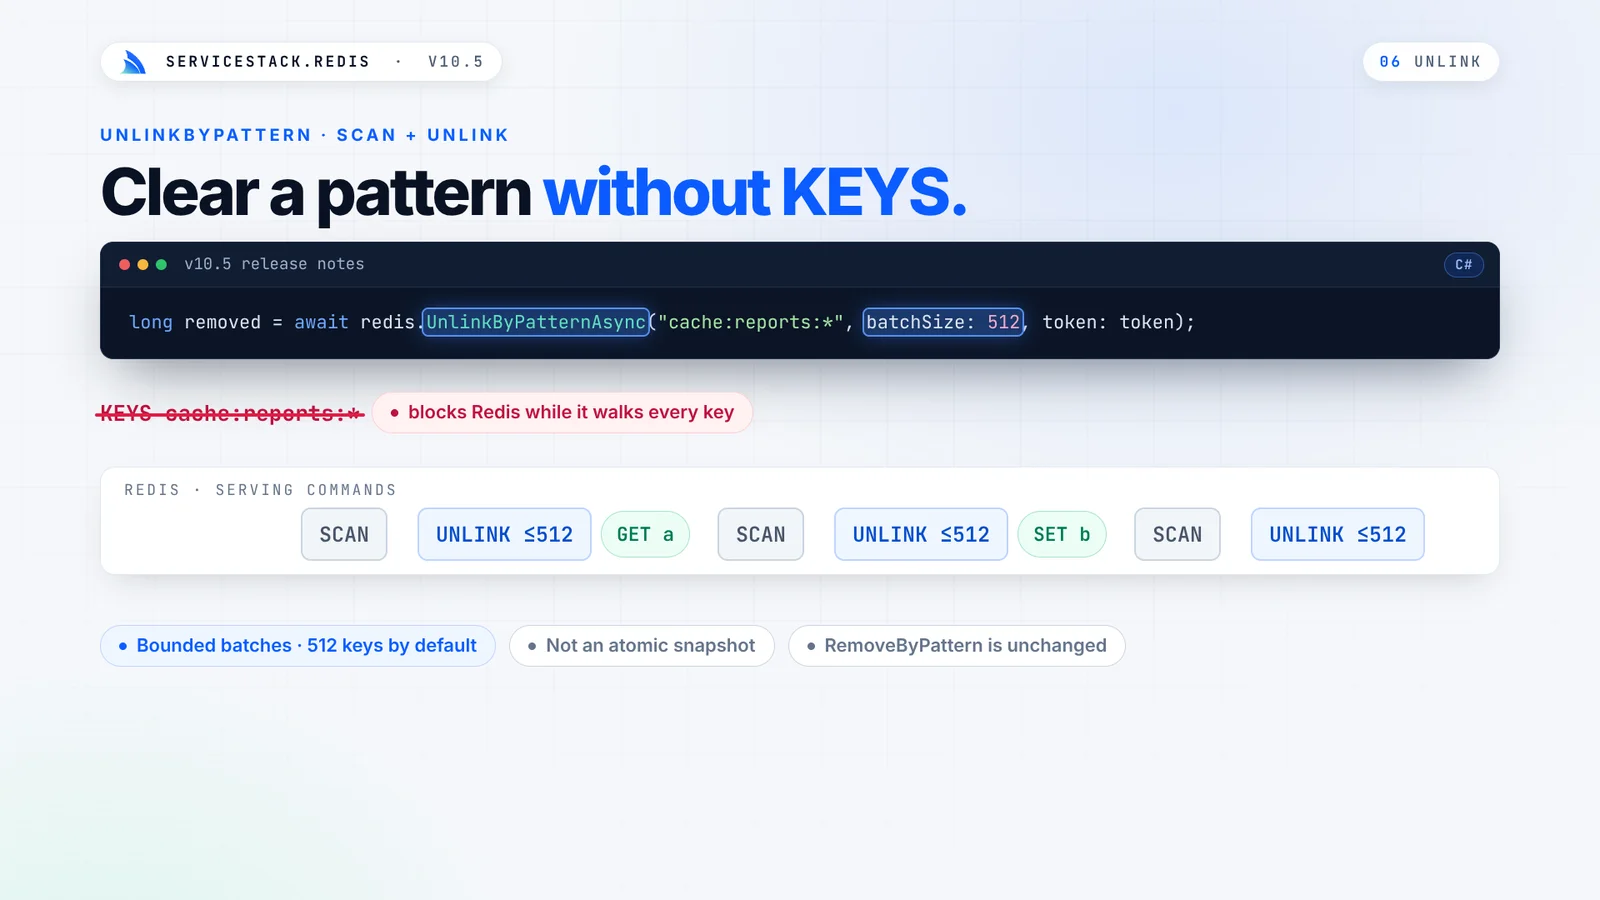
The existing RemoveByPattern behavior is unchanged. See atomic key commands
for details.
Fully Async Connection Setup
The async APIs previously had to make blocking calls while opening a new connection. Now each step of opening
a connection is async: DNS lookup, TCP connect, TLS handshake, AUTH, SELECT, CLIENT SETNAME and the
initial server discovery. Resetting the database on a pooled client no longer happens while holding the pool
lock either. Under load this means fewer blocked thread pool threads.
using var pool = new RedisManagerPool("localhost:6379?ConnectTimeout=2000");
await using var redis = await ((IRedisClientsManagerAsync)pool).GetClientAsync(token);
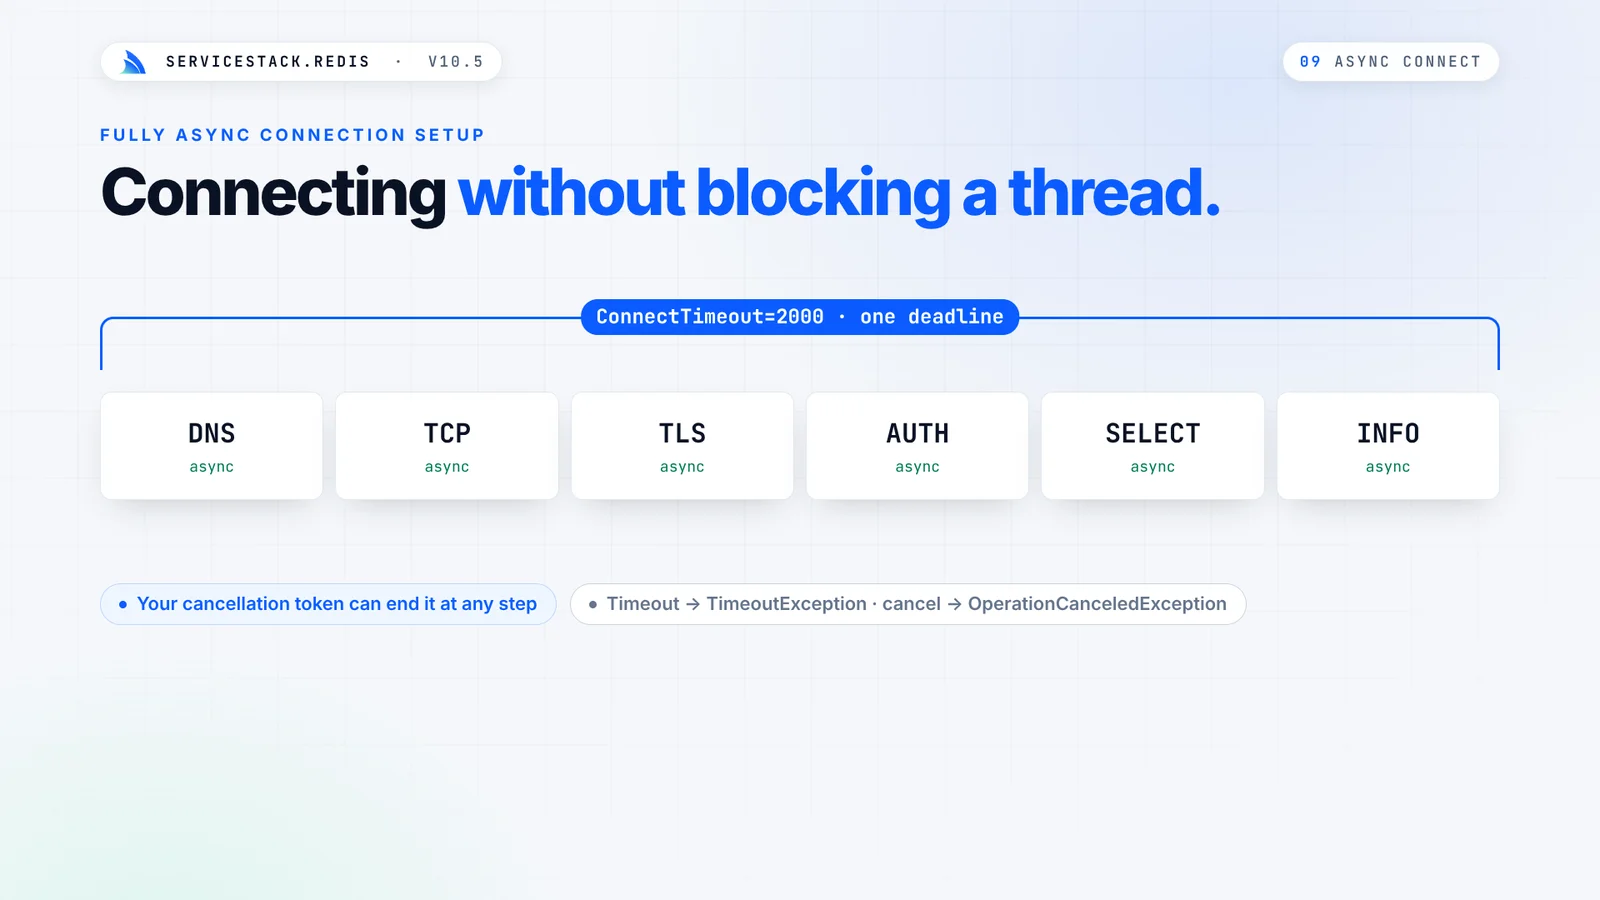
ConnectTimeout now acts as one deadline for the entire async connection setup, and the CancellationToken
you pass in can abort it at any step. A new ConnectionFilterAsync hook on clients and managers lets you run
your own async setup on each new connection:
pool.ConnectionFilterAsync = async (client, token) => await client.PingAsync(token);
Existing synchronous hooks, custom resolvers and Sentinel discovery behave the same as before. See async connection setup for details.
Optional Connection Limits and Cancellable Pool Waits
By default, RedisManagerPool creates extra connections whenever its pool is exhausted. If you need to stay
within a Redis server's connection limit, you can now set MaxLiveConnections to cap them:
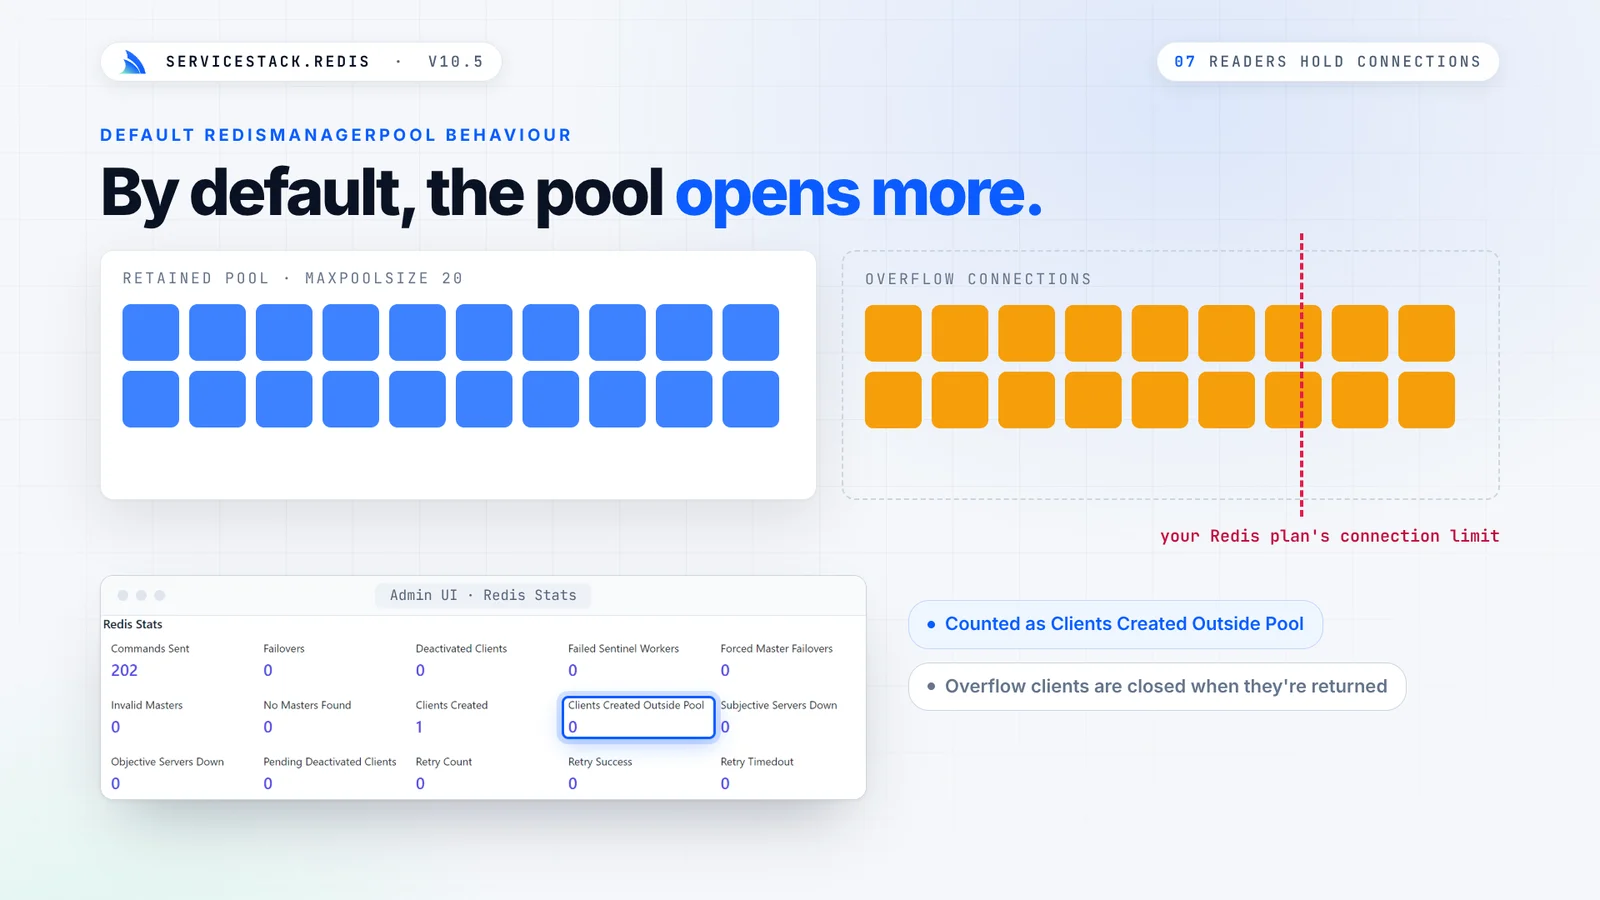
using var pool = new RedisManagerPool("localhost:6379", new RedisPoolConfig {
    MaxPoolSize = 20,          // Clients kept for reuse
    MaxLiveConnections = 40,   // Max open connections at any one time
    MaxWaitingClients = 100,   // Max callers waiting for a free connection (0 = fail fast)
    PoolTimeout = 2000,        // Max time in ms to wait for a free connection
});
When the limit is reached, callers wait for a free connection and fail with a TimeoutException if none frees
up within PoolTimeout. When the wait queue is also full, they fail immediately. Sync and async callers share
the same limit, and GetStats() includes the new admission counters. If you leave MaxLiveConnections unset,
the pool keeps its existing behavior.
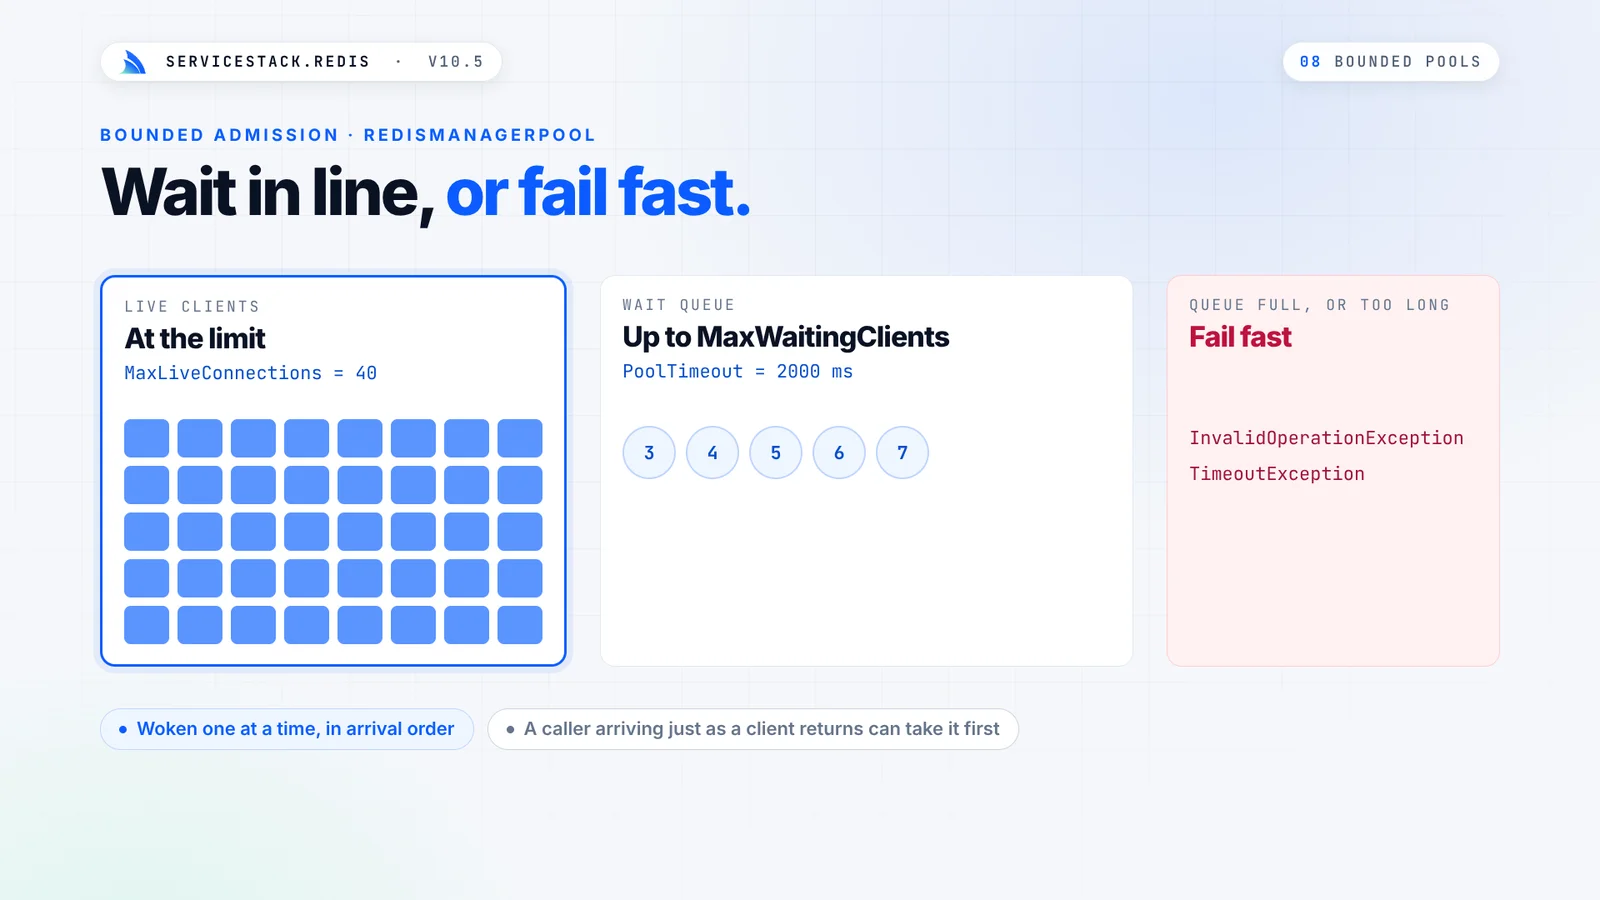
PooledRedisClientManager and RedisManagerPool now also stop waiting for a free client when the
CancellationToken passed to GetClientAsync() is cancelled. Waiting callers, sync or async, are served in
the order they arrived: each returned client wakes only the next waiter, while failover and disposal wake them
all:
using var cts = new CancellationTokenSource(TimeSpan.FromSeconds(2));
await using var redis = await ((IRedisClientsManagerAsync)redisManager).GetClientAsync(cts.Token);
See bounded admission for the full behavior.
IPv6 and Redis URI Endpoints
Connection strings now accept IPv6 addresses (in brackets, e.g. [::1]:6379) and hosts that resolve to both
IPv4 and IPv6 addresses, trying IPv4 addresses first. They also accept standard rediss:// TLS URIs, with URL-encoded ACL credentials and
an optional database number:
using var redis = new RedisClient("rediss://user:p%40ss@redis.example:6380/2");

// Parse a redis:// URI as a standard Redis URI:
var endpoint = RedisEndpoint.ParseUri("redis://user:p%40ss@[::1]:6379/2");
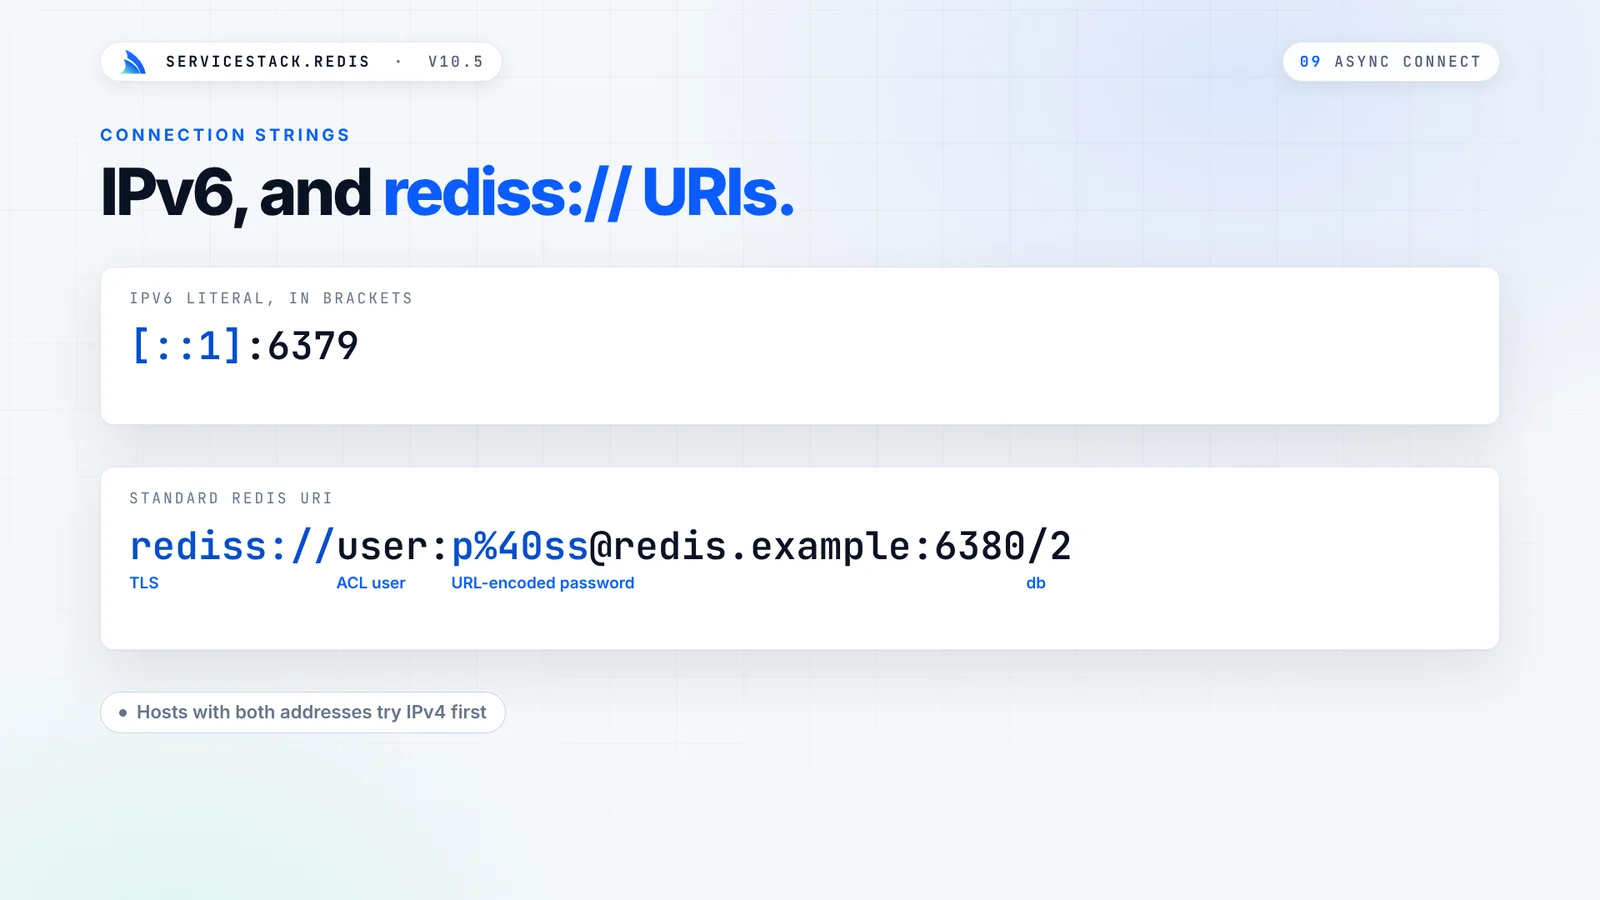
Existing redis:// connection strings are parsed the same way as before. Call RedisEndpoint.ParseUri to parse
them as standard Redis URIs. See IPv6 and Redis URIs.
Atomic Cache Expiration Fixes
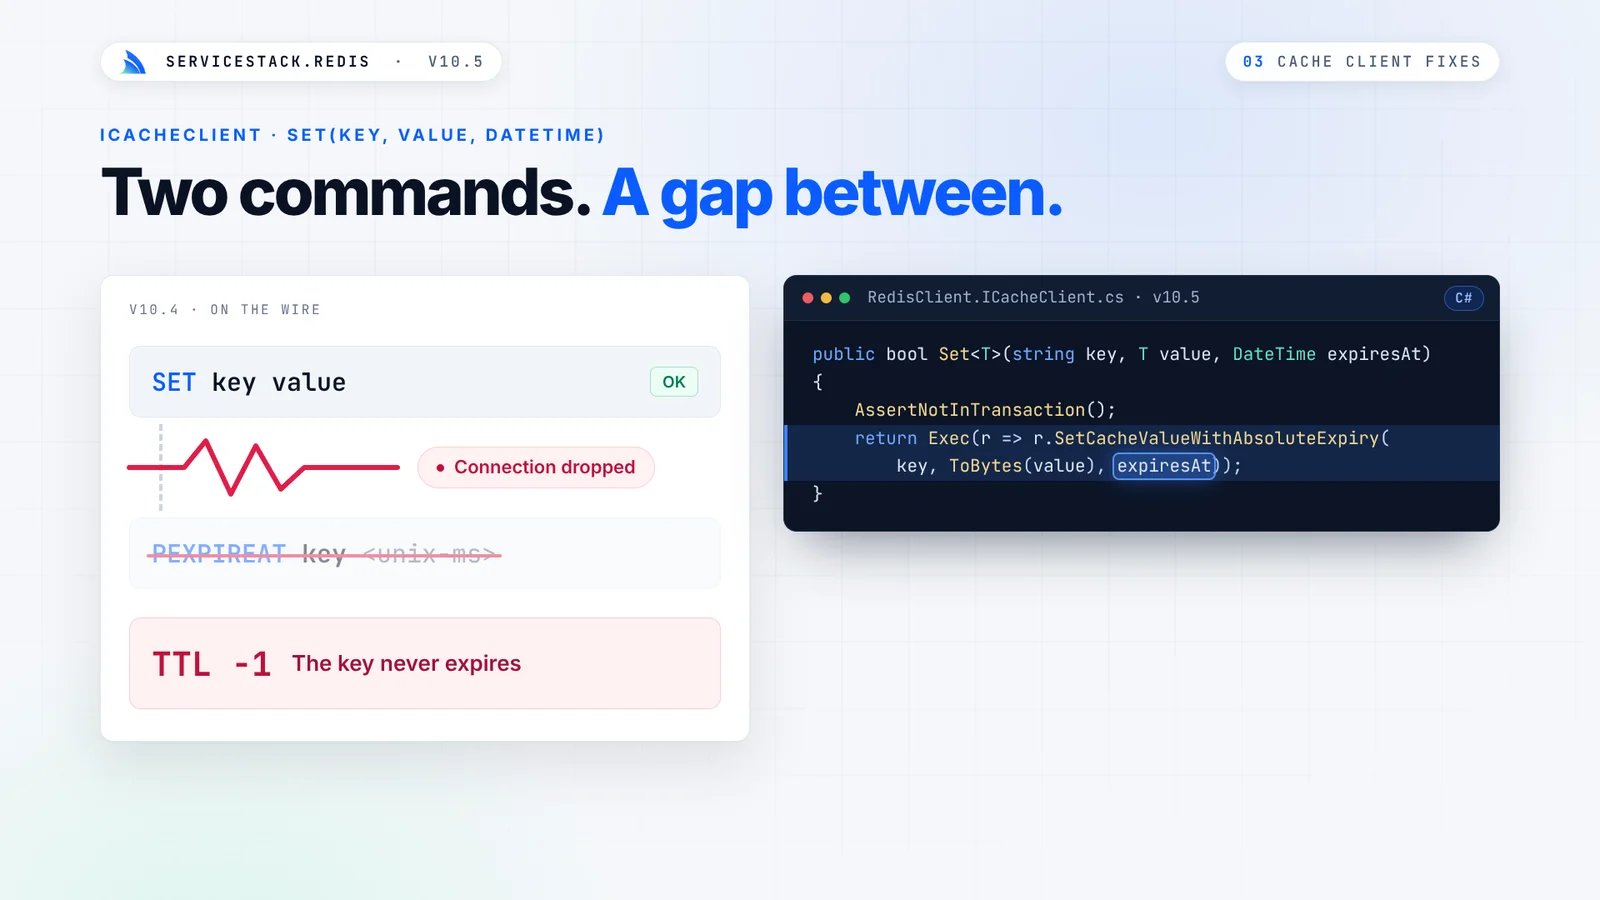
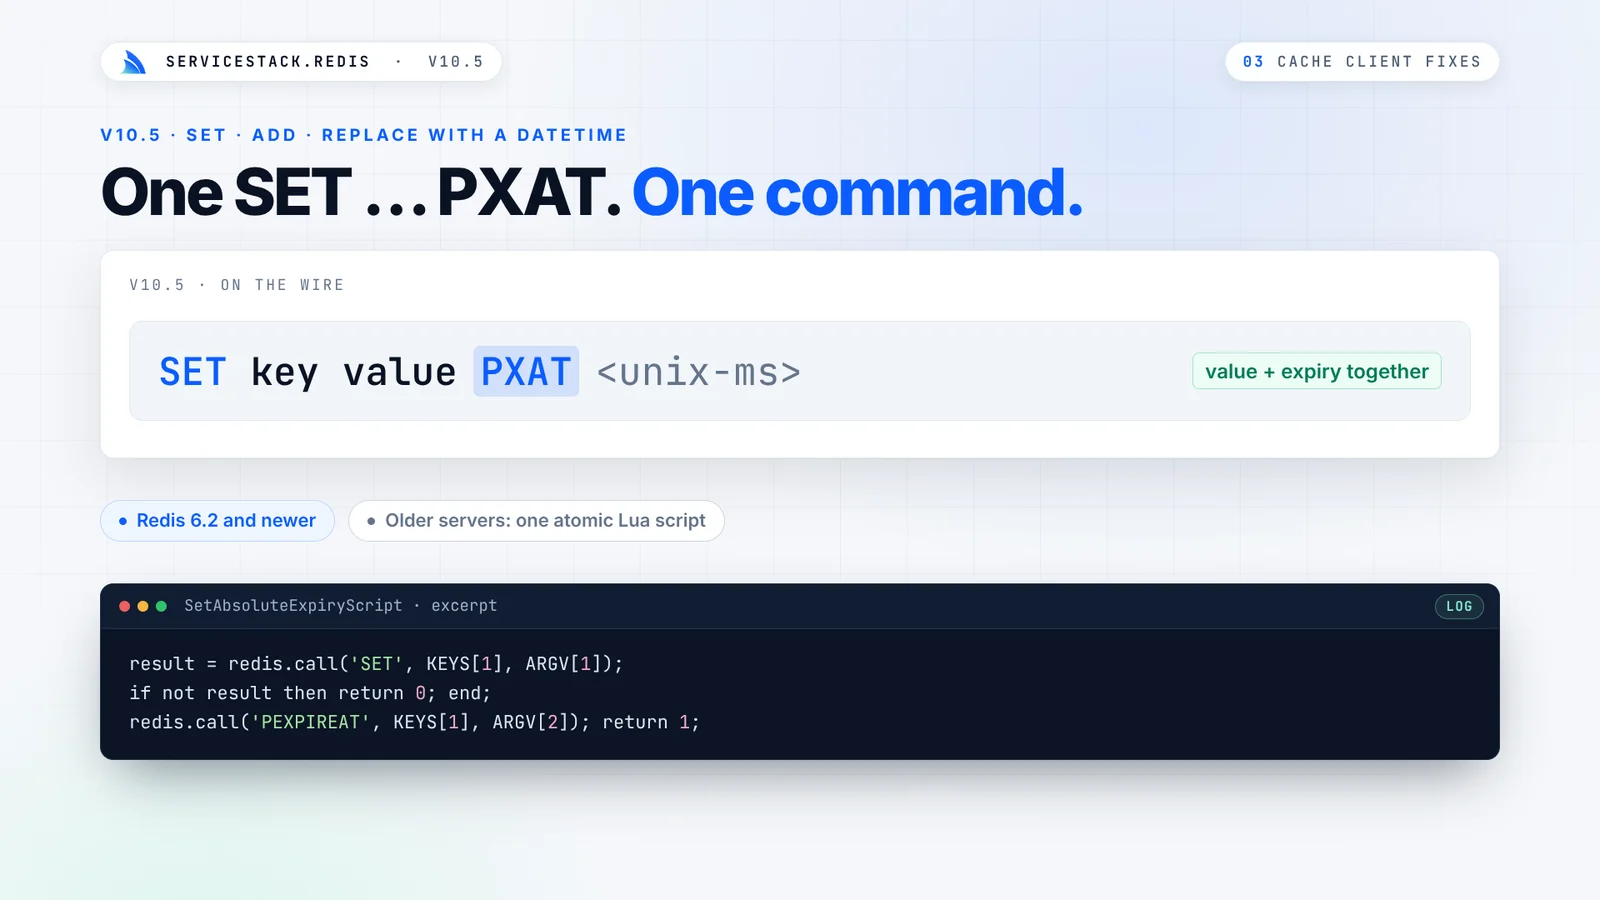
The ICacheClient Set, Add and Replace overloads that take a DateTime expiration now write the value
and its expiration in one atomic operation. Before, they used two separate commands, so a concurrent write or
a dropped connection could leave a key with the wrong expiration, or none at all. These overloads use
SET PXAT on Redis 6.2+ and fall back to an atomic Lua script on older servers.
The async AddAsync and ReplaceAsync overloads that take a TimeSpan also failed to pass their expiration to
Redis, so keys were stored without a TTL. They now set the expiration the same way as their sync versions.
Reliability and Pipeline Fixes
This release also includes several reliability fixes for connection pools and pipelines:
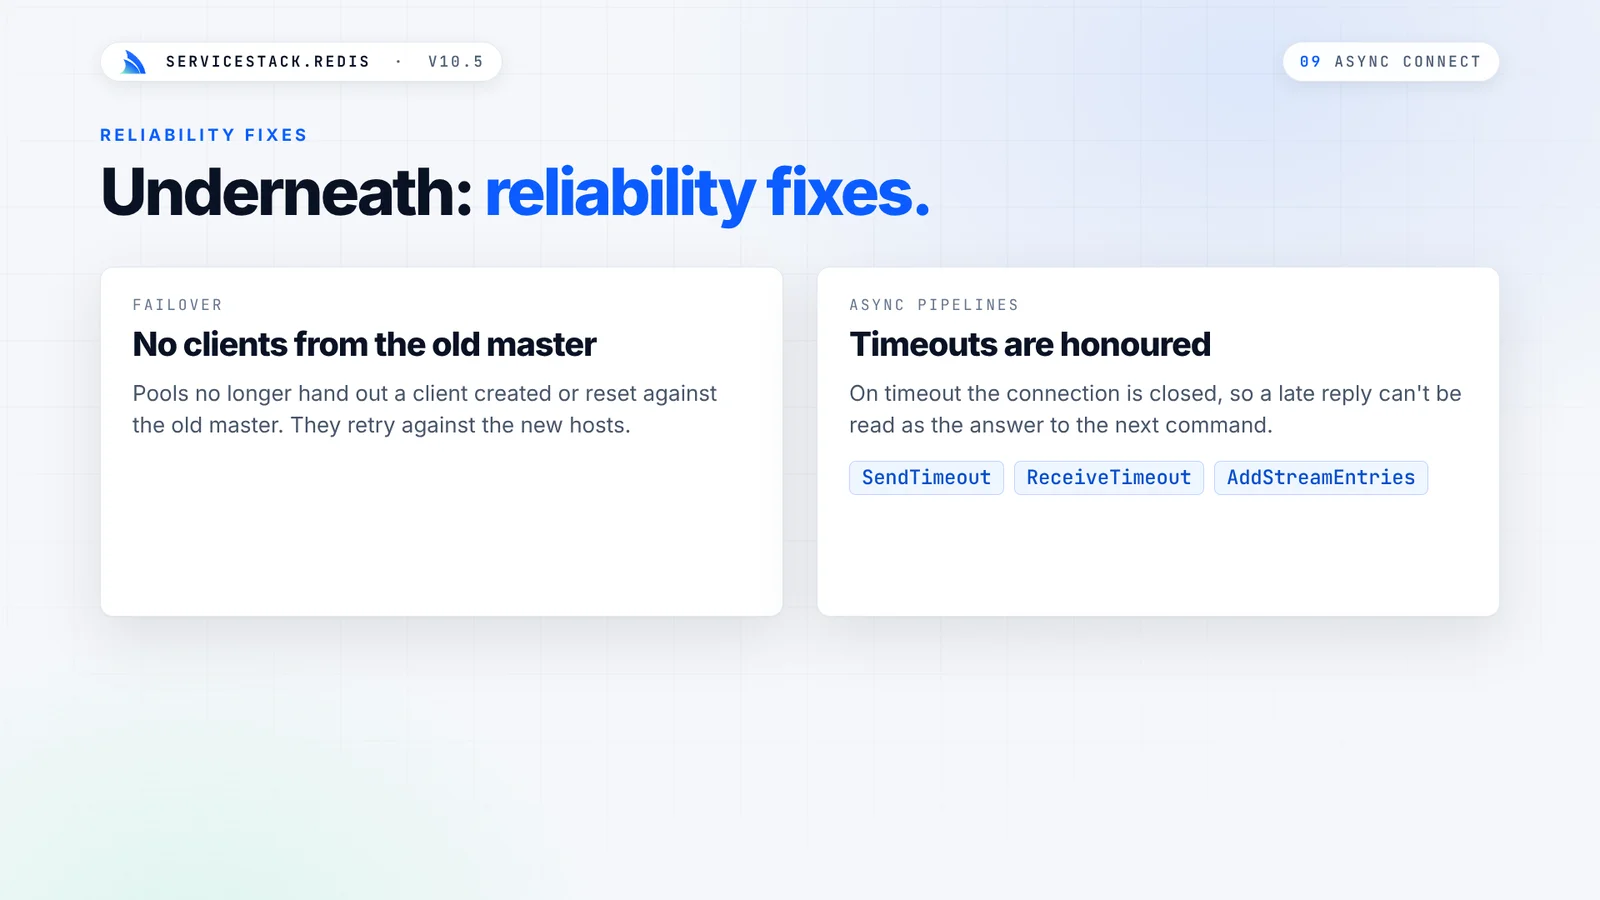
- Failover - pools no longer hand out a client that was created or reset against the old master during a failover; they retry against the new hosts instead. A failed acquisition can't release another caller's reserved pool slot.
- Custom resolvers - subclasses that override
RedisResolver.CreateRedisClientkeep applying their credentials, TLS and routing when clients are acquired withGetClientAsync(). - Pipeline timeouts - async pipelines (including
AddStreamEntries) now honorSendTimeoutwhen sending andReceiveTimeoutfor each reply. On timeout, cancellation or a malformed reply the connection is closed, so unread replies can't be returned as the result of a later command. - Partial sends - sync and async sends now finish writing commands when the socket only accepts part of the buffer.
- IPv6 fallback - hostnames try their IPv4 addresses first, then IPv6, so hosts reachable over IPv4 connect
exactly as before and IPv6-only hosts now work. With a
ConnectTimeout, each attempt gets a share of it, so an unreachable address can't use up the whole timeout before the next one is tried.
Empty values in pipelines and transactions
Reading an empty string or byte array in a pipeline or transaction now returns the empty value instead of
null, matching what the same call returns outside a pipeline. Missing keys still return null:
redis.SetValue("key", "");
redis.GetValue("key"); // "" (unchanged)

string value = null;
using var trans = redis.CreateTransaction();
trans.QueueCommand(r => r.GetValue("key"), v => value = v);
trans.Commit();        // value: was null, now ""
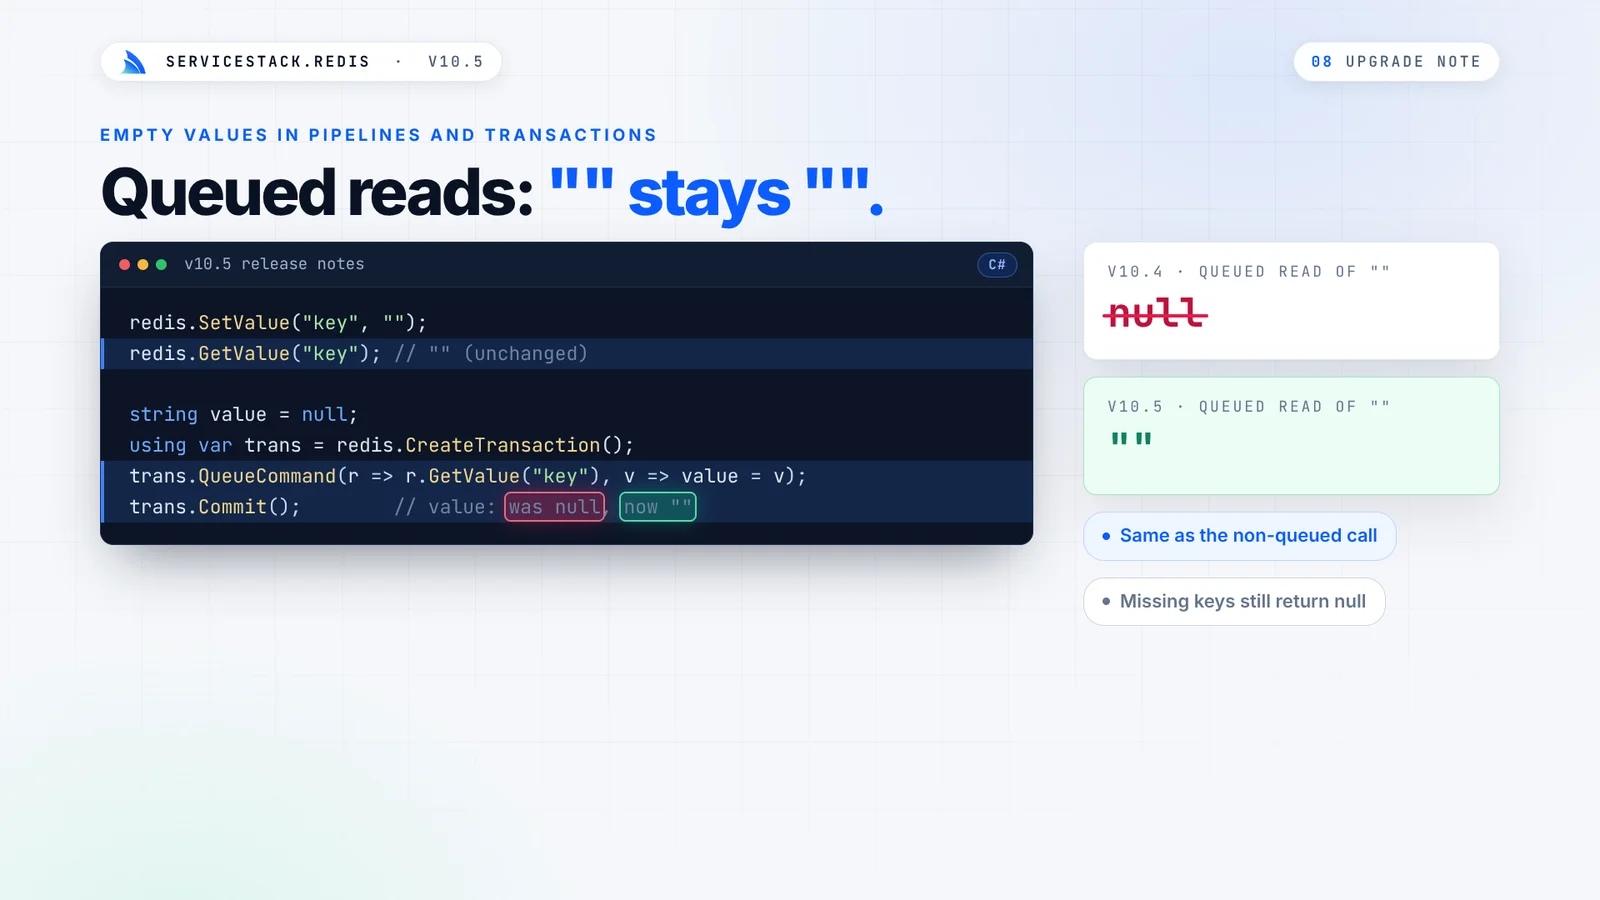
This applies to every queued string and byte read, e.g. GetValue, GetValueFromHash and list pops. If you
check results from a pipeline or transaction with value == null, use string.IsNullOrEmpty(value) to keep
treating empty values as missing. Queued reads into an int still return 0 for an empty value.
To keep the previous behavior while you update your code, turn it back on at startup:
RedisConfig.PipelineEmptyValuesAsNull = true;
See Redis async APIs and client managers for more information.