ServiceStack.AI
ServiceStack.AI
Speech-to-Text and ChatGPT providers to enable natural language features in .NET
ServiceStack.AI Providers
As the AI landscape is actively changing we want our Apps to be able to easily switch to different Speech-to-Text or ChatGPT and TypeChat providers so we're able to easily evaluate and use the best provider for our use-case.
To support this we're maintaining FREE implementation-agnostic abstractions for different AI and GPT Providers to enable AI features in .NET Apps under the new ServiceStack.AI namespace in the dep-free ServiceStack.Interfaces package.
The implementations for these abstractions are maintained across NuGet packages in accordance with their dependencies:
ServiceStack.Aws- AI & GPT Providers for Amazon Web ServicesServiceStack.Azure- AI & GPT Providers for Microsoft AzureServiceStack.GoogleCloud- AI & GPT Providers for Google CloudServiceStack.AI- AI & GPT Providers for OpenAI APIs and local Whisper and Node TypeChat installs
These abstractions and their implementations enable .NET projects to add AI-powered natural language features to their Apps whilst decoupling their Speech-to-text and ChatGPT requirements from any single implementation where they can be easily substituted as needed.
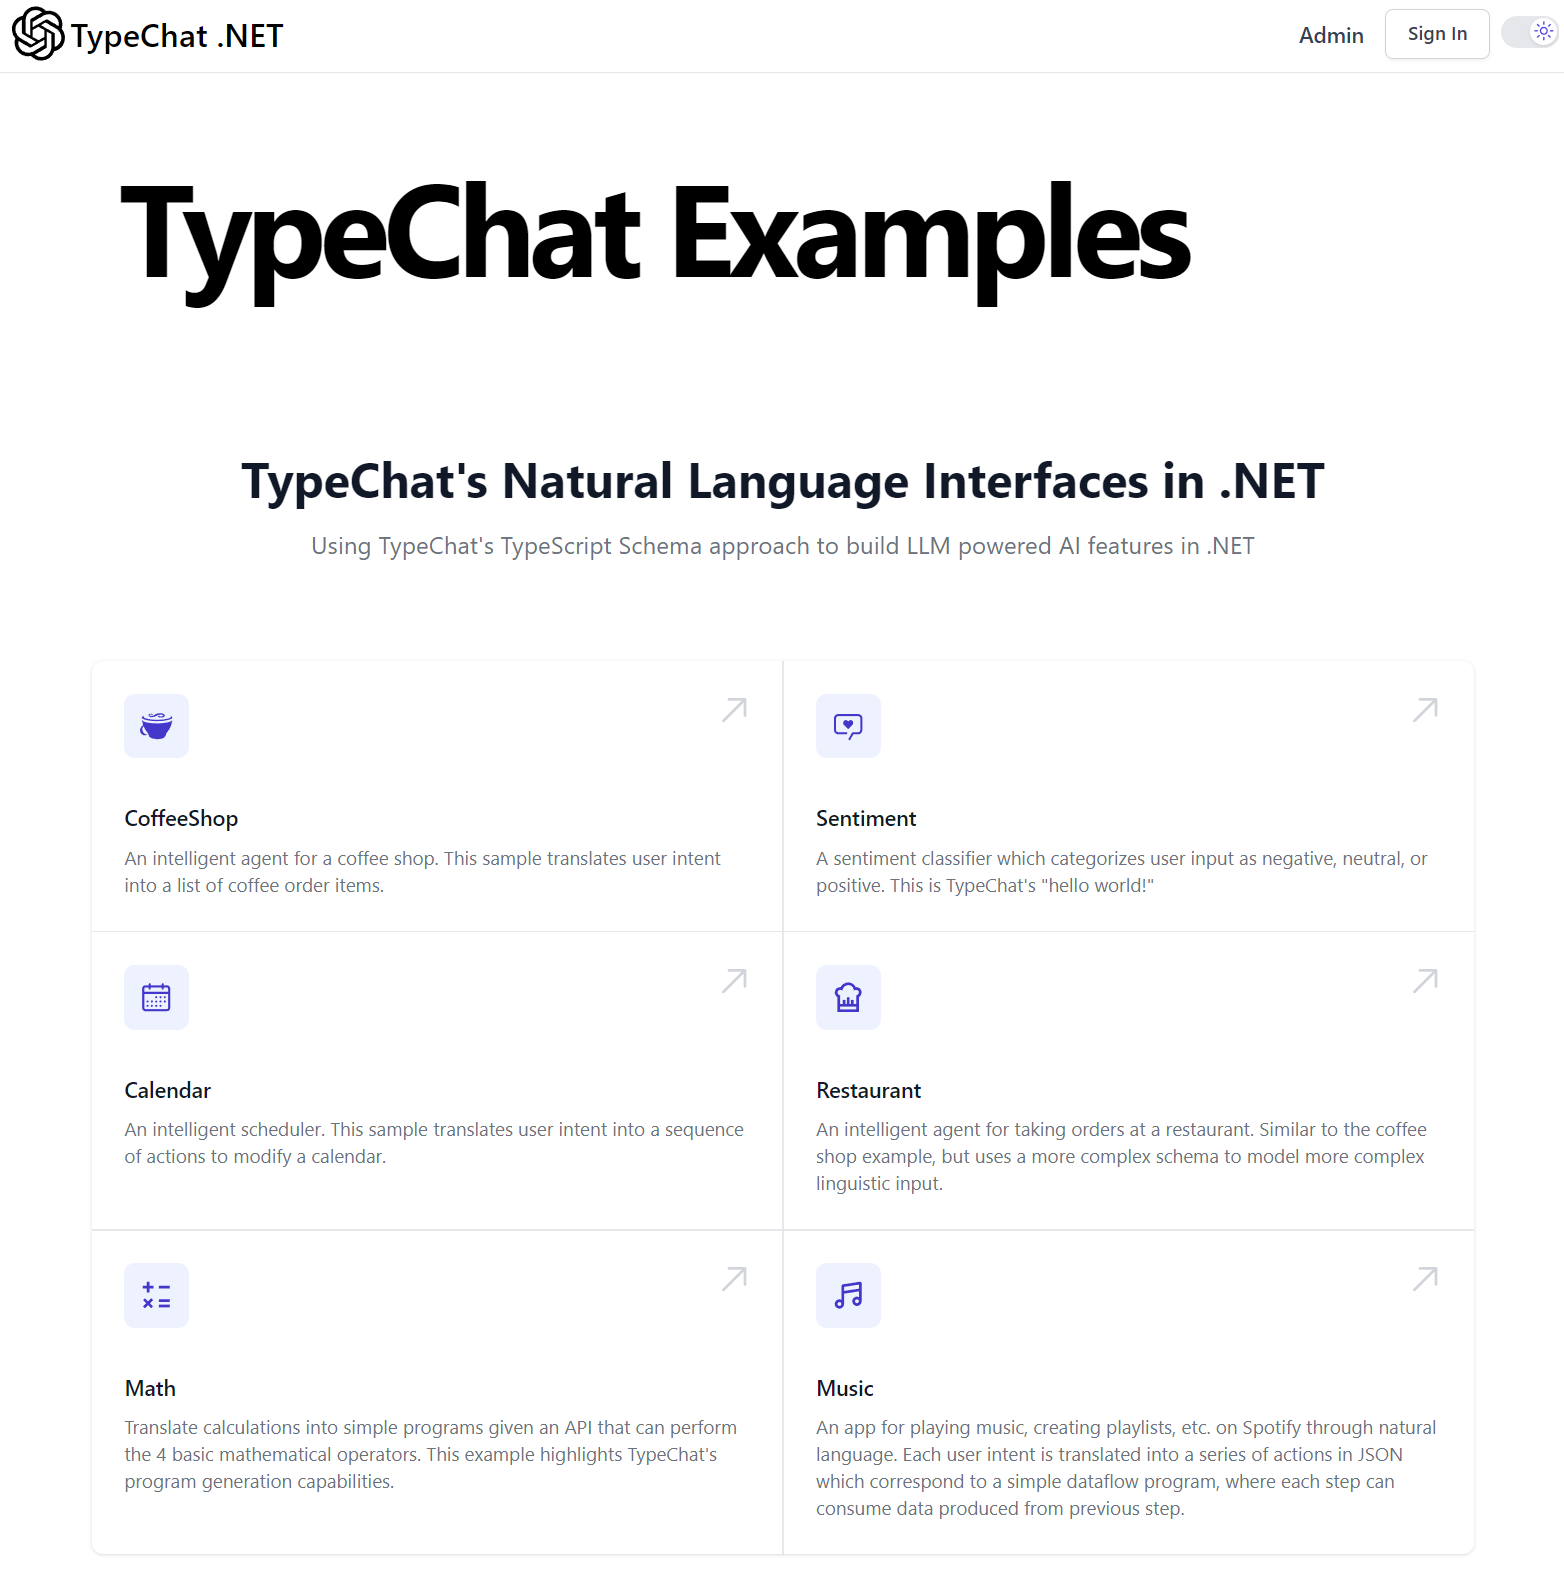
.NET TypeChat Examples
An easy way to evaluate the new ServiceStack.AI providers is by exploring the TypeChat .NET Examples Project which contains .NET implementations for each TypeChat Example that are already configured to work with all available providers which has a Live Demo hosted at:
ISpeechToText
The ISpeechToText interface abstracts Speech-to-Text providers behind a simple API:
public interface ISpeechToText
{
    // Once only task to run out-of-band before using the SpeechToText provider
    Task InitAsync(List<string> phrases, CancellationToken token = default);

    // Transcribe the Audio at recordingPath and return a JSON API Result
    Task<TranscriptResult> TranscribeAsync(string request, CancellationToken token);
}
Which has 5 different Speech-to-Text implementations to choose from:
GoogleCloudSpeechToText- to use Google Cloud's Speech-to-Text v2 APIAwsSpeechToText- to use Amazon Transcribe APIAzureSpeechToText- to use Azure Speech to text APIWhisperApiSpeechToText- to use OpenAI's Whisper APIWhisperLocalSpeechToText- to use local install of OpenAI Whisper
Virtual File System Providers
Likewise file storage is also easily substitutable with Virtual File System providers allowing Audio Voice Recordings to be uploaded to your preferred provider:
FileSystemVirtualFiles- stores uploads in local file system (default)GoogleCloudVirtualFiles- stores uploads in Google Cloud StorageS3VirtualFiles- stores uploads in AWS S3AzureBlobVirtualFiles- stores uploads in Azure Blob StorageR2VirtualFiles- stores uploads in Cloudflare R2
OpenAI Solution
Since you'll likely be needing OpenAI's ChatGPT API for converting natural language requests into a machine readable request your App can process, the easiest solution is to also use OpenAI's Whisper API for your App's Speech-to-Text requirements, which you can configure your App to use in a Modular Startup config:
[assembly: HostingStartup(typeof(ConfigureOpenAi))]

public class ConfigureOpenAi : IHostingStartup
{
    const bool UseKernel = true;

    public void Configure(IWebHostBuilder builder) => builder
        .ConfigureServices((context, services) => {
            services.AddSingleton<ISpeechToText, WhisperApiSpeechToText>();

            // Call Open AI Chat API through node TypeChat
            services.AddSingleton<ITypeChat, NodeTypeChat>();
        })
        .ConfigureAppHost(afterConfigure:appHost => {

            if (appHost.TryResolve<ISpeechToText>() is IRequireVirtualFiles requireVirtualFiles)
                requireVirtualFiles.VirtualFiles = appHost.VirtualFiles;
        });
}
Open AI providers are maintained in the ServiceStack.AI NuGet Package:
<PackageReference Include="ServiceStack.AI" Version="8.*" />
Using Node TypeChat
If you prefer to use Microsoft's node TypeChat library to utilize its auto schema validation and corrective auto-retry features, your Dockerfile will will need to have node installed:
# install node.js and ffmpeg
RUN apt-get clean && apt-get update && apt-get upgrade -y && apt-get install -y --no-install-recommends curl gnupg ffmpeg \
    && curl -sL https://deb.nodesource.com/setup_current.x | bash - \
    && apt-get install nodejs -yq

RUN npm install
package.json
That installs TypeChat by listing it as a dependency in your App's package.json:
{
  "dependencies": {
    "typechat": "^0.0.10"
  }
}
You'll also need a copy of typechat.mjs script that the .NET process invokes to utilize TypeChat, located in the Content Directory root of your Application which you can add to your project with x mix:
x mix typechat.mjs
Using Microsoft Semantic Kernel
Alternatively you can avoid using TypeChat and node altogether by invoking ChatGPT through Microsoft's Semantic Kernel .NET Library:
var kernel = Kernel.Builder.WithOpenAIChatCompletionService(
        Environment.GetEnvironmentVariable("OPENAI_MODEL") ?? "gpt-3.5-turbo",
        Environment.GetEnvironmentVariable("OPENAI_API_KEY")!)
    .Build();
services.AddSingleton(kernel);
services.AddSingleton<ITypeChat>(c => new KernelTypeChat(c.Resolve<IKernel>()));
If you're not using TypeChat you'll likely want to implement your own Custom Validation and Auto-correcting solution which can be more effective that TypeChat's schema validation errors approach.
Supporting Safari Web Audio
If you're not using OpenAI's Whisper for transcribing you'll likely need to use ffmpeg to convert
Convert Uploaded Files into a format your
Speech-to-Text provider accepts.
Google Cloud Solution
To use any of the Google Cloud providers your pc needs to be configured with GoogleCloud Credentials on a project with Speech-to-Text enabled.
You can then configure your App's appsettings.json with your Google Cloud Project and Storage where you would like uploads to persist to:
{
  "GoogleCloudConfig": {
    "Project": "servicestackdemo",
    "Location": "global",
    "Bucket": "servicestack-typechat"
  }
}
Which you'll be able to configure your App to use within a Modular Startup config:
[assembly: HostingStartup(typeof(ConfigureGoogleCloud))]

public class ConfigureGoogleCloud : IHostingStartup
{
    public void Configure(IWebHostBuilder builder) => builder
        .ConfigureServices((context, services) => {
            GoogleCloudConfig.AssertValidCredentials();

            var gcp = context.Configuration.GetSection(nameof(GoogleCloudConfig))
                .Get<GoogleCloudConfig>();
            services.AddSingleton(gcp);

            services.AddSingleton<ISpeechToText>(c => {
                return new GoogleCloudSpeechToText(SpeechClient.Create(),
                    gcp.ToSpeechToTextConfig(x => {
                        // x.PhraseSetId = PhraseSetId;
                    })
                ) {
                    VirtualFiles = HostContext.VirtualFiles
                };
            });
        })
        .ConfigureAppHost(afterConfigure:appHost => {
            appHost.VirtualFiles = new GoogleCloudVirtualFiles(
                StorageClient.Create(), appHost.Resolve<GoogleCloudConfig>().Bucket!);
        });
}
Google Cloud providers are maintained in the ServiceStack.GoogleCloud NuGet Package:
<PackageReference Include="ServiceStack.GoogleCloud" Version="8.*" />
Multiple custom Speech-to-Text configurations
Google Cloud Speech-to-Text APIs supports the ability to improve transcription results by creating Custom PhraseSets and Recognizers where you can specify which phrases are likely to be used so you can boost their probability they'll be recognized correctly, they'll also let you configure which optimized model and languages to use.
If your App uses multiple Phrasesets or Recognizers they'll need return a different configured GoogleCloudSpeechToText
provider dependent on the feature that's requested, which you can configure with a SpeechToTextFactory:
services.AddSingleton<ISpeechToTextFactory>(c => new SpeechToTextFactory
{
    Resolve = feature =>
    {
        var config = c.Resolve<AppConfig>();
        var gcp = c.Resolve<GoogleCloudConfig>();
        var siteConfig = config.GetSiteConfig(feature);

        return new GoogleCloudSpeechToText(
            SpeechClient.Create(),
            gcp.ToSpeechToTextConfig(x => {
                x.RecognizerId = siteConfig.RecognizerId;
                x.PhraseSetId = siteConfig.PhraseSetId;
            }))
        {
            VirtualFiles = HostContext.VirtualFiles
        };
    }
});
Creating Custom Recognizers
The GoogleCloudSpeechToText provider also supports recreating a custom recognizer with a vocabulary of boosted phrases
using the InitAsync API:
ISpeechToTextFactory SpeechToTextFactory { get; set; }

//...
List<KeyValuePair<string, int>> phraseWeights = ...;
var speechProvider = SpeechToTextFactory.Get(feature);
await speechProvider.InitAsync(new() {
    PhraseWeights = phraseWeights
});
This will re-create the PhraseSet and Recognizer using the PhraseSetId and RecognizerId identifiers that provider
was configured with in its GoogleCloudConfig.
GoogleCloud Credential Deployments
Google Cloud configures their Security credentials differently to other providers where instead of storing
Bearer Tokens or connection strings in Environment Variables, their GOOGLE_APPLICATION_CREDENTIALS Environment Variable
is used to instead specify the path where the actual JSON credentials are stored on disk.
Unfortunately passing the JSON configuration file as-is is incompatible with Docker Secrets for when you want Production App's credentials maintained outside of the Source Code repository.
A simple workaround you can do in your GitHub Actions release.yml instead is to Base64 encode the credentials which can then be passed as a Docker secret:
# Build and push new docker image, skip for manual redeploy other than 'latest'
- name: Build and push Docker images
uses: docker/build-push-action@v3
with:
file: Dockerfile
context: .
push: true
tags: ghcr.io/${{ env.image_repository_name }}:${{ env.TAG_NAME }}
secrets: |
googlecloud_credentials_base64=${{secrets.GOOGLE_APPLICATION_CREDENTIALS}}
Which your Dockerfile can then decode with
Unix base64 tool before saving the credentials.json inside your Docker Container:
RUN --mount=type=secret,id=googlecloud_credentials_base64 \
    cat /run/secrets/googlecloud_credentials_base64 | base64 -d > /out/googlecloud-credentials.json
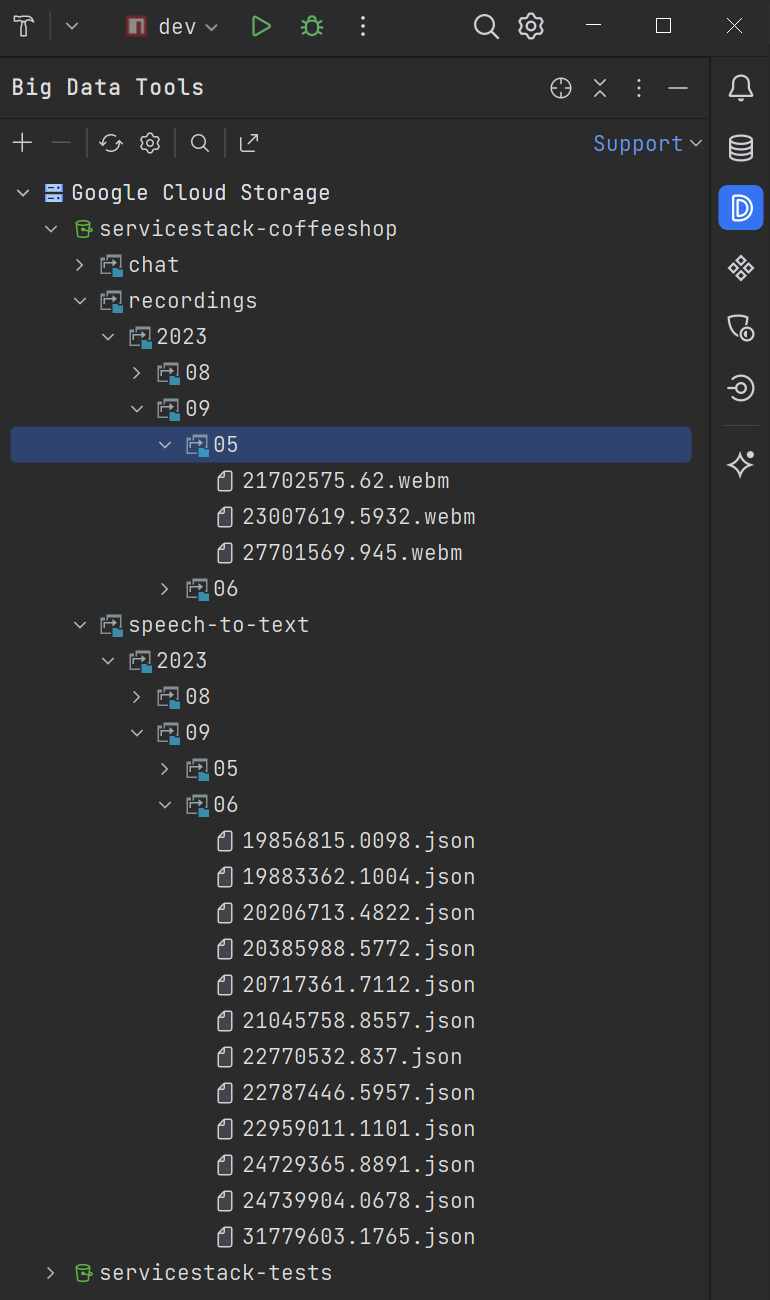
IDE Tooling
A nice feature from using Cloud Services is the built-in tooling in IDEs like JetBrains Big Data Tools where you can inspect new Recordings and ChatGPT JSON responses from within your IDE, instead of SSH'ing into remote servers to inspect local volumes:
Azure Solution
You can configure your App to use Azure AI Speech API to transcribe Web Audio Recordings that are persisted in Azure Blob Storage with the configuration below:
[assembly: HostingStartup(typeof(ConfigureAzure))]

public class ConfigureAzure : IHostingStartup
{
    public void Configure(IWebHostBuilder builder) => builder
        .ConfigureServices((context, services) => {

            var config = context.Configuration.GetSection(nameof(AzureConfig))
                .Get<AzureConfig>();
            services.AddSingleton(config);

            services.AddSingleton<ISpeechToText>(c =>
                new AzureSpeechToText(config.ToSpeechConfig()) {
                    VirtualFiles = HostContext.VirtualFiles
                });
        })
        .ConfigureAppHost(afterConfigure:appHost => {

            var config = appHost.Resolve<AzureConfig>();
            appHost.VirtualFiles = new AzureBlobVirtualFiles(
                config.ConnectionString, config.ContainerName);
        });
}
Azure providers are maintained in the ServiceStack.Azure NuGet Package:
<PackageReference Include="ServiceStack.Azure" Version="8.*" />
Enable Web Audio Support
As Azure AI Speech only supports limited Audio formats, it's recommended to have GStreamer installed along side your App to enable support for more popular compressed Web Audio formats.
Refer to the GStreamer configuration docs for how install GStreamer in different Operating Systems.
AWS Solution
Organizations hosting on AWS can configure their App to use Amazon Transcribe for transcribing their Audio recordings to text that they can store in AWS S3 with the configuration below:
[assembly: HostingStartup(typeof(ConfigureAws))]

namespace GptProviders;

public class ConfigureAws : IHostingStartup
{
    public void Configure(IWebHostBuilder builder) => builder
        .ConfigureServices((context, services) => {

            var config = context.Configuration.GetSection(nameof(AwsConfig)).Get<AwsConfig>();
            services.AddSingleton(config);

            services.AddSingleton<ISpeechToText>(c => new AwsSpeechToText(
                new AmazonTranscribeServiceClient(
                    config.AccessKey, config.SecretKey, config.ToRegionEndpoint()),
                new AwsSpeechToTextConfig {
                    Bucket = config.Bucket,
                    VocabularyName = config.VocabularyName,
                }) {
                VirtualFiles = HostContext.VirtualFiles
            });
        })
        .ConfigureAppHost(afterConfigure:appHost => {

            var config = appHost.Resolve<AwsConfig>();
            appHost.VirtualFiles = new S3VirtualFiles(
                new AmazonS3Client(config.AccessKey, config.SecretKey, config.ToRegionEndpoint()),
                config.Bucket);
        });
}
Amazon Web Services providers are maintained in the ServiceStack.Aws NuGet Package:
<PackageReference Include="ServiceStack.Aws" Version="8.*" />
AWS Speech-to-Text Factory
If your App uses custom vocabularies for different features you'll instead want register factory instead so you can
return the correct configured AwsSpeechToText for the request feature:
services.AddSingleton<ISpeechToTextFactory>(c => new SpeechToTextFactory
{
    Resolve = feature =>
    {
        var config = c.Resolve<AppConfig>();
        var aws = c.Resolve<AwsConfig>();
        var site = config.GetSiteConfig(feature);

        return new AwsSpeechToText(new AmazonTranscribeServiceClient(
                aws.AccessKey, aws.SecretKey, aws.ToRegionEndpoint()),
            aws.ToSpeechToTextConfig(x => x.VocabularyName = site.VocabularyName))
        {
            VirtualFiles = HostContext.VirtualFiles
        };
    }
});
Creating Custom Vocabulary
The AwsSpeechToText provider also supports recreating a custom recognizer with a vocabulary of boosted phrases
using the InitAsync API:
ISpeechToTextFactory SpeechToTextFactory { get; set; }

//...
List<KeyValuePair<string, int>> phraseWeights = ...;
var speechProvider = SpeechToTextFactory.Get(feature);
await speechProvider.InitAsync(new() {
    PhraseWeights = phraseWeights
});
This will re-create the Vocabulary with the VocabularyName the AwsSpeechToText was configured with:
Cloudflare Solution
Cloudflare AI newly released AI Gateway offers a
managed gateway over OpenAI's APIs to cache responses, limit and retry requests, and provide analytics to help you monitor and track usage
which you can utilize by changing the OpenAiBaseUrl used.
You may also soon be able to use Cloudflare's OpenAI's Whisper model independently that's currently on available through their Workers AI solution.
In the meantime their Cloudflare R2 product is one of the best value managed storage solutions available, it's an attractive option to use to store Web Audio recordings for usage with other Speech-to-Text providers, which your App can be configured to use with:
[assembly: HostingStartup(typeof(ConfigureCloudflare))]

public class ConfigureCloudflare : IHostingStartup
{
    public void Configure(IWebHostBuilder builder) => builder
        .ConfigureServices((context, services) =>
        {
            var config = context.Configuration.GetSection(nameof(CloudflareConfig))
                .Get<CloudflareConfig>();
            services.AddSingleton(config);

            services.AddSingleton<ISpeechToText>(c => new WhisperApiSpeechToText {
                BaseUri = config.OpenAiBaseUrl!,
            });
        })
        .ConfigureAppHost(afterConfigure:appHost => {

            var config = appHost.Resolve<CloudflareConfig>();
            appHost.VirtualFiles = new R2VirtualFiles(
                new AmazonS3Client(config.AccessKey, config.SecretKey,
                new AmazonS3Config {
                    ServiceURL = config.ToServiceUrl(),
                }), config.Bucket);
        });
}
Cloudflare's R2VirtualFiles provider is maintained in the ServiceStack.Aws NuGet Package:
<PackageReference Include="ServiceStack.Aws" Version="8.*" />
Local OpenAI Whisper
If your App's requirements and hardware supports it, you can save an infrastructure dependency by using a local install of OpenAI's Whisper, which after installing ffmpeg and Python, can be installed with:
pip install -U openai-whisper
This will enable you to transcribe Audio recordings by simply specifying the recording you want a transcription of:
whisper recording.webm
Usage Notes
- The
--languageflag helps speed up transcriptions by avoiding needing to run auto language detection - By default whisper will generate its transcription results in all supported
.txt,.json,.tsv,.srtand.vttformats- you can limit to just the format you want it in with
--output_format, e.g. usetxtif you're just interested in the transcribed text
- you can limit to just the format you want it in with
- The default install also had FP16 and Numba Deprecation warnings
We can resolve these issues by using the modified prompt:
export PYTHONWARNINGS="ignore"
whisper --language=en --fp16 False --output_format txt recording.webm
Which should now generate a clean output containing the recordings transcribed text, that's also written to recording.txt:
[00:00.000 --> 00:02.000] A latte, please.
This 2s recording took 9 seconds to transcribe on an M2 Macbook Air, a fair bit longer than the 1-2 seconds it takes to upload and transcribe recordings to Google Cloud, but still within acceptable response times for real-time transcriptions.
Switch to local OpenAI Whisper
You can configure your App to use a local whisper install by registering WhisperLocalSpeechToText:
services.AddSingleton<ISpeechToText>(c => new WhisperLocalSpeechToText {
   WhisperPath = ProcessUtils.FindExePath("whisper"),
   TimeoutMs = 120 * 1000,
});
Example Usage
TypeChat Examples CreateRecording API implementation in
GptServices.cs
is used to transcribe the uploaded Web Audio recording for all its examples which it first creates an entry in the
Recording RDBMS Table before invoking the Speech-to-Text API that is then updated after its successful or error response:
public class MyServices(IAutoQueryDb autoQuery, ISpeechToTextFactory speechToTextFactory)
{
    public async Task<Recording> Any(CreateRecording request)
    {
        var feature = request.Feature.ToLower();
        var recording = (Recording)await autoQuery.CreateAsync(request, Request);
        var speechToText = speechToTextFactory.Get(request.Feature);

        var transcribeStart = DateTime.UtcNow;
        await Db.UpdateOnlyAsync(() => new Recording { TranscribeStart=transcribeStart },
            where: x => x.Id == recording.Id);

        ResponseStatus? responseStatus = null;
        try
        {
            var response = await speechToText.TranscribeAsync(request.Path);
            var transcribeEnd = DateTime.UtcNow;
            await Db.UpdateOnlyAsync(() => new Recording
            {
                Feature = feature,
                Provider = speechToText.GetType().Name,
                Transcript = response.Transcript,
                TranscriptConfidence = response.Confidence,
                TranscriptResponse = response.ApiResponse,
                TranscribeEnd = transcribeEnd,
                TranscribeDurationMs = (transcribeEnd-transcribeStart).TotalMilliseconds,
                Error = response.ResponseStatus.ToJson(),
            }, where: x => x.Id == recording.Id);
            responseStatus = response.ResponseStatus;
        }
        catch (Exception e)
        {
            await Db.UpdateOnlyAsync(() => new Recording { Error = e.ToString() },
                where: x => x.Id == recording.Id);
            responseStatus = e.ToResponseStatus();
        }

        recording = await Db.SingleByIdAsync<Recording>(recording.Id);

        if (responseStatus != null)
            throw new HttpError(responseStatus, HttpStatusCode.BadRequest);

        return recording;
    }
}
Client Usage Example
Now that our Server supports it we can start using this API to upload Audio Recordings by running the pre-configured npm script to update our App's Typed JavaScript DTOs:
npm run dtos
To simplify capturing Web Audio recordings we've the encapsulated reusable functionality within the AudioRecorder.mjs
class whose start() method starts recording Audio from the Users microphone:
import { AudioRecorder } from "/mjs/AudioRecorder.mjs"

let audioRecorder = new AudioRecorder()
await audioRecorder.start()
Where it captures audio chunks until stop() is called that are then stitched together into a Blob and converted into
a Blob DataURL that's returned within a populated Audio
Media element:
const audio = await audioRecorder.stop()
That supports the HTMLMediaElement API allowing pause and playback of recordings:
audio.play()
audio.pause()
The AudioRecorder also maintains the Blob of its latest recording in its audioBlob field and the MimeType that it was
captured with in audioExt field, which we can use to upload it to the CreateRecording API, which if
successful will return a transcription of the Audio recording:
import { JsonServiceClient } from "@servicestack/client"

const client = new JsonServiceClient()

const formData = new FormData()
formData.append('path', audioRecorder.audioBlob, `file.${audioRecorder.audioExt}`)
const api = await client.apiForm(new CreateRecording({feature:'coffeeshop'}),formData)
if (api.succeeded) {
   transcript.value = api.response.transcript
}
This is used by all TypeChat Examples that's encapsulated in their UI Razor Pages:
Prompt Providers
Whilst not required for usage with other providers, the IPromptProvider interface can improve code reuse by
implementing a standard interface for generating their TypeScript Schema and Chat GPT Prompt texts.
// The App Provider to use to generate TypeChat Schema and Prompts
public interface IPromptProvider
{
    // Create a TypeChat TypeScript Schema from a TypeChatRequest
    Task<string> CreateSchemaAsync(CancellationToken token);

    // Create a TypeChat TypeScript Prompt from a User request
    Task<string> CreatePromptAsync(string userMessage, CancellationToken token);
}
Implementations contain the App-specific functionality for creating its TypeScript Schema and GPT Prompt,
which each App in TypeChatExamples maintains in its *PromptProvider.cs classes in the
TypeChatExamples.ServiceInterface project.
TypeChat API
After receiving a text transcript of a Customer's natural language request you'll need to enlist the services of Chat GPT to convert it into an Order request that your App can understand.
ITypeChat
Just as we've abstracted the substitutable Speech-to-text Services App binds to, we've also created an abstraction for the TypeChat provider App uses, which allows easily swap out and evaluate different solutions or Mocking in tests:
public interface ITypeChat
{
    Task<TypeChatResponse> TranslateMessageAsync(TypeChatRequest request,
        CancellationToken token = default);
}
Whilst a simple API on the surface, different execution and customizations options are available in the
TypeChatRequest which at a minimum requires the Schema & Prompt to use and the UserMessage to convert:
// Request to process a TypeChat Request
public class TypeChatRequest
{
    public TypeChatRequest(string schema, string prompt, string userMessage)
    {
        Schema = schema;
        Prompt = prompt;
        UserMessage = userMessage;
    }

    /// TypeScript Schema
    public string Schema { get; set; }

    /// TypeChat Prompt
    public string Prompt { get; set; }

    /// Chat Request
    public string UserMessage { get; }

    /// Path to node exe (default node in $PATH)
    public string? NodePath { get; set; }

    /// Timeout to wait for node script to complete (default 120s)
    public int NodeProcessTimeoutMs { get; set; } = 120 * 1000;

    /// Path to node TypeChat script (default typechat.mjs)
    public string? ScriptPath { get; set; }

    /// TypeChat Behavior we want to use (Json | Program)
    public TypeChatTranslator TypeChatTranslator { get; set; }

    /// Path to write TypeScript Schema to (default Temp File)
    public string? SchemaPath { get; set; }

    /// Which directory to execute the ScriptPath (default CurrentDirectory)
    public string? WorkingDirectory { get; set; }
}
There are currently 2 different Chat GPT ITypeChat implementations registered in TypeChat Examples
Configure.Gpt.cs.
Semantic Kernel TypeChat Provider
The natural approach for interfacing with OpenAI's ChatGPT API in .NET is to use Microsoft's Semantic Kernel to call it directly, which can be registered with:
var kernel = Kernel.Builder.WithOpenAIChatCompletionService(
        Environment.GetEnvironmentVariable("OPENAI_MODEL") ?? "gpt-3.5-turbo",
        Environment.GetEnvironmentVariable("OPENAI_API_KEY")!)
    .Build();
services.AddSingleton(kernel);
services.AddSingleton<ITypeChat>(c => new KernelTypeChat(c.Resolve<IKernel>()));
Node TypeChat Provider
As the TypeChat library uses typescript it requires calling out to the node executable in order to be able to use it from .NET Apps, which can be configured withL
services.AddSingleton<ITypeChat>(c => new NodeTypeChat());
It works by executing an external process that invokes a typechat.mjs
script wrapper around TypeChat's functionality to invoke it and return any error responses in a structured ResponseStatus
format that our .NET App can understand, which can also be invoked manually from the command line with:
node typechat.mjs json gpt\coffeeshop\schema.ts "i wanna latte macchiato with vanilla"
TypeChat uses the OpenAI Environment Variables below to access ChatGPT APIs:
OPENAI_MODEL- The OpenAI model name (e.g. gpt-3.5-turbo or gpt-4)OPENAI_API_KEY- Your OpenAI API key
Using Chat GPT to process Natural Language Orders
We now have everything we need to start leveraging Chat GPT to convert our Customers Natural Language requests into Machine readable instructions that our App can understand, guided by the App's TypeChat TypeScript Schema.
TypeChat Examples does this for all its apps in GptServices.cs
that just like CreateRecording is a custom AutoQuery CRUD Service that uses AutoQuery to create the
initial Chat record, that's later updated with the GPT Chat API Response:
public class GptServices(
    IAutoQueryDb autoQuery,
    IPromptProviderFactory promptFactory,
    ITypeChat typeChat,
    IPromptProvider promptProvider) : Service
{
    //...
    public async Task<object> Any(CreateChat request)
    {
        var feature = request.Feature.ToLower();
        var promptProvider = promptFactory.Get(feature);
        var chat = (Chat)await autoQuery.CreateAsync(request, Request);

        var chatStart = DateTime.UtcNow;
        await Db.UpdateOnlyAsync(() => new Chat { ChatStart = chatStart },
            where: x => x.Id == chat.Id);

        ResponseStatus? responseStatus = null;
        try
        {
            var schema = await promptProvider.CreateSchemaAsync();
            var prompt = await promptProvider.CreatePromptAsync(request.UserMessage);
            var typeChatRequest = CreateTypeChatRequest(feature, schema, prompt, request.UserMessage);

            var response = await typeChat.TranslateMessageAsync(typeChatRequest);
            var chatEnd = DateTime.UtcNow;
            await Db.UpdateOnlyAsync(() => new Chat
            {
                Request = request.UserMessage,
                Feature = feature,
                Provider = TypeChat.GetType().Name,
                Schema = schema,
                Prompt = prompt,
                ChatResponse = response.Result,
                ChatEnd = chatEnd,
                ChatDurationMs = (int)(chatEnd - chatStart).TotalMilliseconds,
                Error = response.ResponseStatus.ToJson(),
            }, where: x => x.Id == chat.Id);
            responseStatus = response.ResponseStatus;
        }
        catch (Exception e)
        {
            await Db.UpdateOnlyAsync(() => new Chat { Error = e.ToString() },
                where: x => x.Id == chat.Id);
            responseStatus = e.ToResponseStatus();
        }

        chat = await Db.SingleByIdAsync<Chat>(chat.Id);

        if (responseStatus != null)
            throw new HttpError(responseStatus, HttpStatusCode.BadRequest);

        return chat;
    }
}
Client Usage
Just like the CreateRecording client usage example we can invoke the
APIs using the typed JavaScript DTOs to invoke the CreateChat API to returns Chat GPTs JSON Response directly to the client:
apiChat.value = await client.api(new CreateChat({
    feature: 'coffeeshop',
    userMessage: request.toLowerCase()
}))

if (apiChat.value.response) {
    processChatItems(JSON.parse(apiChat.value.response.chatResponse).items)
} else if (apiChat.value.error) {
    apiProcessed.value = apiChat.value
}
Which for the CoffeeShop example is in the structure of the TypeScript Schema's array of Cart LineItem's which are matched
against the products and available customizations from the App's database before being added to the user's cart in the
processChatItems(items) function.
Feedback and Feature Requests Welcome
Please submit any feature requests for other GPT or AI providers you'd like to see implemented to:
https://servicestack.net/ideas
TypeChat Examples
TypeScript's TypeChat library and compiler being written in JavaScript presents challenges in being able to utilize it within .NET Apps. To showcase how best to add TypeChat AI-Powered features into .NET Apps we've recreated TypeChat's CoffeeShop App in .NET which first uses AutoQuery to quickly develop the CoffeeShop Data Models, Typed APIs and Management UI to dynamically generate its TypeScript's schema in:


We then show how to utilize the resulting TypeScript Schema with ChatGPT, which initially uses your choice of 5 different Speech-to-Text providers from OpenAI, GoogleCloud, AWS and Azure to transcribe voice activated commands into text that's then submitted to ChatGPT using TypeChat's prompt to convert the natural language request into the machine readable response defined by the App's TypeScript Schema that is matched against its Database Products to create Item Order requests that are added to the Users Cart in:
These informative detailed guides contain our recommended approach for adding natural language powered features to your App by utilizing TypeChat's TypeScript Schema approach.
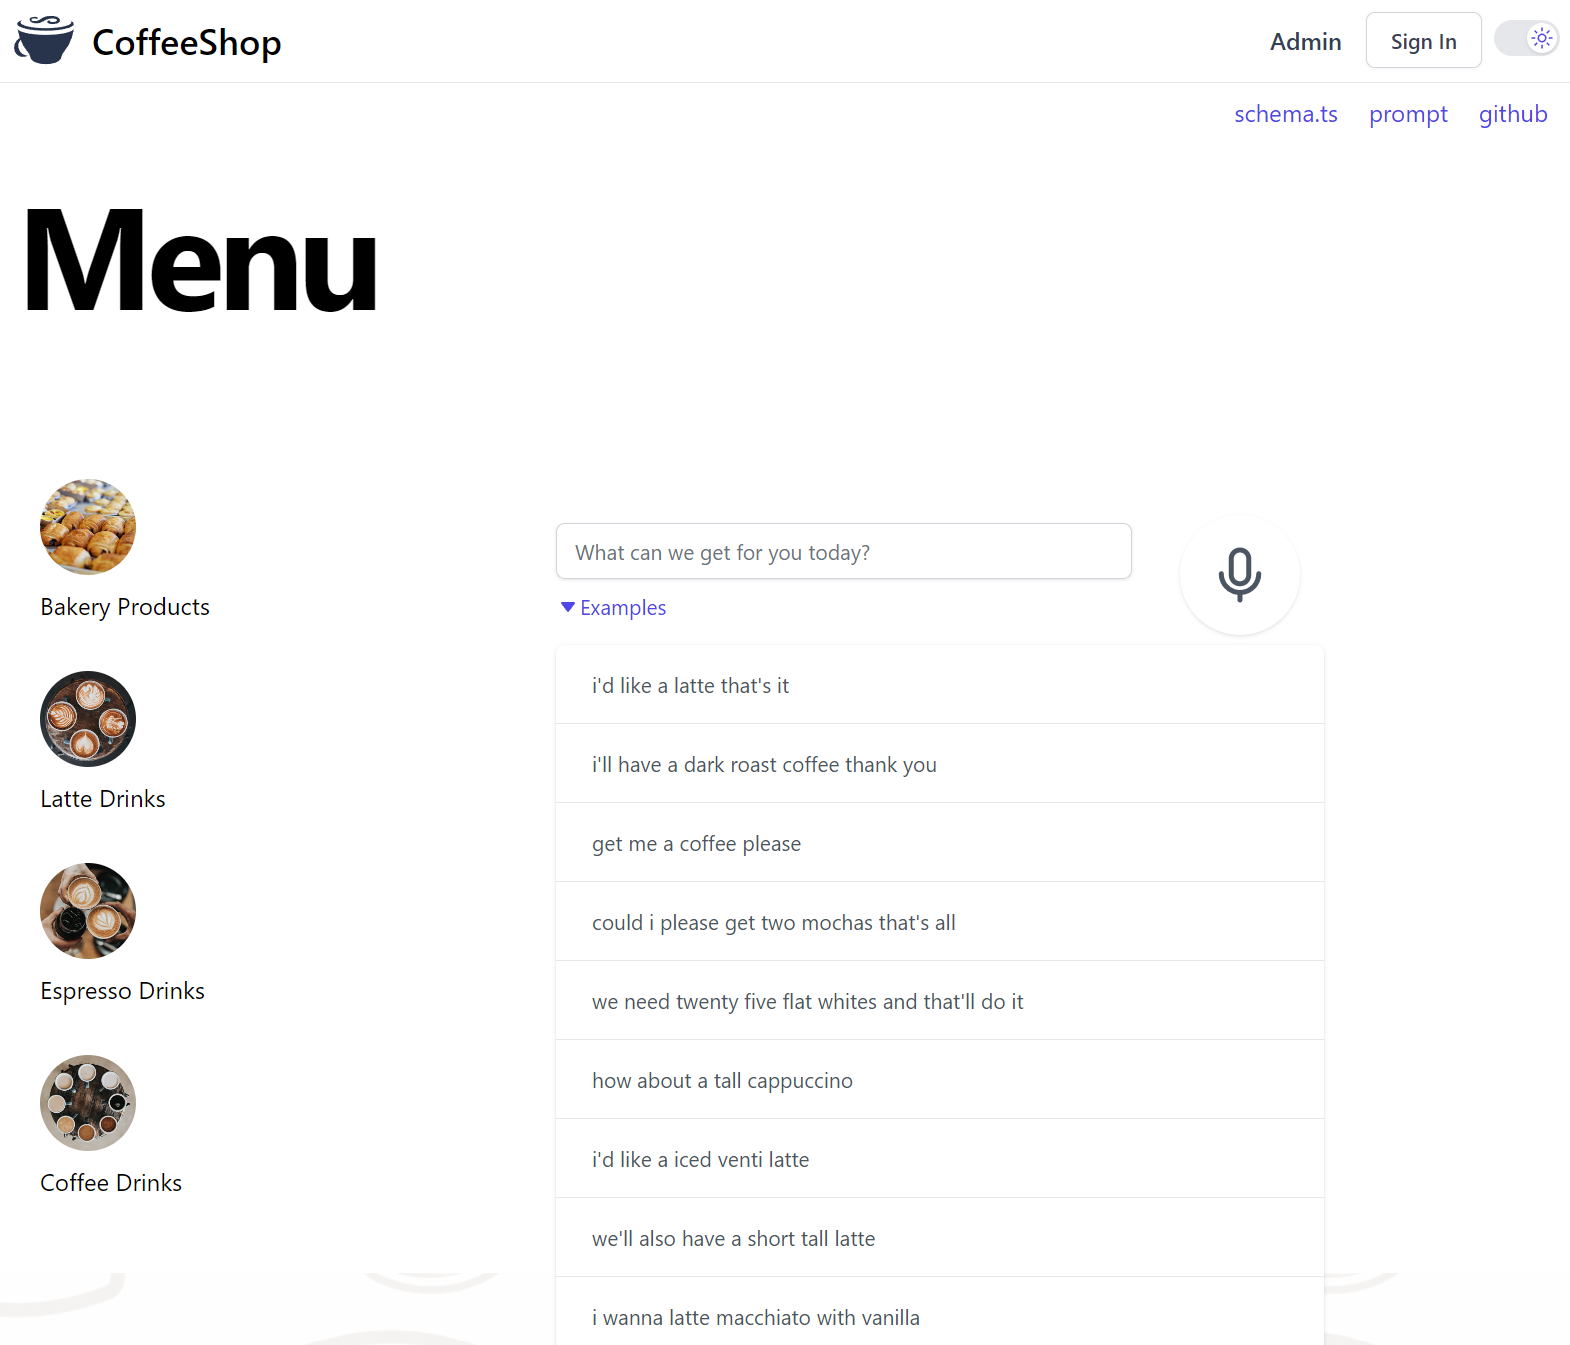
CoffeeShop
This results in an example of a working intelligent voice activated agent for a coffee shop which translates user intent into a list of CoffeeShop order items:
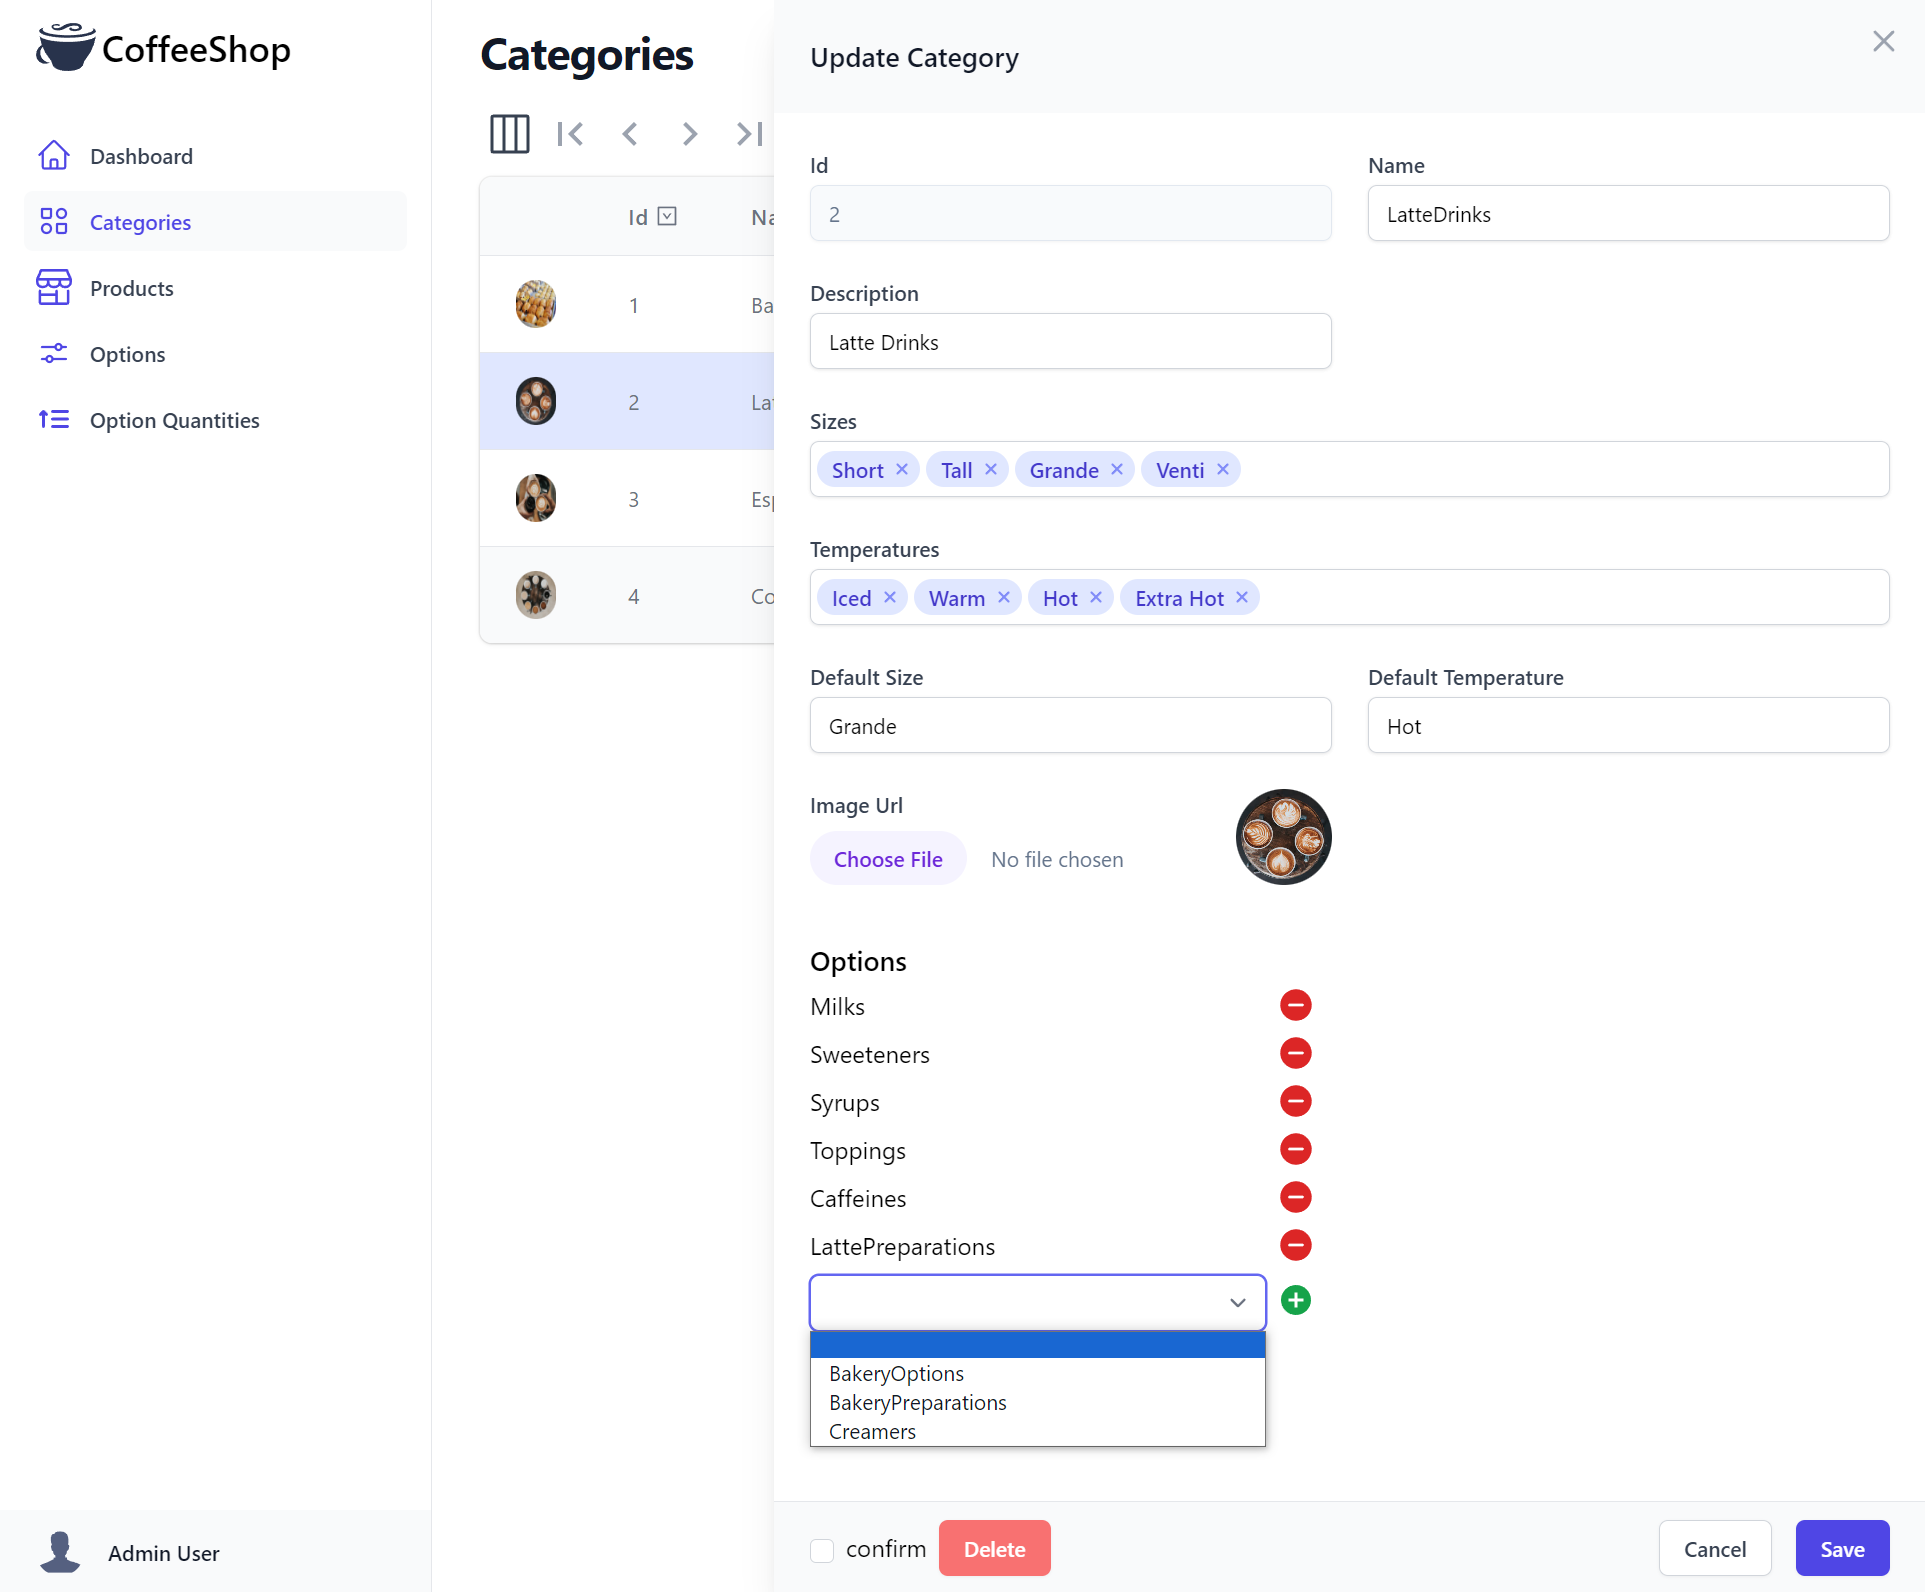
Custom AutoForm UIs
CoffeeShop's Admin UI is a good example of the rapid development model of AutoQuery and Vue's AutoQueryGrid and Auto Form Components was nearly able to develop the entire CRUD management UI using just AutoQuery's Typed DTOs.
The one Form that it wasn't able to generate the entire UI for is its Many-to-Many CategoryOption relationship
which requires a custom AutoForm component to be able to specify which Options a category of CoffeeShop Products can have.
Implementing Many to Many CategoryOption Admin UI
The easier way to implement this functionality would be to have the UI call an API each time an Option was added or removed
to a Category. The problem with this approach is that it doesn't match the existing behavior where if a User cancels
a form they'd expect for none of their changes to be applied.
To implement the desired functionality we'll instead create a custom UpdateCategory implementation that also
handles any changes to CategoryOption using new AddOptionIds and RemoveOptionIds properties that we'll want
rendered as hidden inputs in our HTML Form with:
public class UpdateCategory : IPatchDb<Category>, IReturn<Category>
{
    public int Id { get; set; }
    public string? Name { get; set; }
    public string? Description { get; set; }
    [Input(Type = "tag"), FieldCss(Field = "col-span-12")]
    public List<string>? Sizes { get; set; }
    [Input(Type = "tag"), FieldCss(Field = "col-span-12")]
    public List<string>? Temperatures { get; set; }
    public string? DefaultSize { get; set; }
    public string? DefaultTemperature { get; set; }
    [Input(Type = "file"), UploadTo("products")]
    public string? ImageUrl { get; set; }

    [Input(Type = "hidden")]
    public List<int>? AddOptionIds { get; set; }

    [Input(Type = "hidden")]
    public List<int>? RemoveOptionIds { get; set; }
}
Custom AutoQuery Implementation
The Custom AutoQuery Implementation
in CoffeeShopServices.cs
contains the custom implementation which continues to utilize AutoQuery's Partial Update functionality if there's any changes to update,
as well as removing or adding any Options the user makes to the Category:
public class CoffeeShopServices(IAutoQueryDb autoQuery) : Service
{
    public async Task<object> Any(UpdateCategory request)
    {
        // Perform all RDBMS Updates within the same Transaction
        using var trans = Db.OpenTransaction();

        Category? response = null;
        var ignore = new[]{nameof(request.Id),nameof(request.AddOptionIds),nameof(request.RemoveOptionIds)};
        // Only call AutoQuery Update if there's something to update
        if (request.ToObjectDictionary().HasNonDefaultValues(ignoreKeys:ignore))
        {
            response = (Category) await autoQuery.PartialUpdateAsync<Category>(request, Request, Db);
        }
        if (request.RemoveOptionIds?.Count > 0)
        {
            await Db.DeleteAsync<CategoryOption>(x =>
                x.CategoryId == request.Id && request.RemoveOptionIds.Contains(x.OptionId));
        }
        if (request.AddOptionIds?.Count > 0)
        {
            await Db.InsertAllAsync(request.AddOptionIds.Map(id =>
                new CategoryOption { CategoryId = request.Id, OptionId = id }));
        }
        trans.Commit();

        response ??= request.ConvertTo<Category>();
        return response;
    }
}
Custom AutoForm Component
It now needs to implement a Custom UI that Adds/Removes Options from a Category which is done in a custom CategoryOptions
Vue Component that displays all the Category Options with a button to remove existing ones and a Select Input to
add non existing options.
The purpose of the component is to populate the addOptionIds field with Option Ids that should be added and removeOptionIds
with Ids to be removed, which updates the Request DTO of the parent Form Model with the update:modelValue event:
const CategoryOptions = {
template:`
<div>
<ul v-for="optionType in currentOptionTypes">
<li class="py-1 flex justify-between">
<span>
{{optionType}}
</span>
<span>
<svg class="w-6 h-6 text-red-600 hover:text-red-800 cursor-pointer" @click="removeOption(optionType)" xmlns='http://www.w3.org/2000/svg' width='1024' height='1024' viewBox='0 0 1024 1024'>
<title>Remove Option</title>
<path fill='currentColor' d='M512 64a448 448 0 1 1 0 896a448 448 0 0 1 0-896zM288 512a38.4 38.4 0 0 0 38.4 38.4h371.2a38.4 38.4 0 0 0 0-76.8H326.4A38.4 38.4 0 0 0 288 512z'/>
</svg>
</span>
</li>
</ul>
<div class="flex justify-between items-center">
<select-input class="flex-grow" @change="addOption" :values="['',...options.filter(x => !currentOptionTypes.includes(x.type)).map(x => x.type)]"></select-input>
<svg class="ml-2 w-6 h-6 text-green-600" xmlns='http://www.w3.org/2000/svg' width='24' height='24' viewBox='0 0 24 24'>
<title>Add Option</title>
<path fill='currentColor' d='M11 17h2v-4h4v-2h-4V7h-2v4H7v2h4v4Zm1 5q-2.075 0-3.9-.788t-3.175-2.137q-1.35-1.35-2.137-3.175T2 12q0-2.075.788-3.9t2.137-3.175q1.35-1.35 3.175-2.137T12 2q2.075 0 3.9.788t3.175 2.137q1.35 1.35 2.138 3.175T22 12q0 2.075-.788 3.9t-2.137 3.175q-1.35 1.35-3.175 2.138T12 22Z'/>
</svg>
</div>
</div>
`,
props:['type','id','modelValue'],
emits:['update:modelValue'],
setup(props, { emit }) {
const client = useClient()
const options = ref([])
const model = props.modelValue
model.addOptionIds ??= []
model.removeOptionIds ??= []
const origOptionIds = model.categoryOptions?.map(x => x.optionId) || []
const currentOptionIds = computed(() => [...origOptionIds, ...model.addOptionIds]
.filter(x => !model.removeOptionIds.includes(x)))
const currentOptionTypes = computed(() =>
currentOptionIds.value.map(id => options.value.find(x => x.id === id)?.type).filter(x => !!x))
function addOption(e) {
const optionType = e.target.value
if (!optionType) return
const option = options.value.find(x => x.type === optionType)
if (model.removeOptionIds.includes(option.id))
model.removeOptionIds = model.removeOptionIds.filter(id => id !== option.id)
else if (!model.addOptionIds.includes(option.id))
model.addOptionIds.push(option.id)
emit('update:modelValue', model)
}
function removeOption(optionType) {
const option = options.value.find(x => x.type === optionType)
if (model.addOptionIds.includes(option.id))
model.addOptionIds = model.addOptionIds.filter(id => id !== option.id)
else if (!model.removeOptionIds.includes(option.id))
model.removeOptionIds.push(option.id)
}
onMounted(async () => {
const api = await client.api(new QueryOptions({ orderBy:'id' }))
options.value = api.response.results || []
emit('update:modelValue', model)
})
return { options, addOption, removeOption, currentOptionTypes }
}
}
Which is then attached to the AutoQueryGrid Form Components using its <template #formfooter> to include it in the
bottom of the Create and Edit Form Components:
const sections = {
Categories: {
type: 'Category',
component: {
components: { CategoryOptions },
template:`
<AutoQueryGrid :type="type" selectedColumns="imageUrl,id,name,defaultSize,products"
:headerTitles="{ imageUrl: ' ' }" :canFilter="x => x != 'ImageUrl'">
<template #imageUrl="{ imageUrl }">
<Icon :src="imageUrl" class="w-8 h-8 rounded-full" />
</template>
<template #id="{ id }">{{id}}</template>
<template #name="{ name }">{{name}}</template>
<template #description="{ description }">{{description}}</template>
<template #defaultSize="{ defaultSize }">{{defaultSize}}</template>
<template #products="{ products }">{{ products.map(x => x.name).join(', ') }}</template>
<template #formfooter="{ form, type, apis, model, id, updateModel }">
<div class="w-1/2 mt-4 px-4 sm:px-6">
<h3 class="text-lg font-semibold">Options</h3>
<CategoryOptions v-if="form === 'edit'" :key="id" :type="type" :id="id" v-model="model" @update:modelValue="updateModel(model)" />
</div>
</template>
</AutoQueryGrid>`,
},
},
//...
}
With those finishing touches CoffeeShop's back-end Admin UI is now complete which now allows shop owners to manage their entire database:
All TypeChat Examples
To show the versatility of this approach we've implemented the remaining TypeChat Examples in .NET which supports all the Speech-to-Text providers above as well as both a pure .NET approach of generating TypeChat's prompt in C# and using Semantic Kernel to connect with your preferred Chat GPT provider or utilizing node's TypeChat library to interface with ChatGPT where it benefits from TypeScript schema validation and auto-retry of invalid responses with auto correcting prompts.
If not using node & TypeChat checkout the Custom Validation with C# Semantic Kernel example for how you can achieve more effective results with manual validation.
Feel free to explore to explore the different TypeChat examples for the implementation which best suits your use-case.
The source code for all Examples are maintained in a Combined App at:
With a Live Demo of these examples available at:
Individual Examples
If you're only interested in one of the examples for your use-case, simpler examples of each App is available in the individual GitHub Repos below:
- https://github.com/NetCoreApps/CoffeeShop
- https://github.com/NetCoreApps/SentimentTypeChat
- https://github.com/NetCoreApps/CalendarTypeChat
- https://github.com/NetCoreApps/RestaurantTypeChat
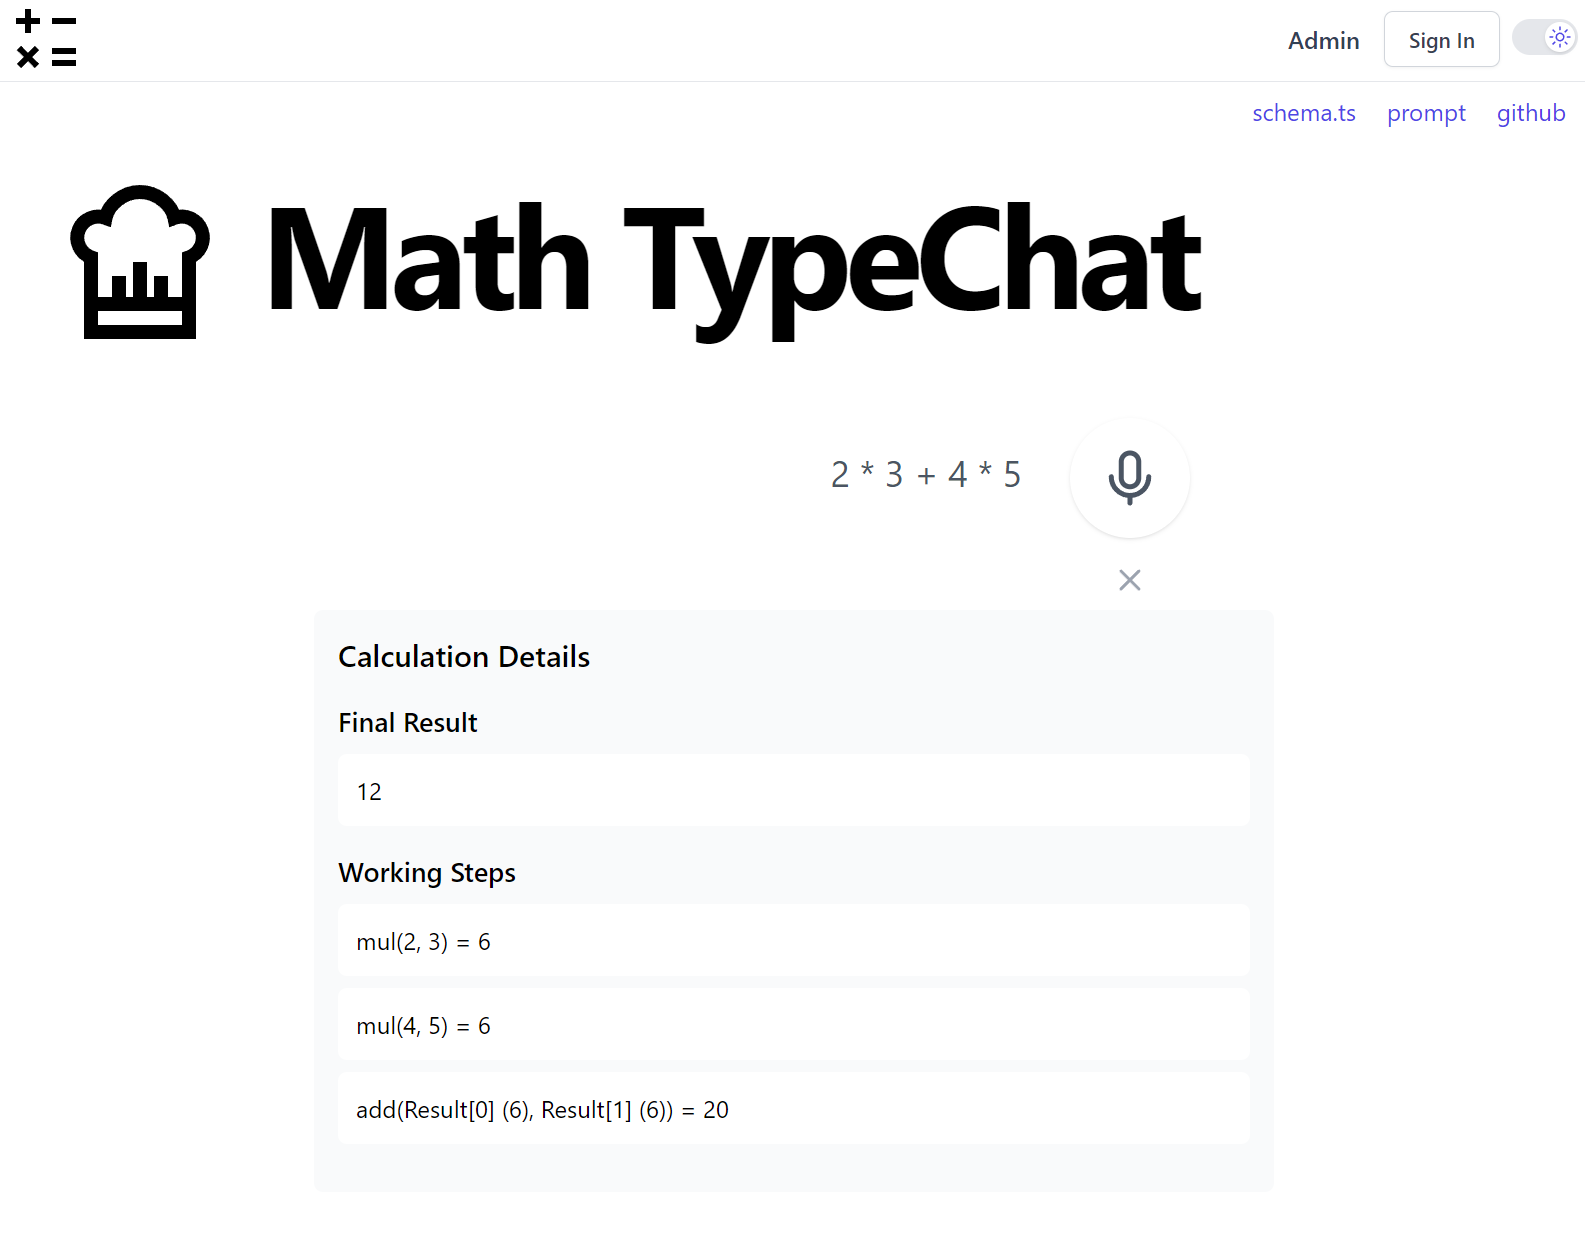
- https://github.com/NetCoreApps/MathTypeChat
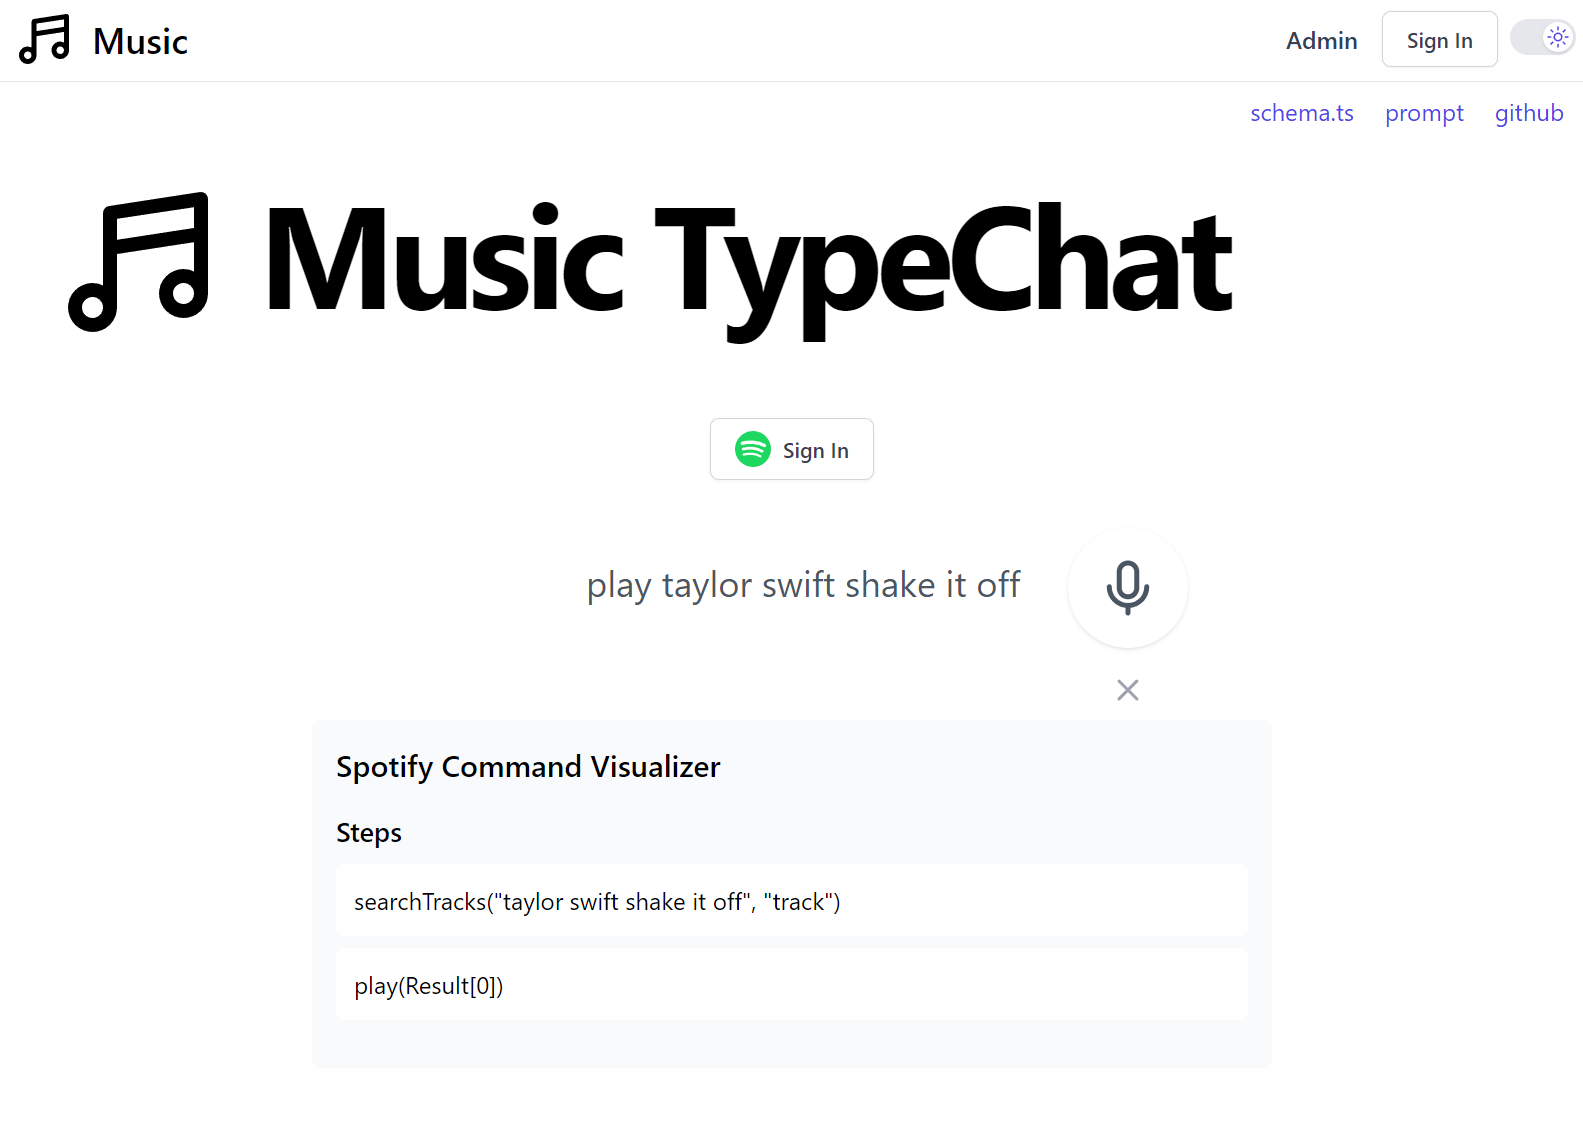
- https://github.com/NetCoreApps/MusicTypeChat
Descriptions, Screenshots and Links for each TypeChat Example is available below:
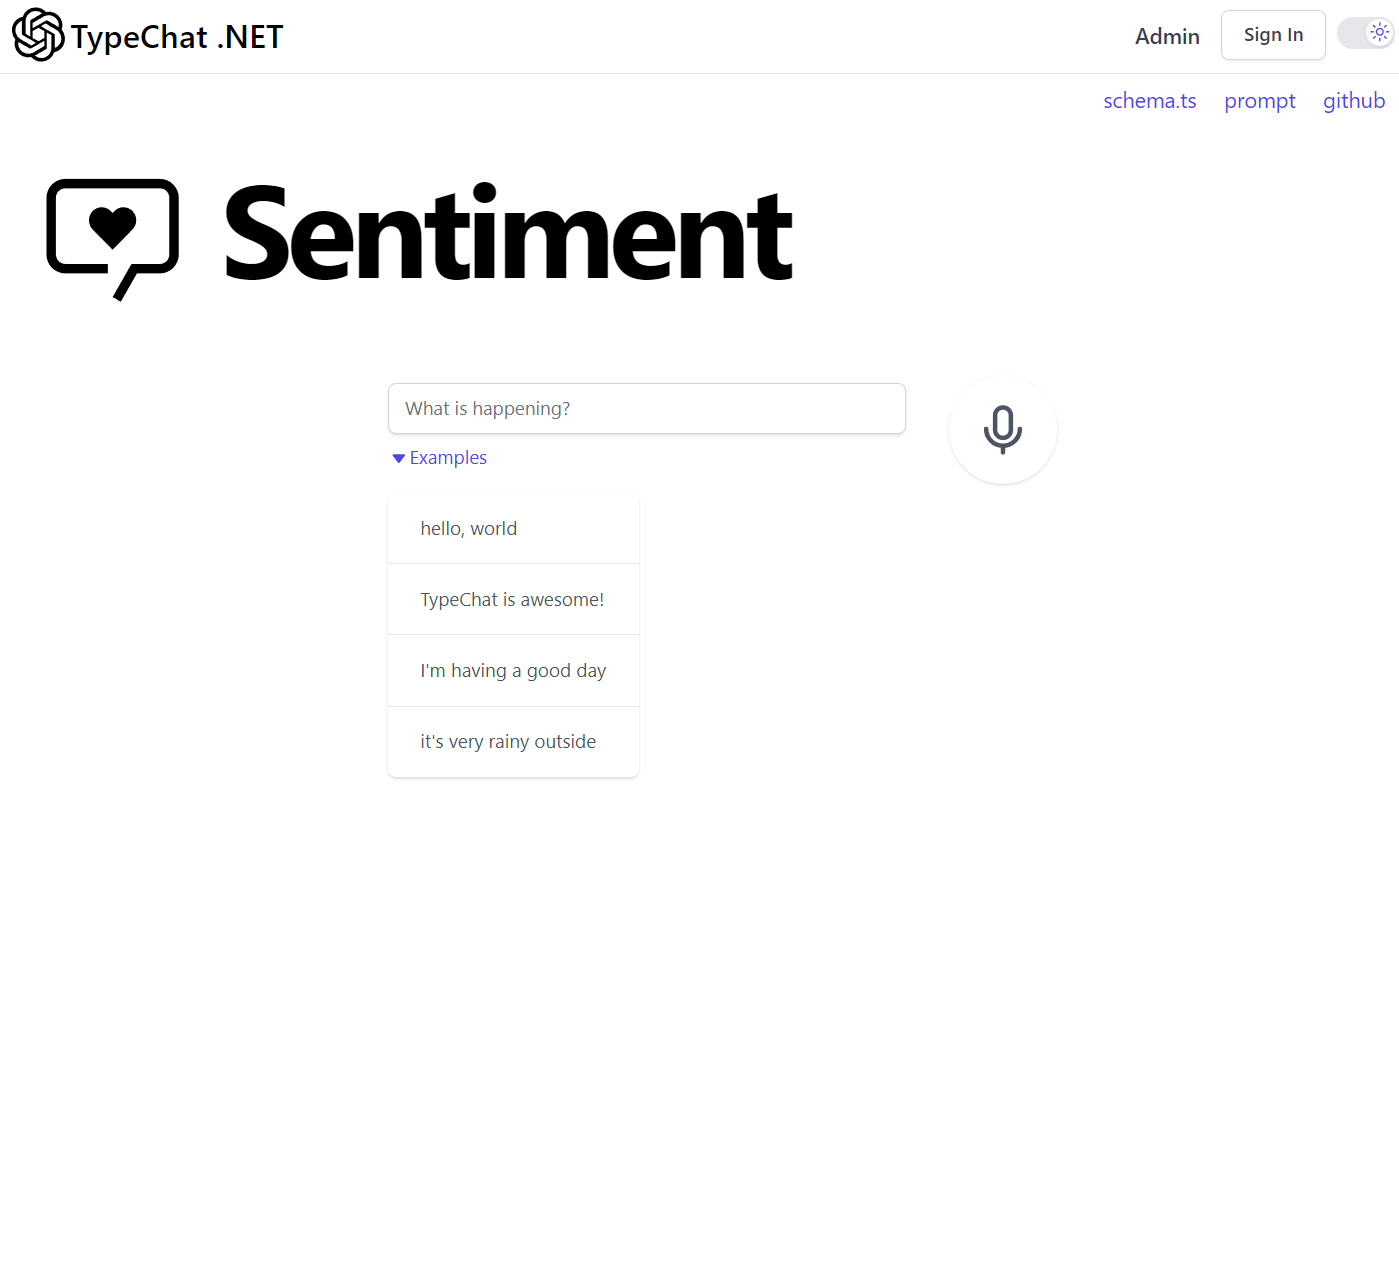
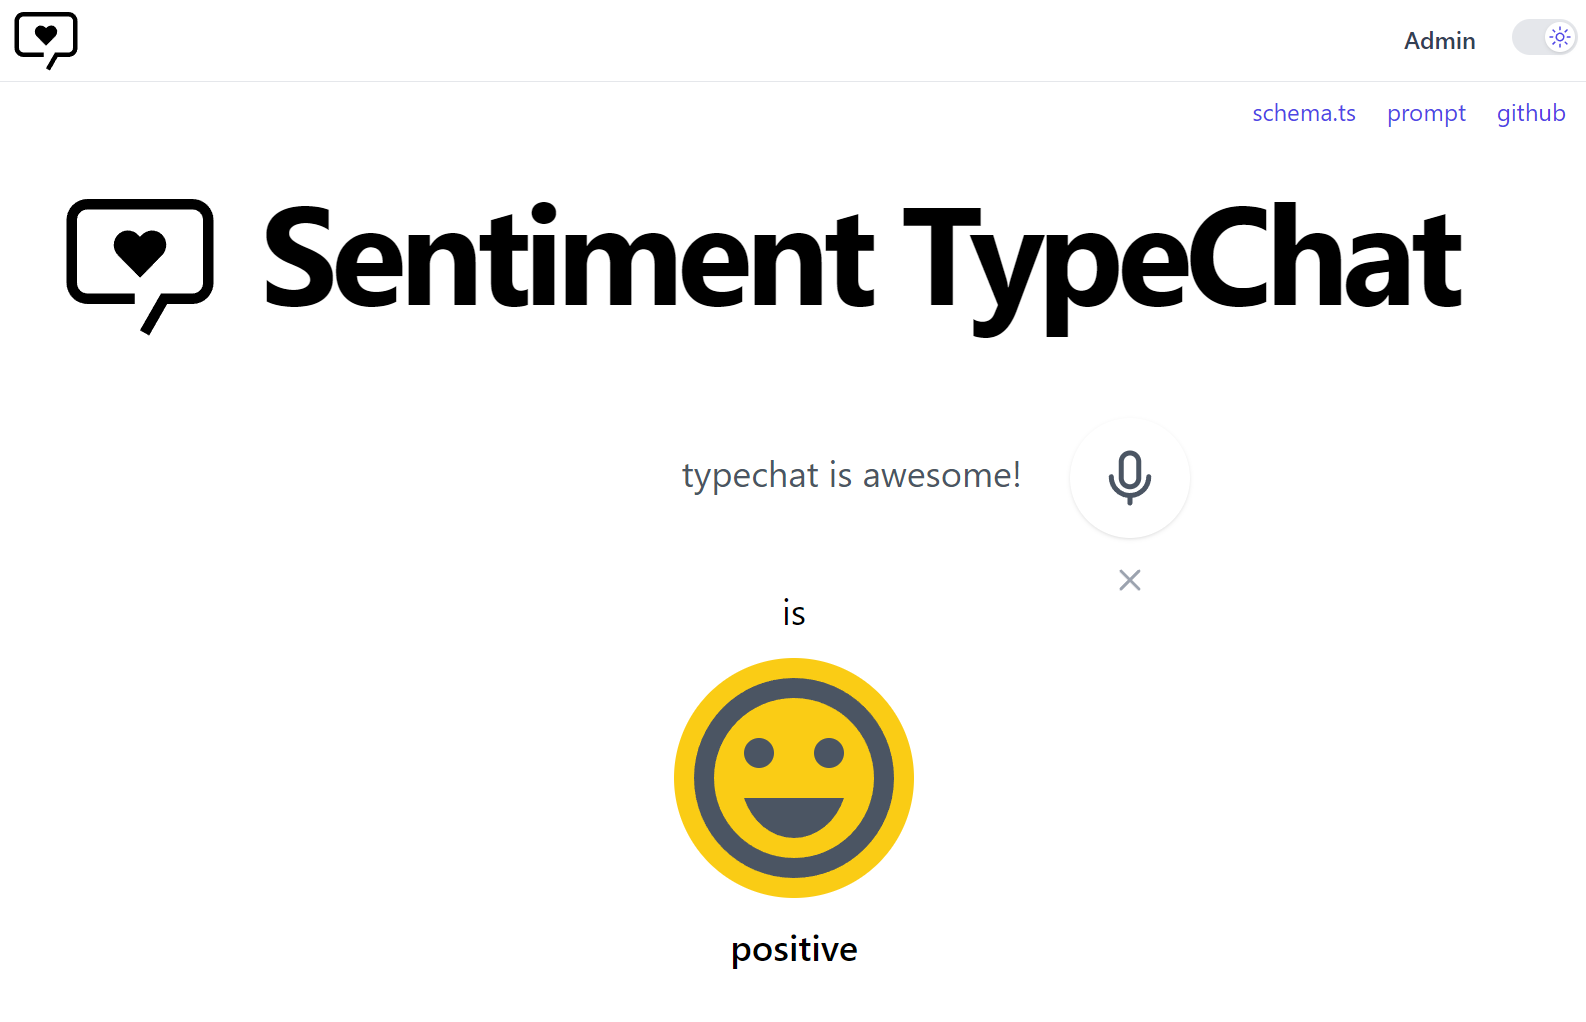
Sentiment
A sentiment classifier which categorizes user input as negative, neutral, or positive. This is TypeChat's "hello world!"
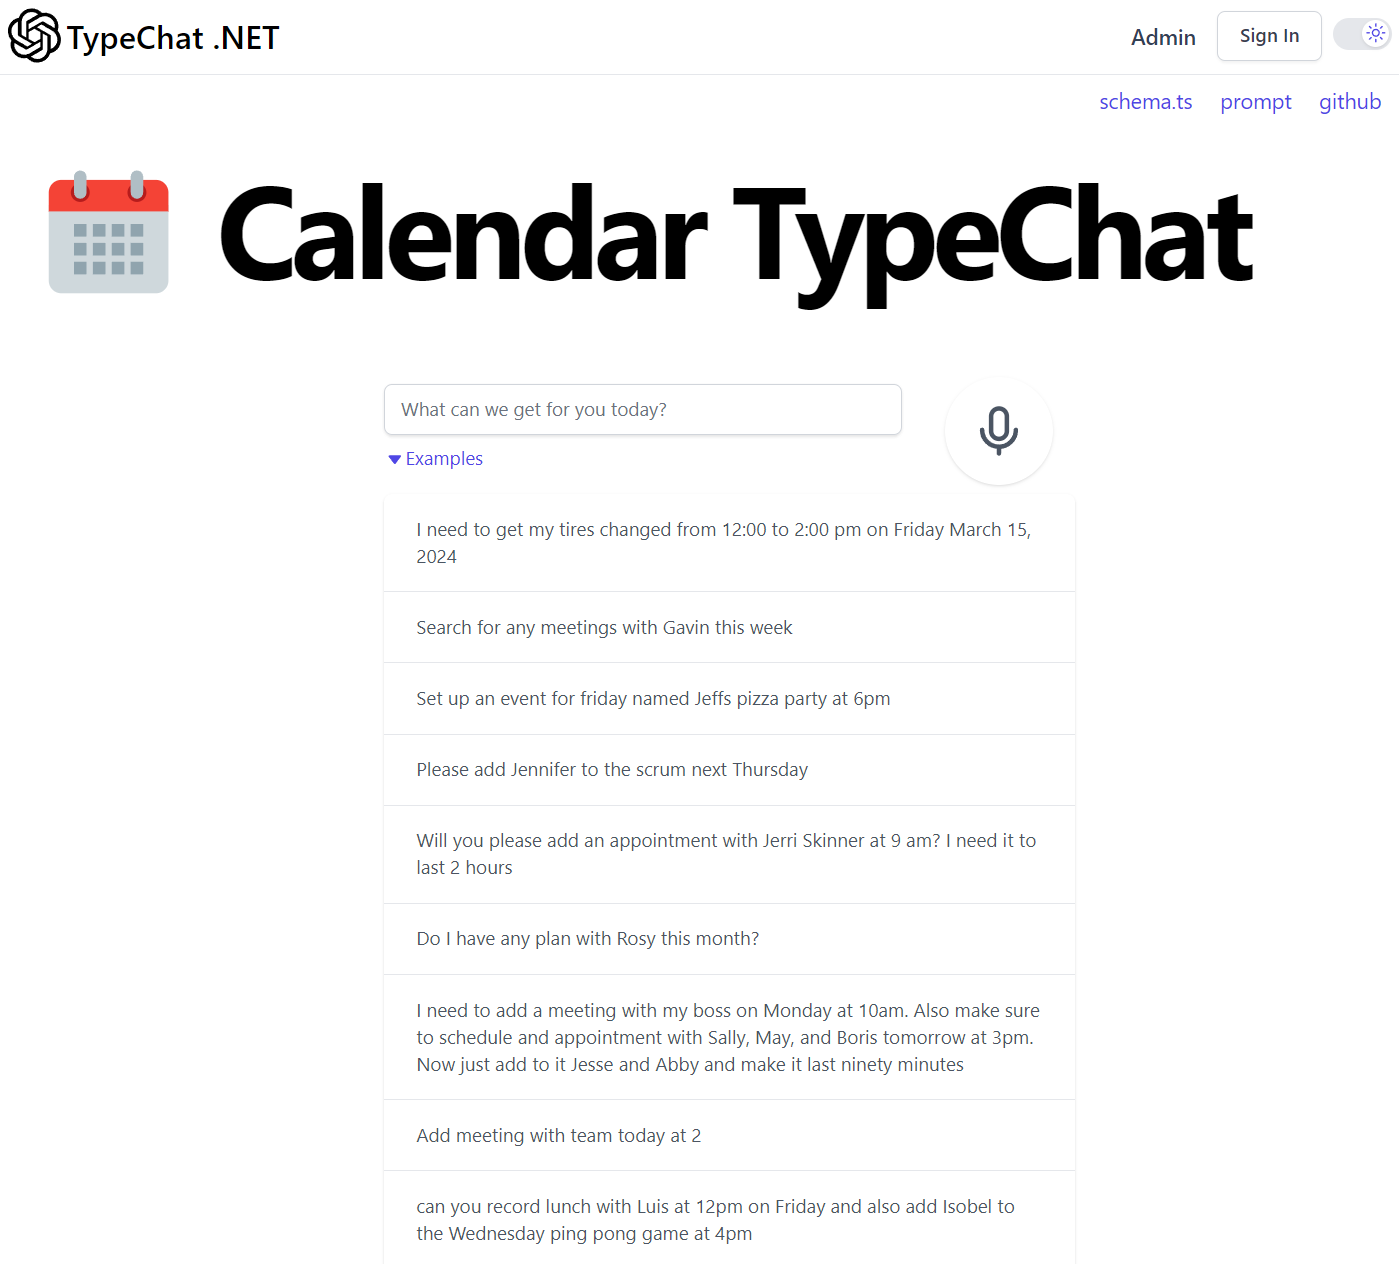
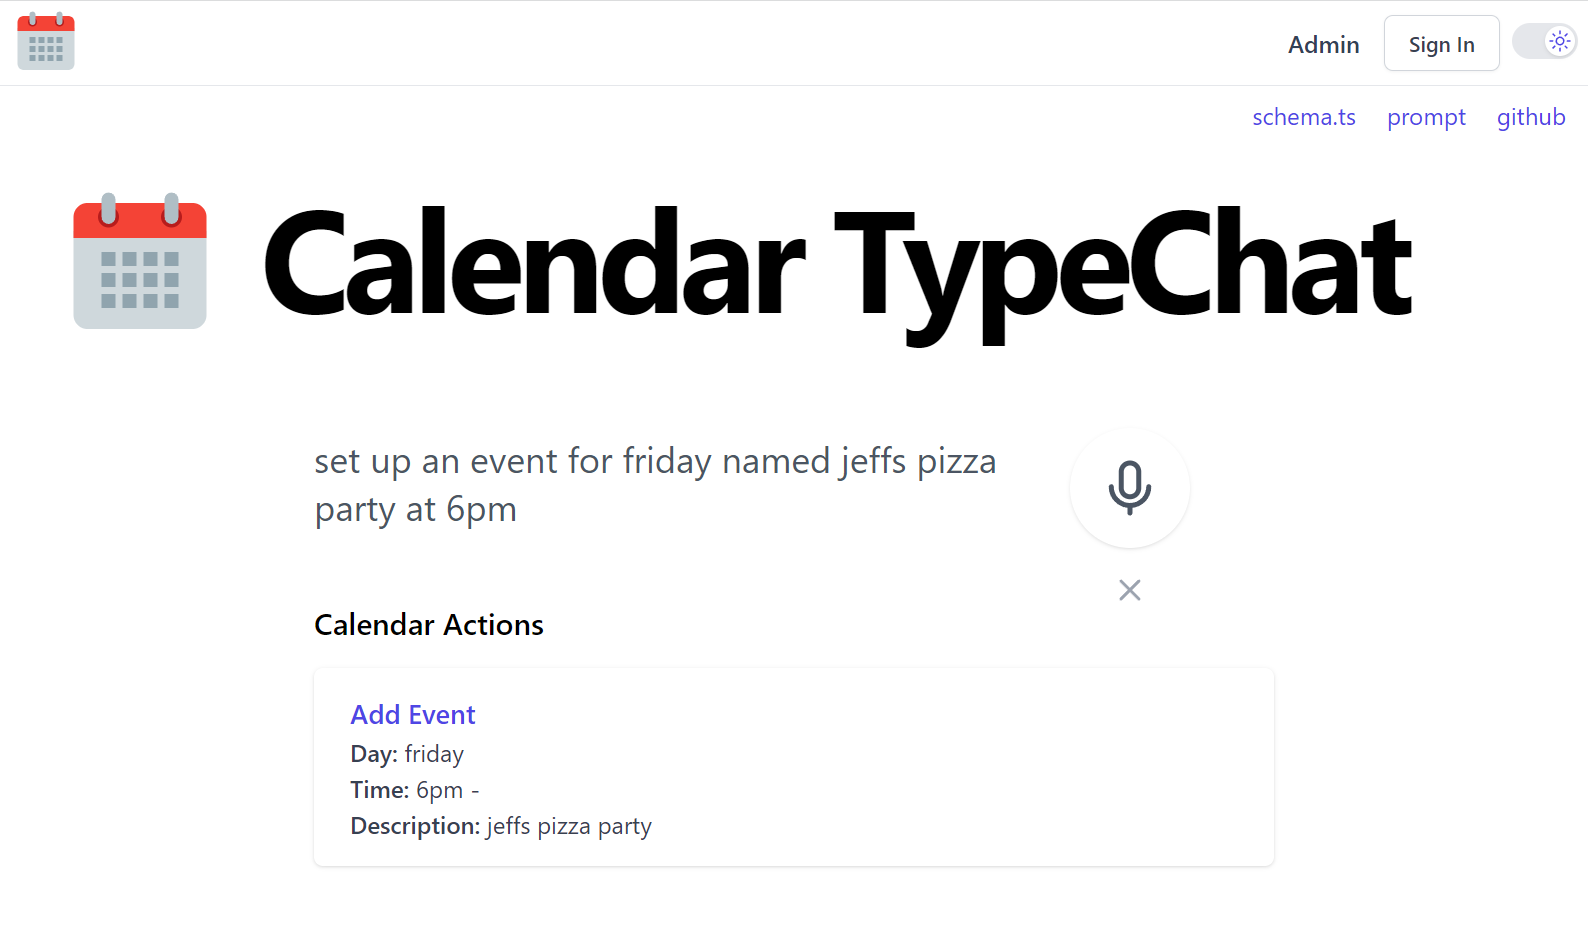
Calendar
An intelligent scheduler. This sample translates user intent into a sequence of actions to modify a calendar.
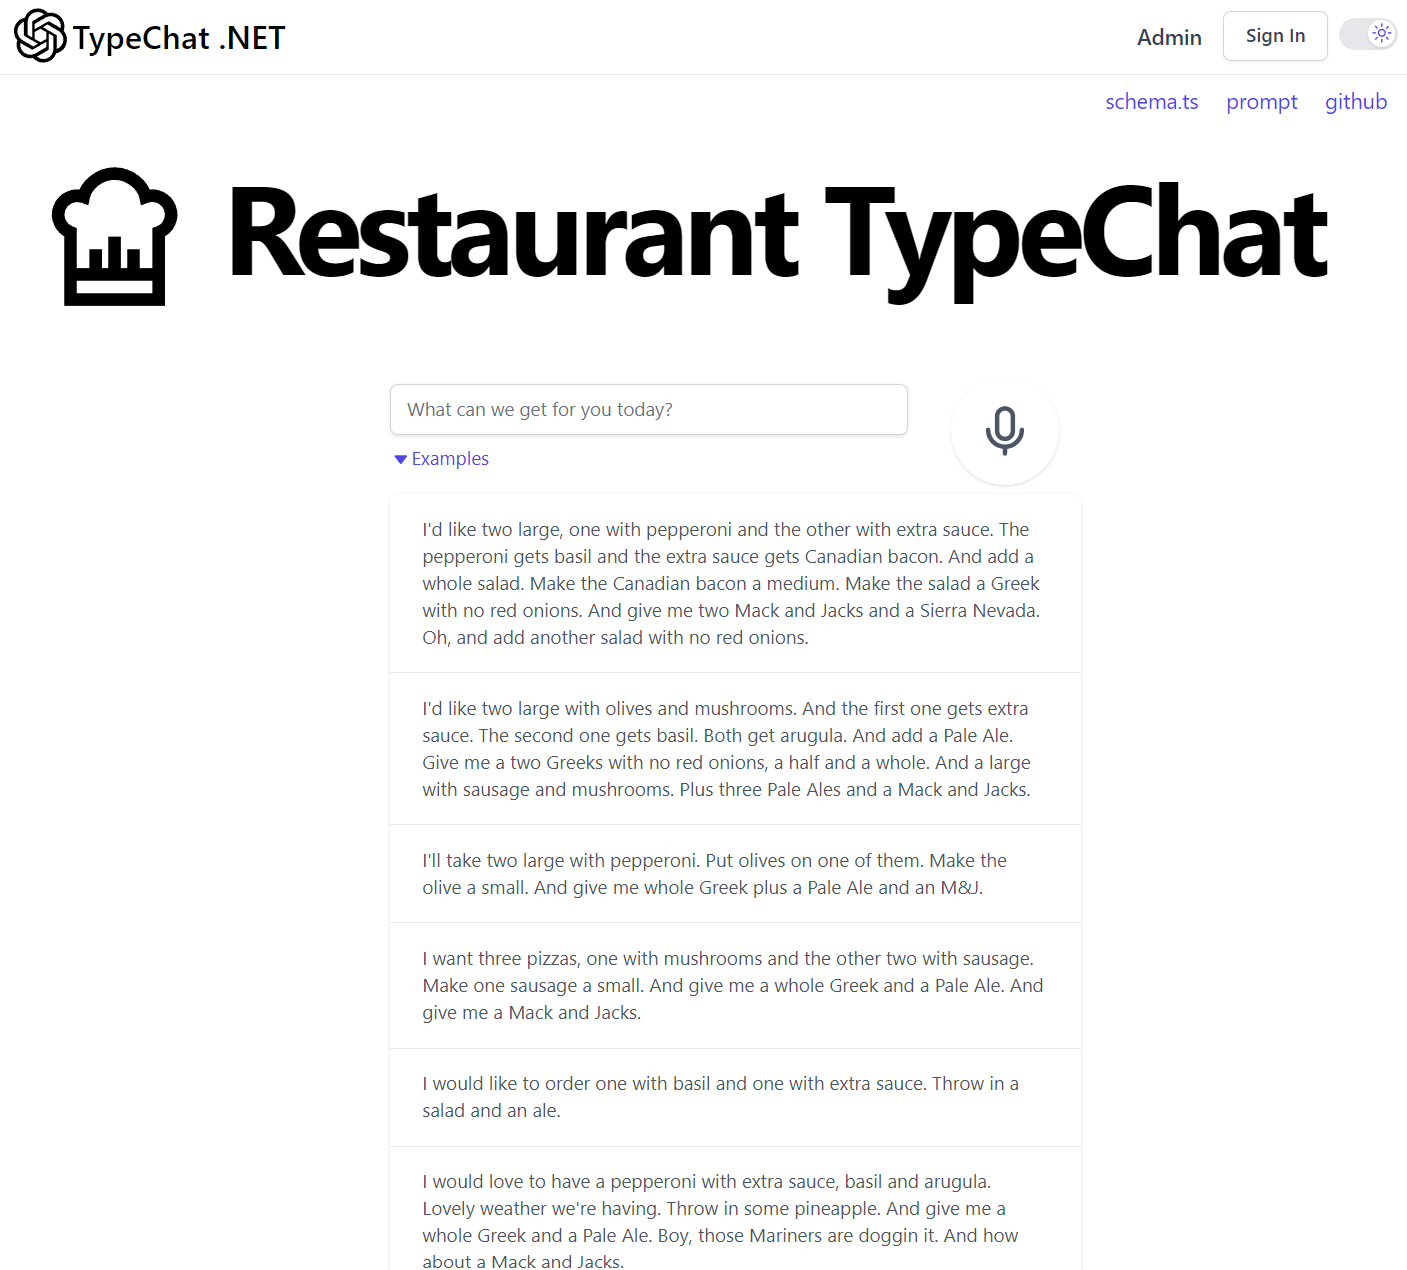
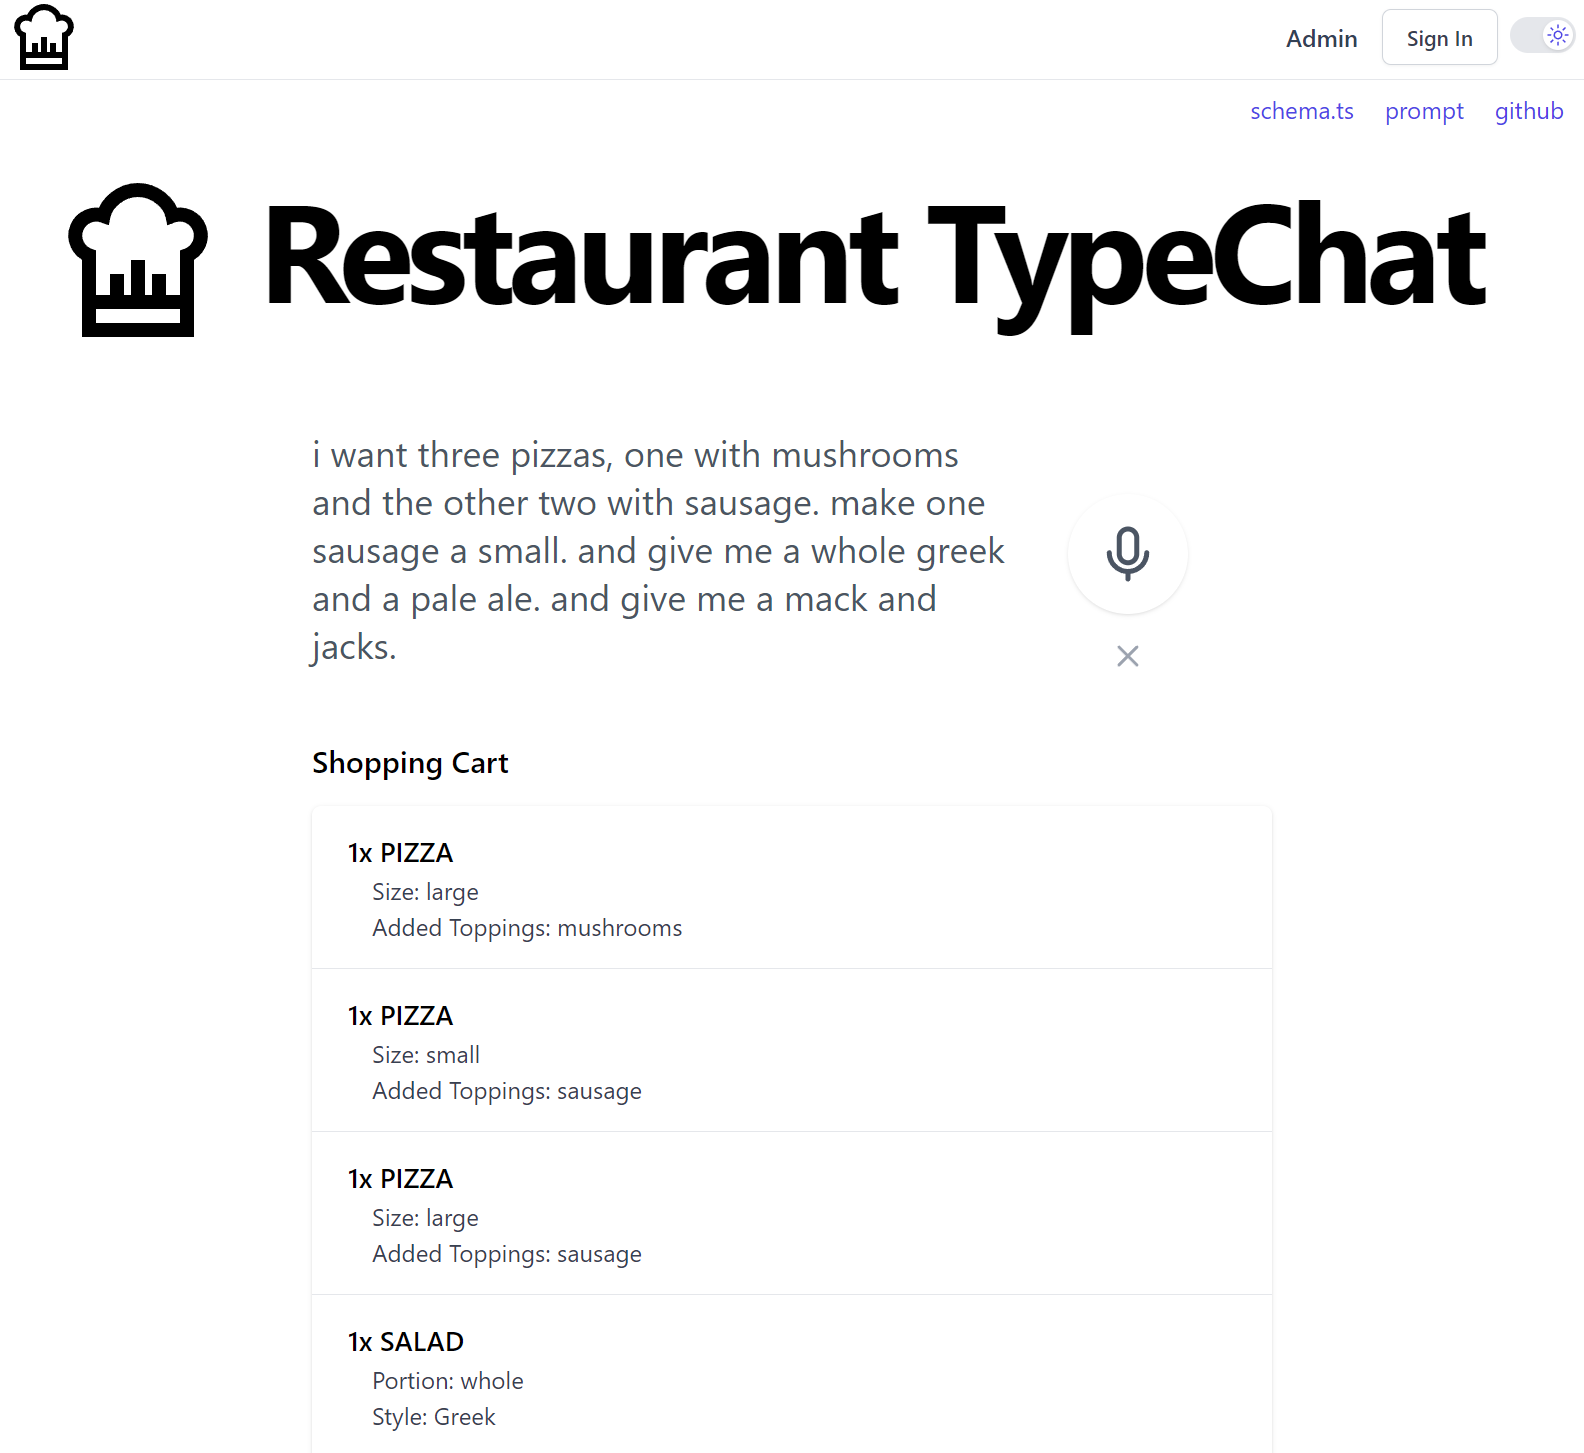
Restaurant
An intelligent agent for taking orders at a restaurant. Similar to the coffee shop example, but uses a more complex schema to model more complex linguistic input.
The prose files illustrate the line between simpler and more advanced language models in handling compound sentences, distractions, and corrections. This example also shows how we can use TypeScript to provide a user intent summary.
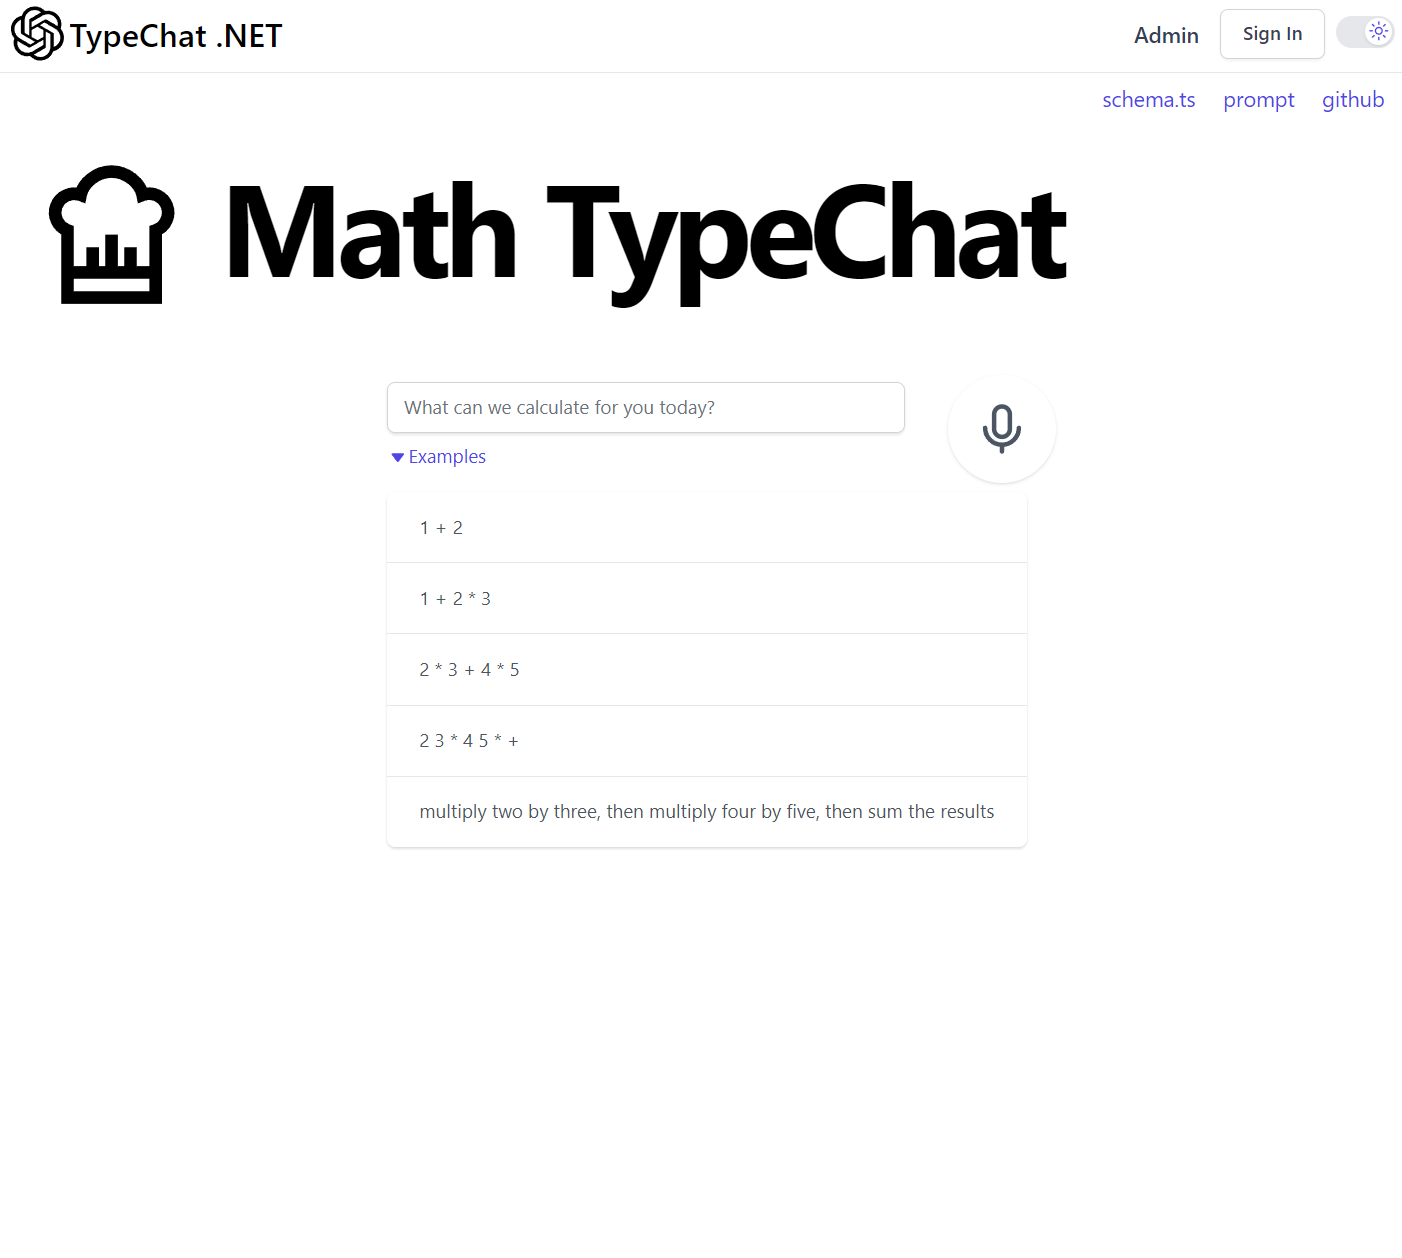
Math
Translate calculations into simple programs given an API that can perform the 4 basic mathematical operators. This example highlights TypeChat's program generation capabilities.
Music
An app for playing music, creating playlists, etc. on Spotify through natural language. Each user intent is translated into a series of actions in which correspond to a simple dataflow program, where each step can consume data produced from previous step.
If you Sign In with a premium Spotify Account you'll also be able to use natural language to control what you're listening to:

Spotify AuthProvider
We've created a Spotify OAuth provider in order to integrate Music TypeChat ChatGPT Responses to control your Spotify playlists which you can register in your AuthFeature plugin with all the permissions your App needs access to, e.g:
appHost.Plugins.Add(new AuthFeature(() => new CustomUserSession(),
    new IAuthProvider[] {
        new CredentialsAuthProvider(appSettings),
        new SpotifyAuthProvider(appSettings)
        {
            Scopes = new[]
            {
                "user-read-private",
                "user-read-email",
                "app-remote-control",
                "user-modify-playback-state",
                "user-read-playback-state",
                "user-read-currently-playing"
            }
        }  /* Create App https://developer.spotify.com/my-applications */
    }));
Integrated MQ Worker Templates
The GenericAppHost used by all Service Worker templates has been changed to use the standard UseServiceStack() middleware other .NET 5+ Apps
use that now integrates with the .NET App Host to configure ServiceStack to use its configured logging and IOC:
public class Program
{
    public static void Main(string[] args)
    {
        CreateHostBuilder(args)
            .Build()
            .UseServiceStack(new GenericAppHost(typeof(MyService).Assembly)
            {
                ConfigureAppHost = host =>
                {
                    var mqServer = host.Resolve<IMessageService>();
                    mqServer.RegisterHandler<Hello>(host.ExecuteMessage);
                }
            })
            .Run();
    }
    //...
}
You can create a new Worker Service Project from the templates below:
Custom AutoGen Database DTO Generation
The tables and columns for AutoQuery AutoGen can now be customized by overriding the GetTableNames
to specify which tables you want Data Models and AutoQuery APIs generated for and override GetTableColumns if you want to
customize the properties/columns of those tables:
Plugins.Add(new AutoQueryFeature {
    GenerateCrudServices = new GenerateCrudServices {
        GetTableNames = (db, schema) => db.GetTableNames(schema),
        GetTableColumns = (db, table, schema) =>
        {
            var quotedTable = db.Dialect().GetQuotedTableName(table, schema);
            return db.GetTableColumns($"SELECT * FROM {quotedTable}");
        }
    }
});
Async Populate Session Filters
The JwtAuthProvider, NetCoreIdentityAuthProvider and IdentityApplicationAuthProvider auth providers now have async filters for
populating User Sessions from tokens wheen needed, e.g:
new JwtAuthProvider(AppSettings)
{
    PopulateSessionFilterAsync = async (session,payload,req) =>
        session.Info = await client.GetAsync(new GetInfo { Id = session.Id });
}
Please also checkout other blog posts and videos that have been published during this release:
From the blog