This ended up being our funnest releases in which we've built upon significant enhancements made to Templates in our last release just a few weeks ago, to create some fun an exciting solutions which we're super excited to share:
.NET Core Windows Desktop Apps!
Our new app build tool is packed with features for "Chromitizing" any
.NET Core Web App into a .NET Core Windows Desktop App that's as easy as installing the app tool:
$ dotnet tool install -g app
and using it to run your .NET Core Web App's .dll, e.g:
$ app MyApp.dll
Where it will run your .NET Core App and host it inside an Chromium Embedded Framework (CEF) browser.
This provides instant utility for being able to deploy .NET Core Apps end users can run locally using Chrome's leading and consistent rendering engine within a Windows Desktop Application.
app includes a number of features and deep integration with GitHub that makes running .NET Core Chromium Desktop Apps a seamless experience.
To illustrate this we can install any .NET Core project from GitHub by specifying the project's name along with the name of
the GitHub User or Organization via the --source argument. If you don't have a .NET Core Application on-hand to try it on, you can use
any of ServiceStack's .NET Core Templates which are all functioning .NET Core projects in their own right.
Where we can install the NetCoreTemplates/mvc project with:
$ app install mvc --source NetCoreTemplates
Which will download and unzip either the Project's latest release, or an archive of master if none exists.
Then publish the .NET Core App as normal by going into the Host project folder (MyApp in all ServiceStack's Templates):
$ cd mvc\MyApp
Create a published version of the App:
$ dotnet publish -c Release
Then in the /publish folder:
$ cd bin\Release\netcoreapp2.1\publish
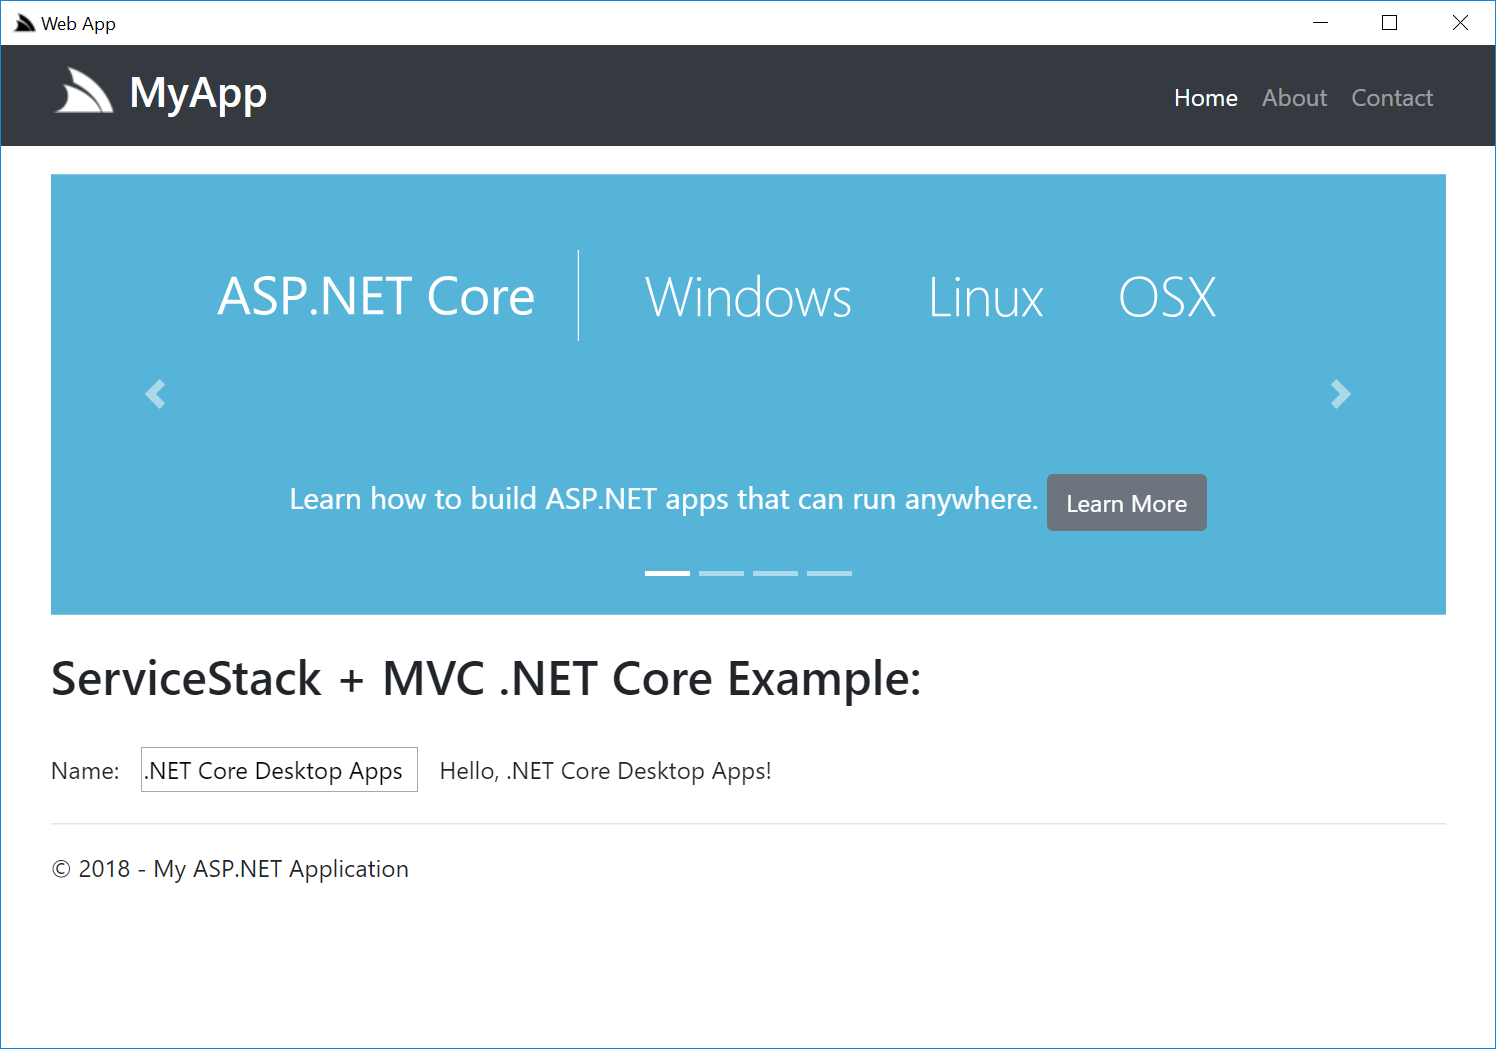
You can use app to run the .NET Core binary:
$ app MyApp.dll
Where it will run the .NET Core App and launch it within a CEF Windows Application:
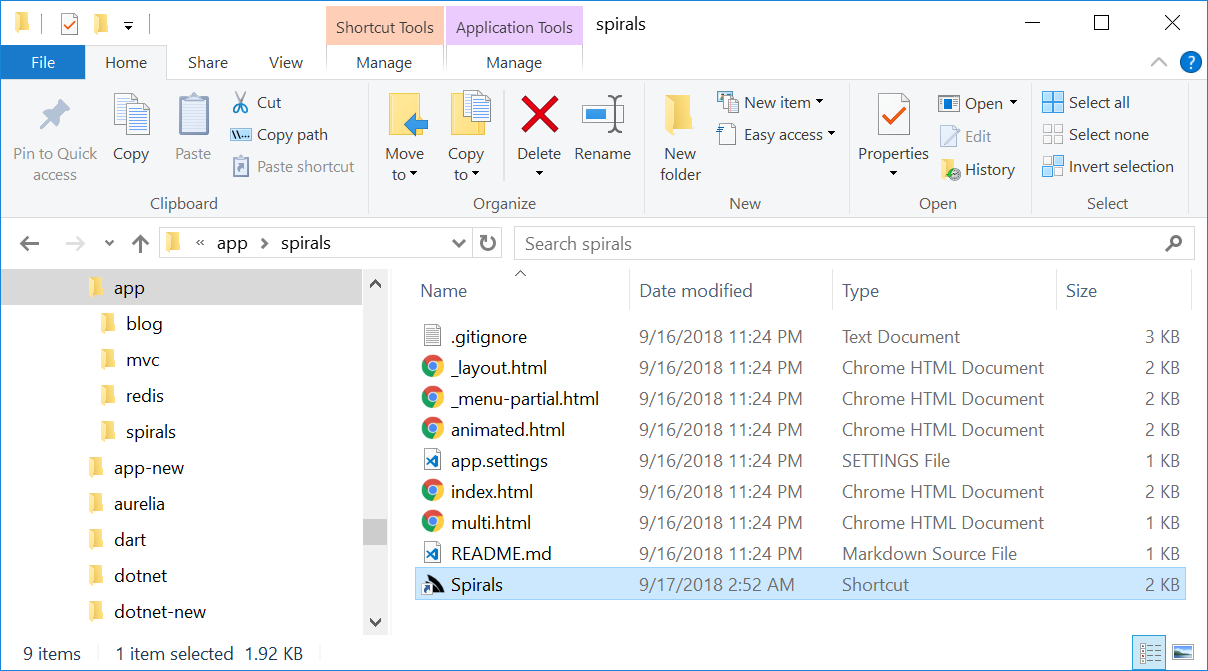
To make the experience of running .NET Core Desktop Apps even nicer you can use the shortcut command to create a Windows Shortcut for your App:
$ app shortcut MyApp.dll
Which you can either double-click to run or copy to a more accessible location like the Users Desktop:
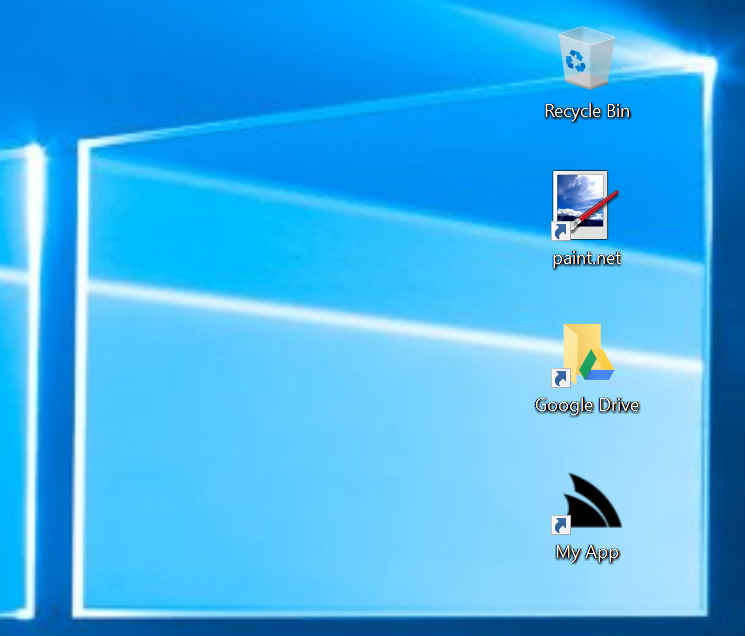
If you wanted to use your own icon instead, copy it as favicon.ico in your /publish folder and rerun the command:
$ app shortcut MyApp.dll
Where it will be used in both Shortcut Icon and Windows Desktop icon:
![]()
Installing .NET Core Apps
The app tool also makes it easy to install .NET Core Apps where you can list apps that are available to install with:
$ app list
By default this will list all NetCoreWebApps available, ordered by popularity:
   1. redis           Redis Admin Viewer developed as Vue Client Single Page App
   2. bare            Bootstrap + jQuery multi-page Website with dynamic Menu Navigation + Sharp APIs
   3. chat            Highly extensible App with custom AppHost leveraging OAuth + SSE for real-time Chat
   4. plugins         Extend WebApps with Plugins, Filters, ServiceStack Services and other C# extensions
   5. blog            Minimal multi-user Twitter OAuth blogging platform that creates living powerful pages
   6. rockwind-aws    Rockwind Cloud Web App on AWS
   7. rockwind-azure  Rockwind Cloud Web App on Azure
   8. redis-html      Redis Admin Viewer developed as server-generated HTML Website
   9. spirals         Explore and generate different Spirals with SVG
  10. rockwind        Web App combining multi-layout Rockstars website + data-driven Northwind Browser

Usage: app install <name>
The source can be customized with the APP_SOURCE Environment Variable where you could list multiple GitHub Organizations by setting:
$ SET APP_SOURCE=NetCoreTemplates;NetCoreWebApps
Where app list will now return:
NetCoreTemplates:

   1. vue-nuxt          .NET Core 2.1 Nuxt.js SPA App with Bootstrap
   2. vue-spa           .NET Core 2.1 Vue CLI Bootstrap App
   3. vuetify-nuxt      .NET Core 2.1 Nuxt.js SPA App with Material Vuetify
   4. aurelia-spa       .NET Core 2.1 Aurelia CLI Bootstrap App
   5. angular-spa       .NET Core 2.1 Angular 7 CLI Bootstrap App
   6. vuetify-spa       .NET Core 2.1 Vue CLI App with Material Vuetify
   7. react-spa         .NET Core 2.1 React Create App CLI Bootstrap App
   8. angular-lite-spa  .NET Core 2.1 Angular 4 Material Design Lite Webpack App
   9. web               .NET Core 2.1 Empty Website
  10. rockwind-app   .NET Core 2.1 Rockwind Sharp Apps
  11. selfhost          .NET Core 2.1 self-hosting Console App
  12. mvc               .NET Core 2.1 MVC Website
  13. templates         .NET Core 2.1 Templates Bootstrap Website
  14. razor             .NET Core 2.1 Website with ServiceStack.Razor
  15. parcel            .NET Core 2.1 Parcel TypeScript App

NetCoreWebApps:

   1. redis           Redis Admin Viewer developed as Vue Client Single Page App
   2. bare            Bootstrap + jQuery multi-page Website with dynamic Menu Navigation + Sharp APIs
   3. chat            Highly extensible App with custom AppHost leveraging OAuth + SSE for real-time Chat
   4. plugins         Extend WebApps with Plugins, Filters, ServiceStack Services and other C# extensions
   5. blog            Minimal multi-user Twitter OAuth blogging platform that creates living powerful pages
   6. rockwind-aws    Rockwind Cloud Web App on AWS
   7. rockwind-azure  Rockwind Cloud Web App on Azure
   8. redis-html      Redis Admin Viewer developed as server-generated HTML Website
   9. spirals         Explore and generate different Spirals with SVG
  10. rockwind        Web App combining multi-layout Rockstars website + data-driven Northwind Browser

Usage: app install <name>
Now you can install the mvc .NET Core Project Template above without needing to specify the --source argument:
$ app install mvc
App Gallery
For a better visual description of each App you can run gallery to view a richer showcase of different apps available:
$ app gallery
Which by default opens .NET Core Web Apps Gallery in a CEF browser
or can also be customized to open any URL by changing the APP_GALLERY environment variable.
Custom .NET Core Desktop Apps
When running the .NET Core MyApp.dll, it effectively runs an external dotnet MyApp.dll process, pipes the output to the console and launches
a CEF browser with the url in ASPNETCORE_URLS.
The ServiceStack.CefGlue.Win64.AspNetCore project shows how to launch both the .NET Core App and a customized CEF browser in the same process by referencing the ServiceStack.CefGlue.Win64 NuGet package in your win-x64 .NET Core project:
<Project Sdk="Microsoft.NET.Sdk">

  <PropertyGroup>
    <OutputType>WinExe</OutputType>
    <TargetFramework>netcoreapp2.1</TargetFramework>
    <RuntimeIdentifiers>win-x64</RuntimeIdentifiers>
    <Platforms>x64</Platforms>
    <ApplicationIcon>favicon.ico</ApplicationIcon>
    <AssemblyName>webapp</AssemblyName>
    <TrimUnusedDependencies>true</TrimUnusedDependencies>
    <TargetLatestRuntimePatch>true</TargetLatestRuntimePatch>
    <RuntimeFrameworkVersion>2.1.2</RuntimeFrameworkVersion>
    <CopyLocalLockFileAssemblies>true</CopyLocalLockFileAssemblies>
  </PropertyGroup>

  <ItemGroup>
    <PackageReference Include="Microsoft.AspNetCore.Server.Kestrel" Version="2.*" />

    <PackageReference Include="ServiceStack.CefGlue.Win64" Version="5.*" />
  </ItemGroup>

</Project>
Then in your .NET Core App after calling StartAsync() to run your .NET Core App:
class Program
{
    static int Main(string[] args)
    {
        var startUrl = Environment.GetEnvironmentVariable("ASPNETCORE_URLS") ?? "http://localhost:5000/";

        var host = new WebHostBuilder()
            .UseKestrel()
            .UseContentRoot(Directory.GetCurrentDirectory())
            .UseStartup<Startup>()
            .UseUrls(startUrl)
            .Build();

        host.StartAsync();

        var config = new CefConfig(debug:true)
        {
            Args = args,
            StartUrl = startUrl,
            HideConsoleWindow = false,
        };

        return CefPlatformWindows.Start(config);
    }
}
Call CefPlatformWindows.Start(config) to launch the CEF browser with your preferred customizations in a Windows 64bit OS.
CefConfig.cs supports high-level configuration
where you can change the Window size and position, icon, title as well as the CefSettings and CefBrowserSettings the browser is launched with
and whether to enable or disable the ALT+LEFT/RIGHT Navigation Keys, F5 Refresh or F11 Chrome Dev Tools.
Eventually we intend to provide different packages using the same high-level CefConfig settings to simplify the effort required to run
.NET Core Desktop Apps on different Operating Systems.
Upgrading
The nice benefit of delivering app as a dotnet global tool is that it makes updates effortless by running:
$ dotnet tool update -g app
Which will upgrade to a newer CEF and app versions as they're released. app also lets you know if there's a newer version available
after running the list, gallery and -v commands.
Additional Features
The app dotnet tool is a versatile utility belt packed with a number of features to simplify discovering, installing, running and deploying
.NET Core Apps. You can view the full list of supported commands by running app ?, e.g. another useful command is using app init for generating
pre-set templates:
app init                    Create basic .NET Core Web App
app init nginx              Create nginx example config
app init supervisor         Create supervisor example config
app gist <gist-id>          Write all Gist text files to current directory
Where you can use app init nginx to generate a common nginx template configuration for reverse proxying .NET Core Apps, making configuring Linux
deployment servers for your .NET Core Apps less tedious.
In addition to the pre-set templates, you can create your own public GitHub gist with any number of different files customized for your Environment that anyone can write to their current directory with:
$ app gist <gist-id>
Chromium Desktop Apps
Chrome Desktop Apps are increasingly becoming the preferred approach for developing Desktop Apps today, they benefit from the vast amount of resources Google invests in developing their most important Desktop Application in Chrome and its Chromium project which provides the Chrome rendering engine in popular frameworks like CEF and Electron that's used to power many of the actively developed Desktop Apps today like VS Code, GitHub Desktop, Twitch.tv, WhatsApp, Slack, Skype, Discord, Signal, Microsoft Teams, Microsoft SQL Operations Studio and hundreds more. Whilst CEF is used to render Web content in popular native Desktop Apps like Spotify, Stream, Facebook Messenger, Adobe Acrobat, Adobe Creative Cloud, Amazon Music, Battle.net, Evernote as well as game engines like Unity3D and Unreal Engine.
Ultimately what "Web Desktop Apps" provide most is value, with easy access to advanced Web technologies, rich layout and design techniques, live debugging inspector, navigation, deep-linking and offer significantly greater ROI when needing to support multiple Operating Systems or an online hosted version of your Software. Even without the code-reuse of targeting multiple platforms they offer a leap in productivity for many classes of Apps, e.g. the depth and velocity of VS Code's frequent releases are rarely seen in Native Desktop Apps.
Of course if you can offer software hosted on the Internet that would typically be the preferred approach for increased accessibility, maintainability and reach to your Software. But there's a number of use-cases that would benefit from a Desktop App, e.g. any offline tasks, management of personal data, access to Native Desktop features, local computing and infrastructure resources or to avoid maintenance and management of a central hosted server.
Places where you're using Windows Services could be better served as a unified Packaged Desktop App where you can ensure consistent behavior by using the same tested Chrome rendering engine to run your App, mitigating any environment, versions and cross-browser issues.
Desktop Web Apps
Whilst app is useful for running any Windows .NET Core Desktop App, it provides the greatest value for running
ServiceStack .NET Core Web Apps - a revolutionary new simplified development model
for developing .NET Core Apps which eliminates much of the friction .NET developers have historically had to face. Web Apps require no
builds/compilation, wait times, complicated build tooling, configuration, incompatible dependencies, dev tools or IDE's.
The simplicity of being able to use the same executable for running all Web Apps allows us more flexibility to provide even greater value-added functionality than what's otherwise possible. By contrast Web Apps can be developed with any text editor in an iterative, live-development environment that updates itself on save, whilst the App is running. It utilizes a familiar JavaScript and Handlebars syntax in a high-level dynamic language that late-binds to .NET APIs using Compiled Expressions for avoiding runtime reflection.
Web Apps are highly customizable by nature as they're delivered and run in source code form, requires no external dependencies or dev tools as they
can be edited by any text editor whilst the app is running. They're also significantly smaller than normal Web Apps since the app tool already
contains the shared binaries that all Web Apps use - making them easier to deploy, install and update.
Installing Web Apps
As NetCoreWebApps is the default APP_SOURCE, running:
$ app list
Will return the list of publicly available Web Apps:
   1. redis           Redis Admin Viewer developed as Vue Client Single Page App
   2. bare            Bootstrap + jQuery multi-page Website with dynamic Menu Navigation + Sharp APIs
   3. chat            Highly extensible App with custom AppHost leveraging OAuth + SSE for real-time Chat
   4. plugins         Extend WebApps with Plugins, Filters, ServiceStack Services and other C# extensions
   5. blog            Minimal multi-user Twitter OAuth blogging platform that creates living powerful pages
   6. rockwind-aws    Rockwind Cloud Web App on AWS
   7. rockwind-azure  Rockwind Cloud Web App on Azure
   8. redis-html      Redis Admin Viewer developed as server-generated HTML Website
   9. spirals         Explore and generate different Spirals with SVG
  10. rockwind        Web App combining multi-layout Rockstars website + data-driven Northwind Browser

Usage: app install <name>
Include your Web App in the Gallery
We've also made it easy to list your App in the App gallery, by running:
$ app gallery
Which opens the Web App Gallery Gist where you can request for your Web App to be listed in the gallery by commenting on the gist with a link to your project. We'll review it and if it's acceptable we'll fork it in NetCoreWebApps which creates a "link" to your project where it will be automatically listed.
All existing app installs will be immediately able to install your App, which either installs the latest published release or from master if it
hasn't published any releases.
Installing blog
Installing an App is then just selecting the name of the app to install:
$ app install blog
Where it will download the latest .zip release (36kb) and extracts it into a folder named after the project:
Installing blog...

Installation successful, run with:

  cd blog && app

Shortcut: blog\Blog Web App
Which can either be run on the command-line with:
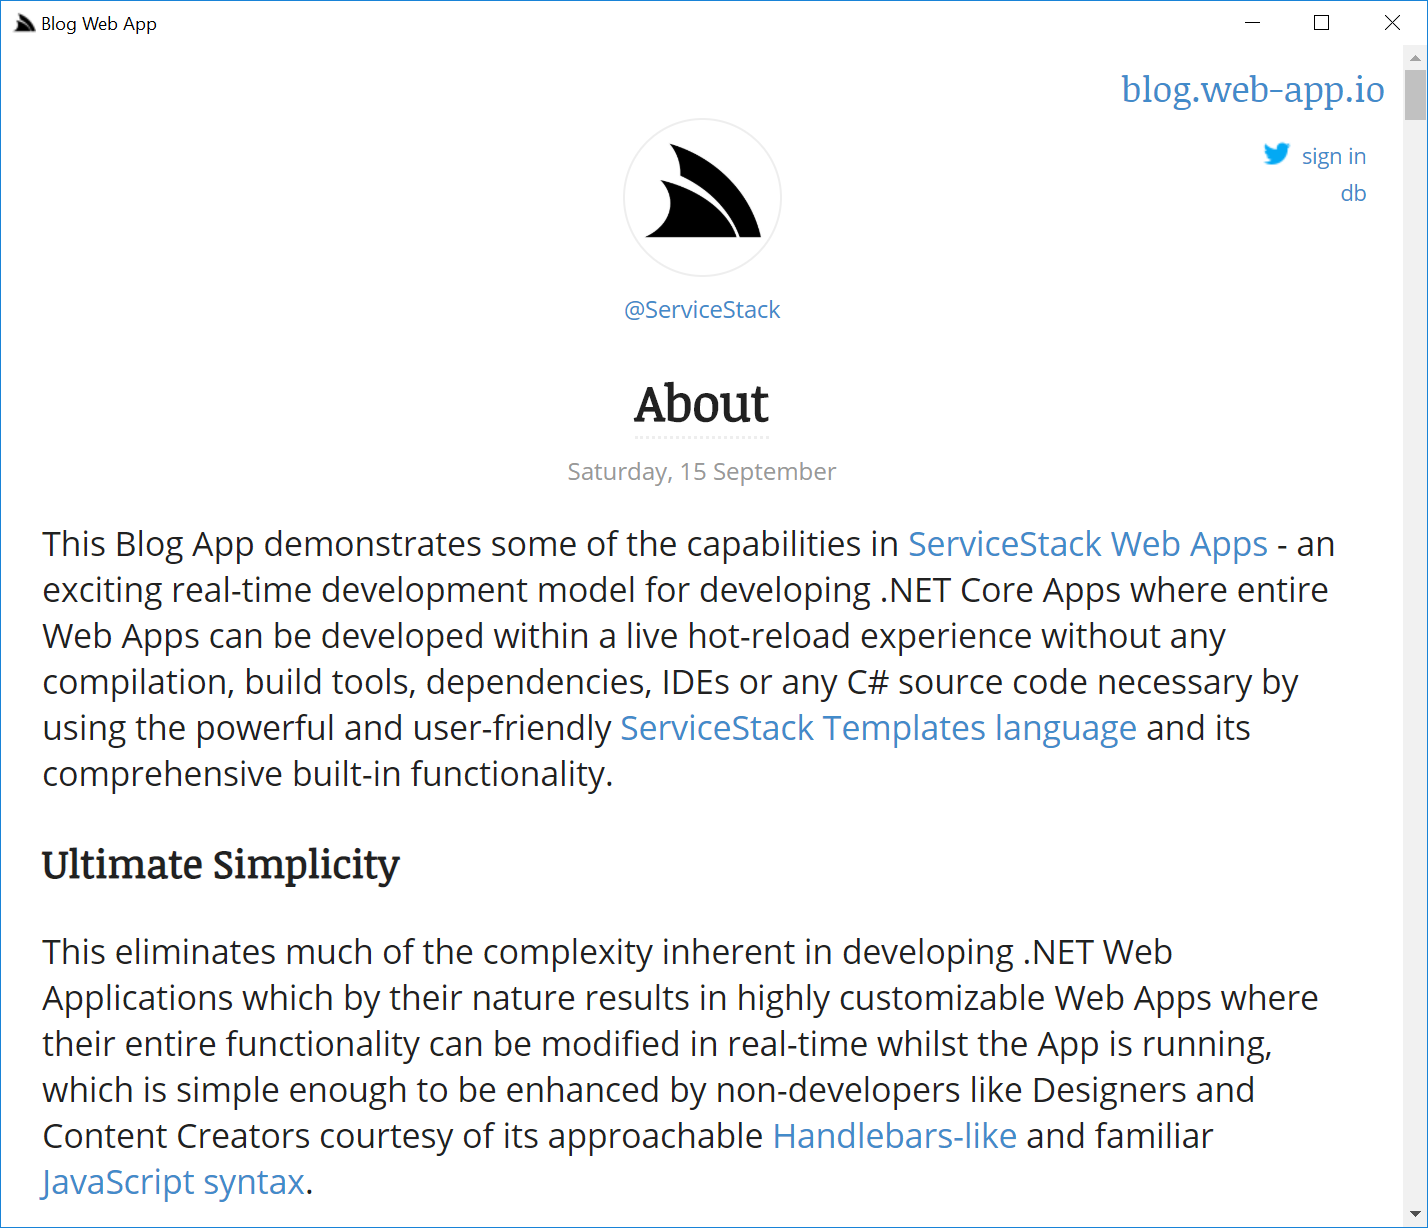
$ cd blog && app
Or by double-clicking the Blog Web App Desktop shortcut.
Running the blog App for the first time will create a new blog.sqlite database seeded with meta content describing itself:
Despite it's small 36kb size it packs a punch:
- Multi User Blogging Platform - Authenticated with Twitter
- Rich Dynamic Content - Each post can contain the same powerful language used to build the app
- Rich Markdown Editor
- Auto saved drafts
- Live Previews - showing rendered content as you type
- Database dump of SQLite tables
At the bottom of each individual post shows the content used to create it, e.g. the Live Document Example shows an example of maintaining a live budget with a dynamic list of projected savings.
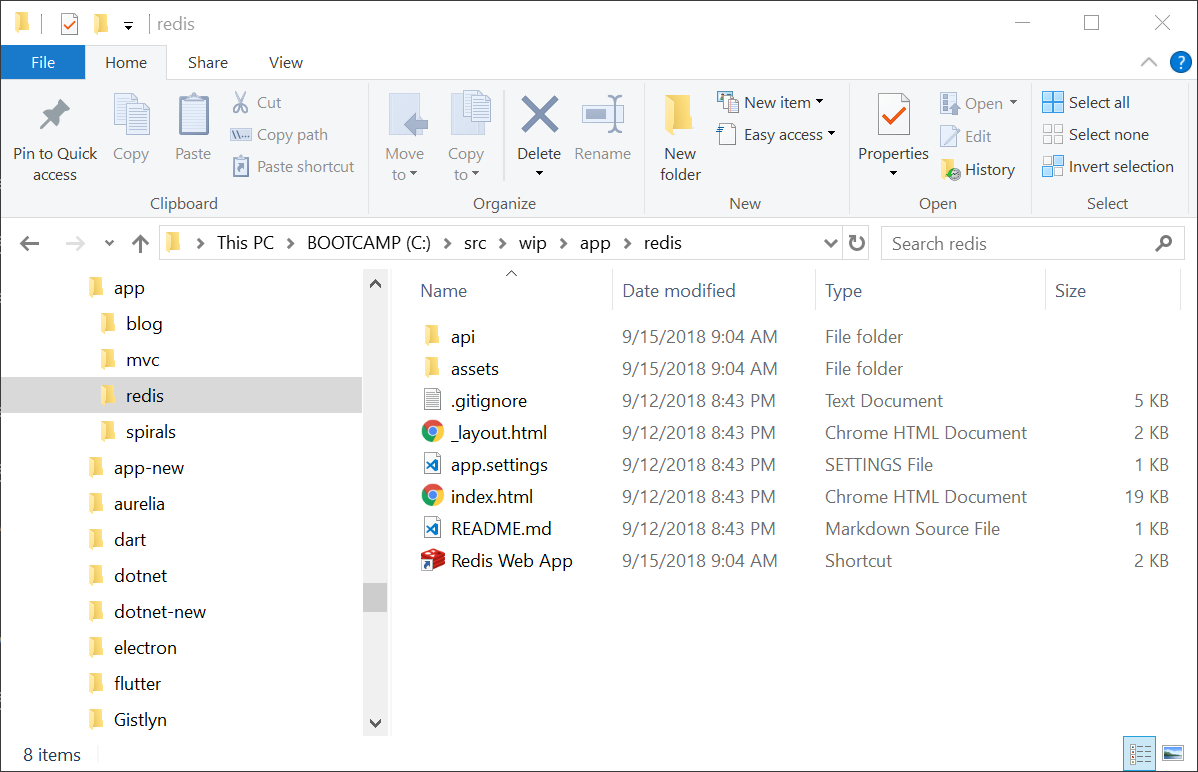
Installing redis
From SQLite powered blog, lets install something entirely different - a Redis Admin UI!
$ app install redis
The redis app includes some additional customizations which controls how the App looks and behaves when run as a Desktop App in its
app.settings:
debug true
name Redis Web App
redis.connection localhost:6379
icon assets/img/redis.ico
CefConfig { Width:1200, Height:1200 }
Where icon is used to point to the App Icon and CefConfig is used to configure the CEF browser, allowing any
CefConfig.cs
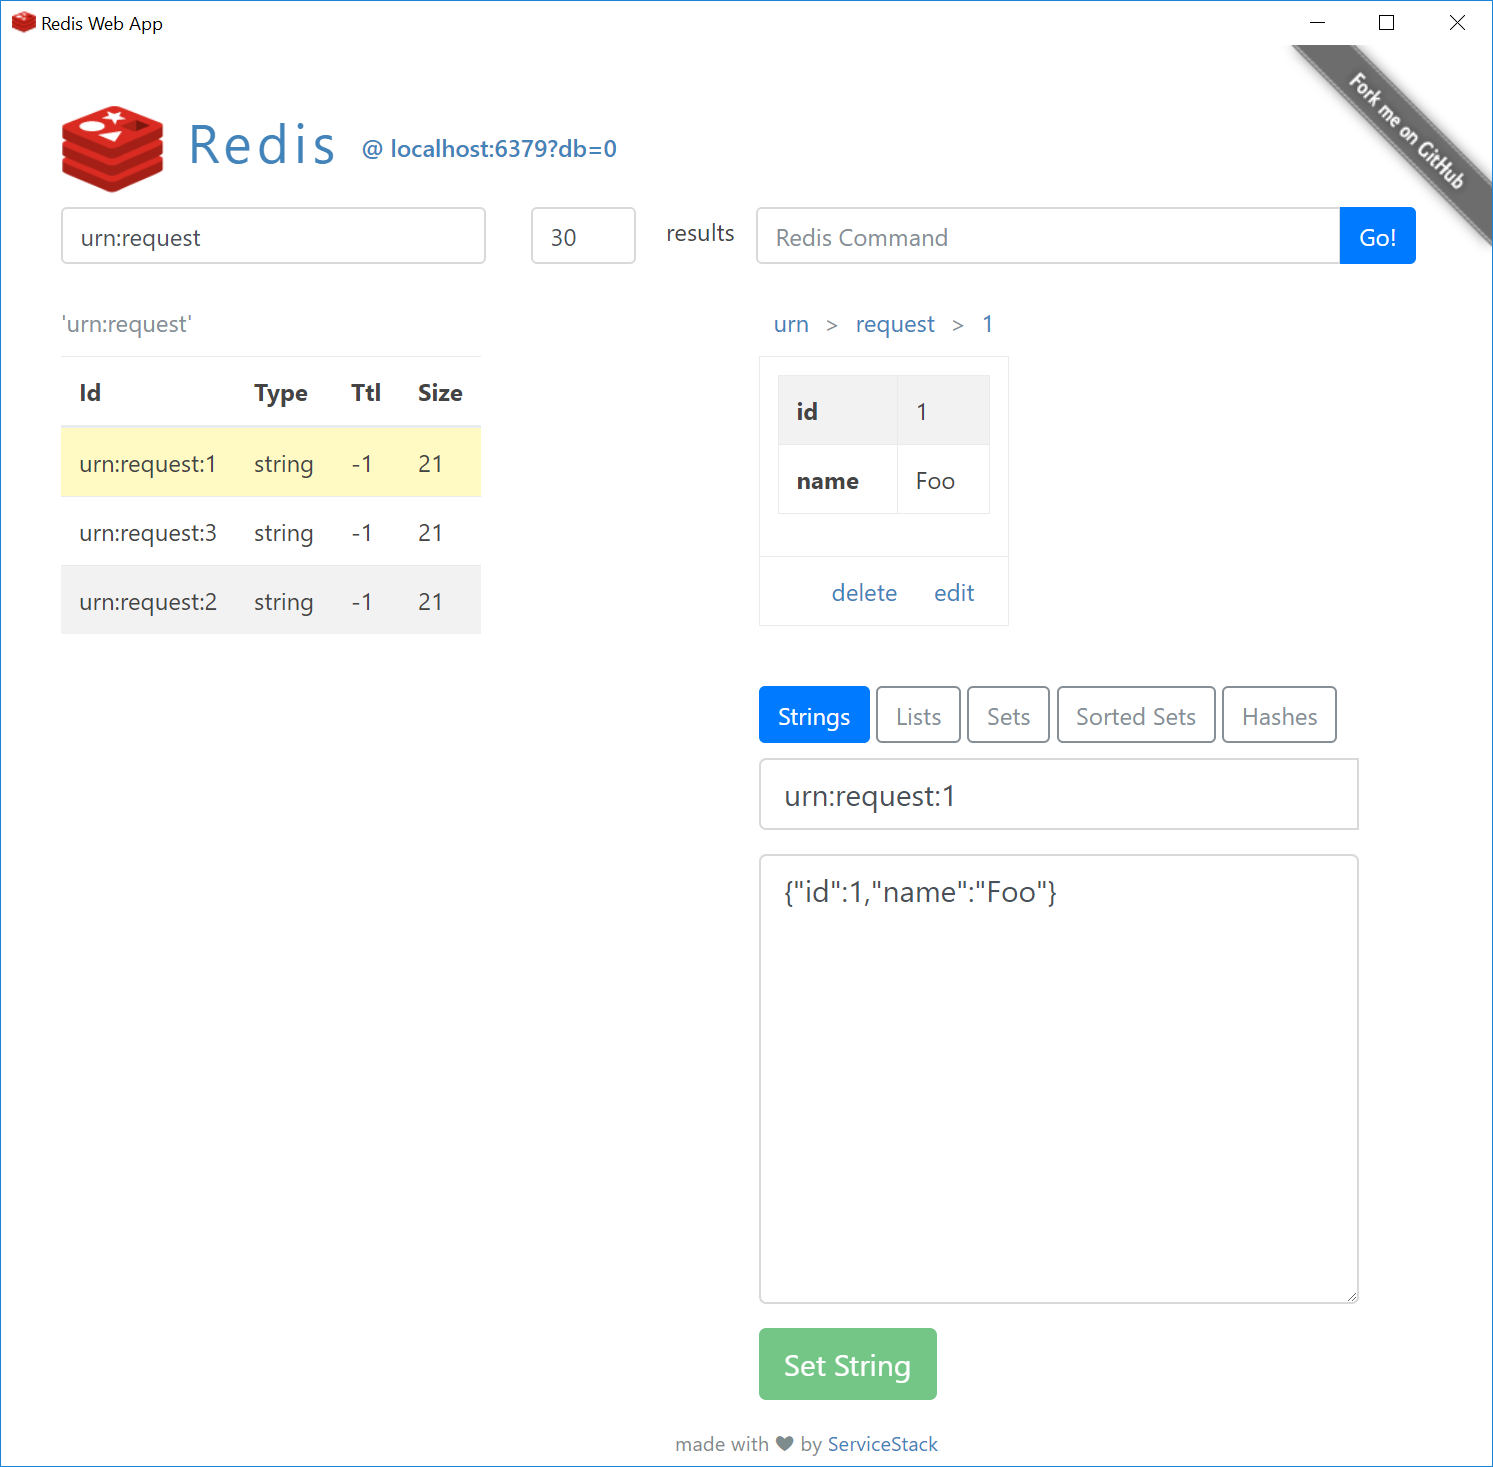
to be configured using a JavaScript object literal. On install the specified icon and name is used to create the Desktop shortcut:
Where it will open a Redis Admin UI connected to your localhost:6379 redis instance:
Customizing CEF Browser
Likewise we can also configure any nested CefConfig.CefSettings using an object literal. We can use this to view verbose logging messages by
telling app not to hide the Console Window and changing CEF's LogSeverity to Verbose:
CefConfig { Width:1200, Height:1200, HideConsoleWindow:false }
CefConfig.CefSettings { LogSeverity:'Verbose' }
Now when running the App we can see the CEF's verbose logging messages mixed in with request logs from .NET Core:
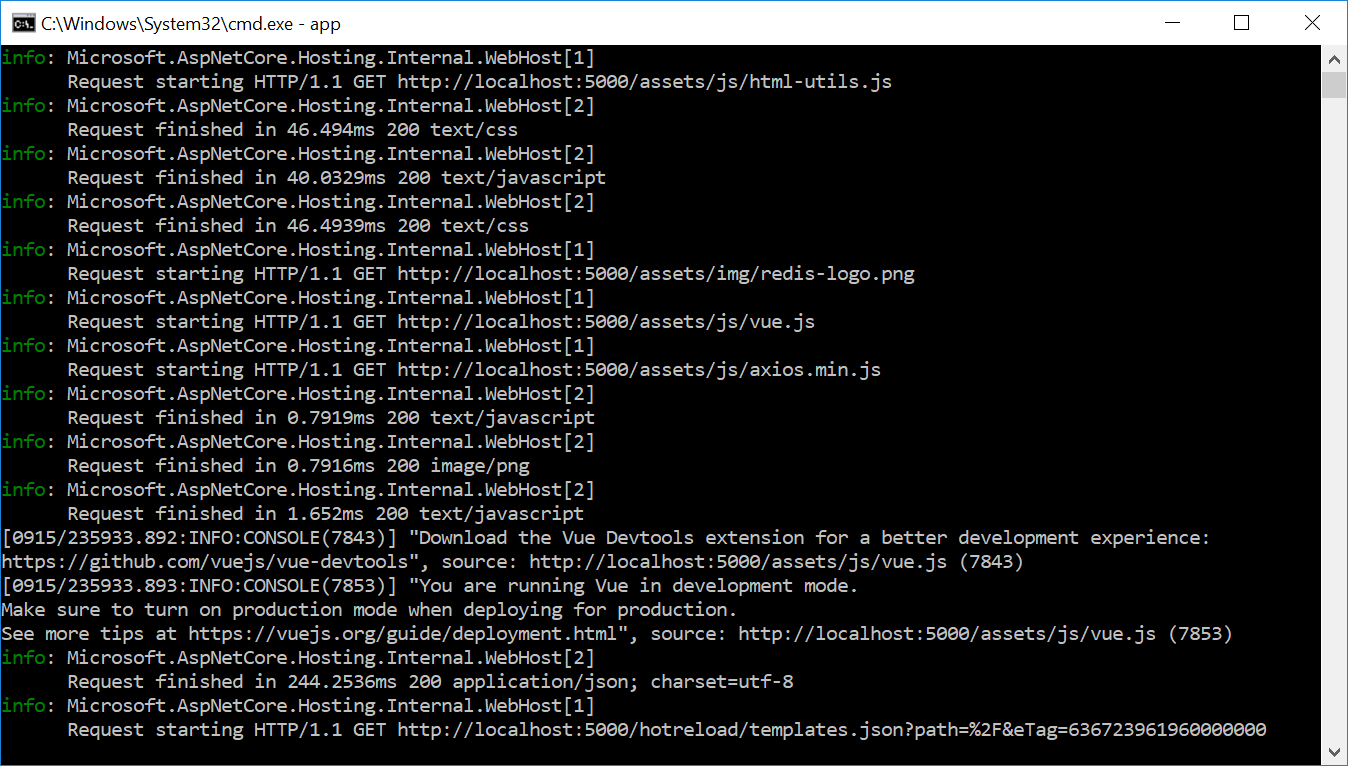
Which in this case shows messages written to Chrome's console.log() which is from Vue.js telling us we're running a development build of Vue.js.
To run the production version of our app we can either set debug false in the app.settings or by running app --release which takes precedence:
$ app -r
This flag changes whether to use vue.js or vue.min.js in the _layout.html page:
<script src="../assets/js/vue{{ '.min' | if(!debug) }}.js"></script>
To instead force running the App in debug mode use
app --debugorapp -d
Compact and easy to Customize
The redis App has all the features you'd expect from a Redis Admin UI:
- Change connection to any Redis instance / database
- Live Search of Redis Keyspace (updated as you type)
- Management of all Redis's core String, List, Set, Sorted Set and Hash Key types
- Execute any arbitrary Redis command
- Display blobbed JSON value data in human-friendly UI
- Redis Server Info List
- Breadcrumbs
- Deep Linking + Browser Navigation (ALT+LEFT Back, ALT+RIGHT Forward, F5 Refresh)
What differs this from other Redis Admin UI's is its terse implementation where its entire custom UI is contained within a single index.html page thanks to the expressiveness of both Vue and #Script.
Its minimal size makes it easy for curious and advanced Users to customize and add features since they can make them locally and see their changes in real-time. Its simpler implementation makes contributions easier as they only have 1 page to edit and can paste their changes directly using GitHub's Edit UI to easily create a pull-request where it can be reviewed and merged.
Simple Updates
Thanks to the easy distribution all users can update to the latest version of any installed App by re-running:
$ app install redis
Which will replace their existing version with the latest release.
Creating Desktop Web Apps
Now that we've seen how easy it is to Install and use existing Web Apps, lets walk through how easy it to create one of our own.
For this example we'll create a small App that leverages one of the advanced Web technologies in SVG that would be cumbersome to create using a native GUI toolkit. To start let's create a folder for our app called spirals and initialize and empty Web App with app init:
$ mkdir spirals
$ cd spirals && app init
We could have started from one of the more complete Web App Templates but this gives us a minimal App generated from this gist.
Now let's open the folder up for editing in our preferred text editor, VS Code:
$ code .
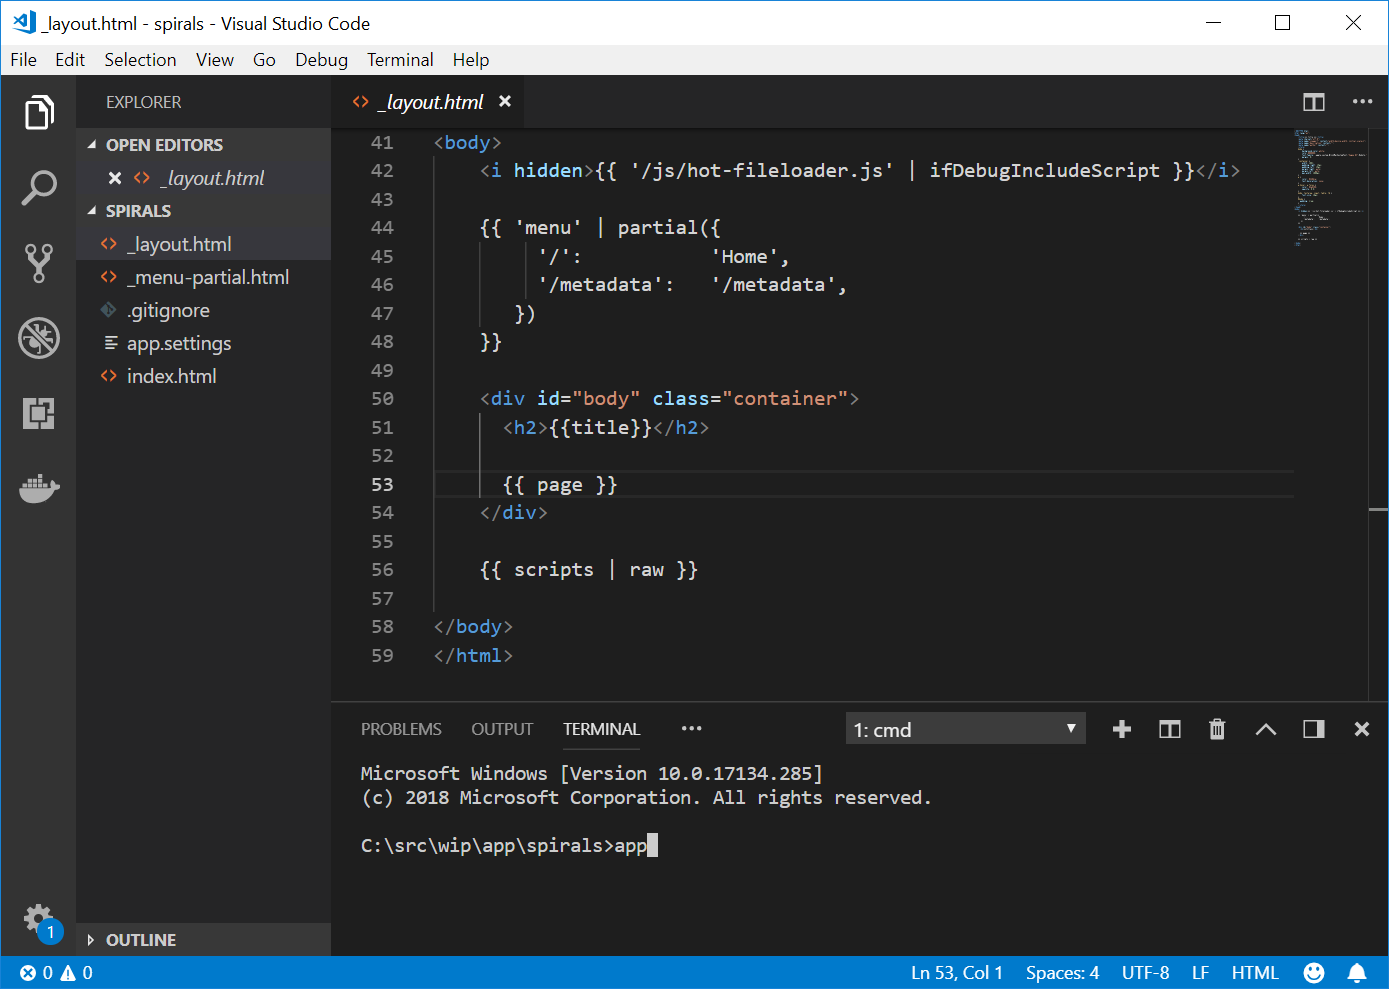
To start developing our App we just have to run app on the command-line which in VS Code we can open with Terminal > New Terminal or the Ctrl+Shift+` shortcut key. This will open our minimal App:
The _layout.html shown above is currently where all the action is which we'll quickly walk through:
<i hidden>{{ '/js/hot-fileloader.js' | ifDebugIncludeScript }}</i>
This gives us a Live Development experience in debug mode where it injects a script that will detect file changes on Save and automatically reload the page at the current scroll offset.
{{ 'menu' | partial({
'/': 'Home',
'/metadata': '/metadata',
})
}}
This evaluates the included _menu-partial.html with the links to different routes we want in our Menu on top of the page.
<div id="body" class="container">
<h2>{{title}}</h2>
{{ page }}
</div>
The body of our App is used to render the title and contents of each page.
{{ scripts | raw }}
If pages include any scripts they'll be rendered in the bottom of the page.
The
rawfilter prevents the output from being HTML encoded.
The other 2 files included is app.settings containing the
name of our App and debug true setting to run our App in Debug mode:
debug true
name My App
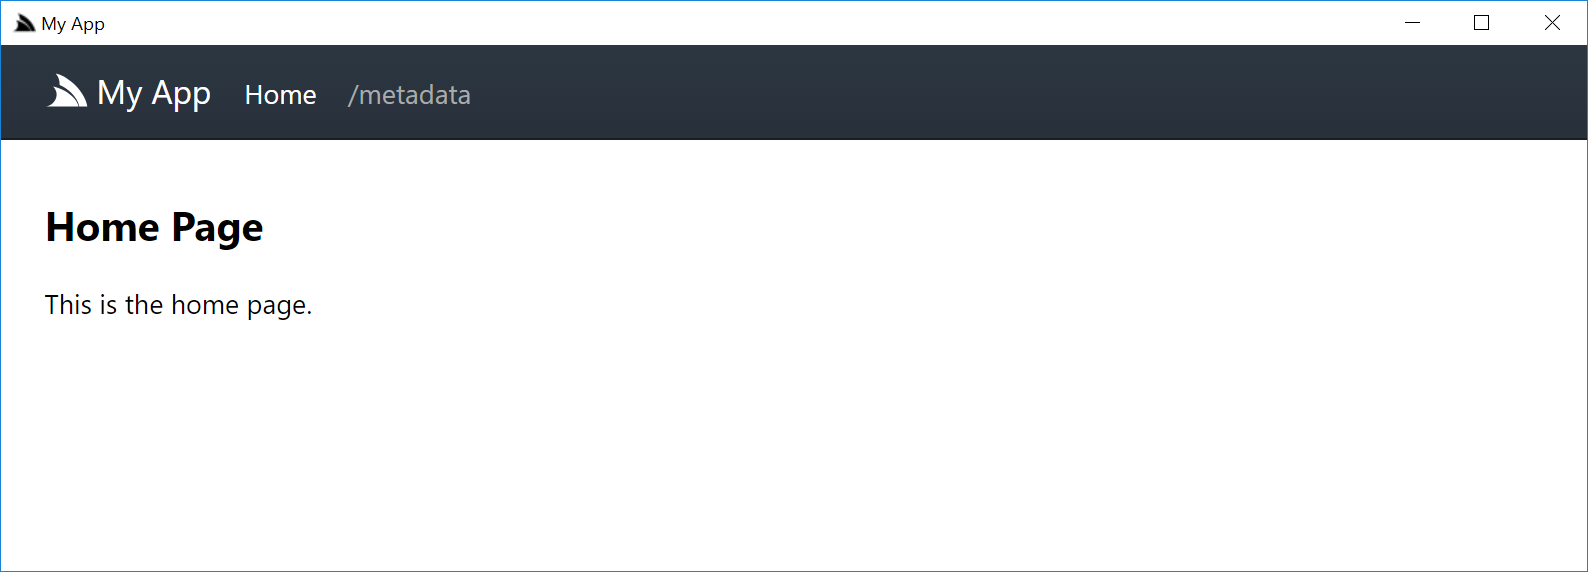
The template only has one page index.html containing the title
of the page in a page argument which the _layout.html has access to without evaluating the page, anything after is the page contents:
<!--
title: Home Page
-->

This is the home page.
We can now save changes to any of the pages and see our changes reflected instantly in the running App. But we also have access to an even better live-development experience than preview as you save with preview as you type :)
Live Previews
To take advantage of this we can exploit one of the features available in all ServiceStack Apps by clicking on /metadata Menu Item to view the
Metadata page containing links to our Apps Services, links to Metadata Services and any registered plugins:
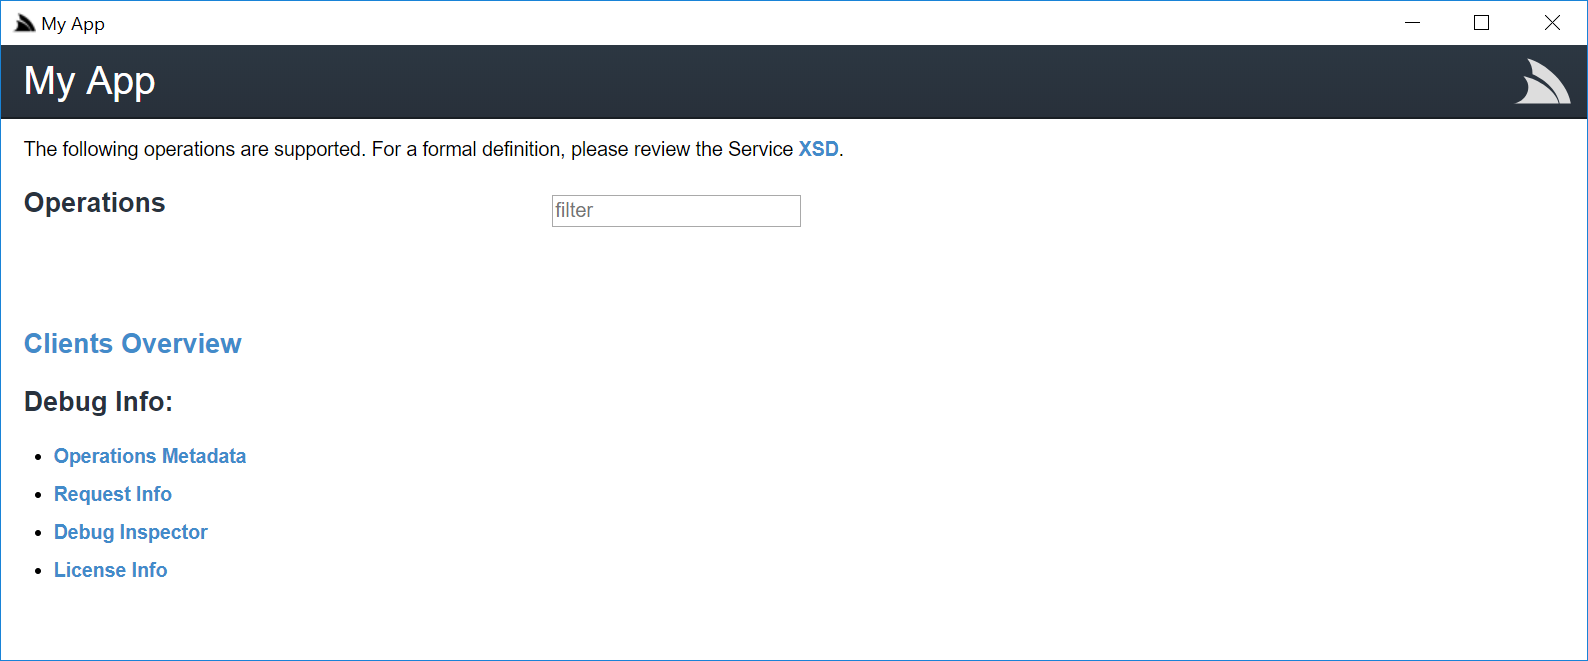
Then click on Debug Inspector to open a real-time REPL, which is normally used to get rich insights from a running App:
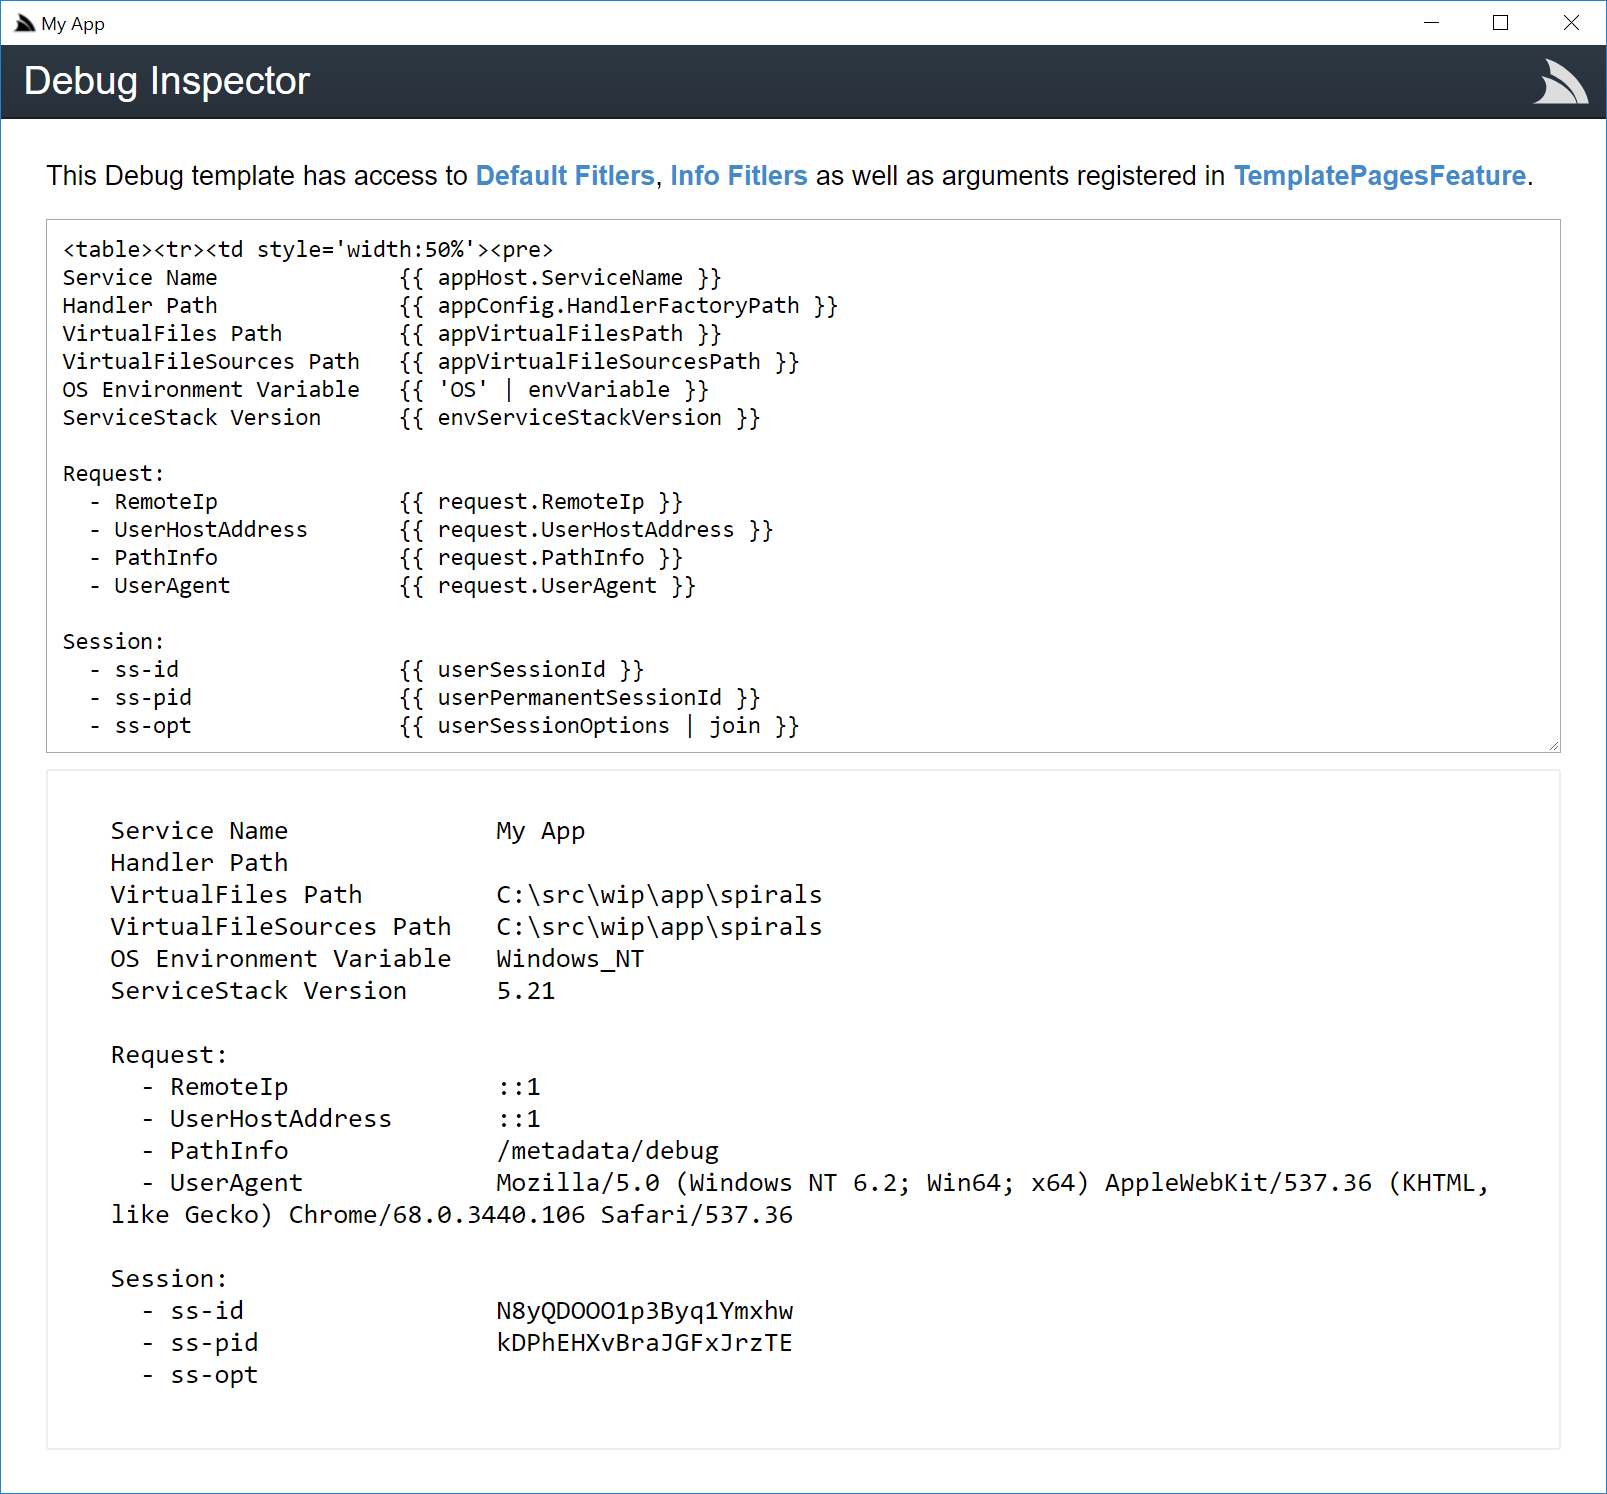
But can also be used for executing ad hoc Template Scripts. Here we can drop in any mix of HTML and templates to view results in real-time.
In this case we want to generate SVG spirals by drawing a circle at each point along a
Archimedean spiral function which was initially used as a base and with the help of the live REPL was
quickly able to apply some constants to draw the tall & narrow spirals we want:
<svg height="640" width="240">
{{#each range(180) }}
{{ 120 + 100 * cos((1) * it * 0.02827) | assignTo: x }}
{{ 320 + 300 * sin((1) * it * 0.02827) | assignTo: y }}
<circle cx="{{x}}" cy="{{y}}" r="10" fill="rgb(0,100,0)" stroke="black" stroke-width="1"/>
{{/each}}
</svg>
We can further explore different spirals by modifying x and y cos/sin constants:
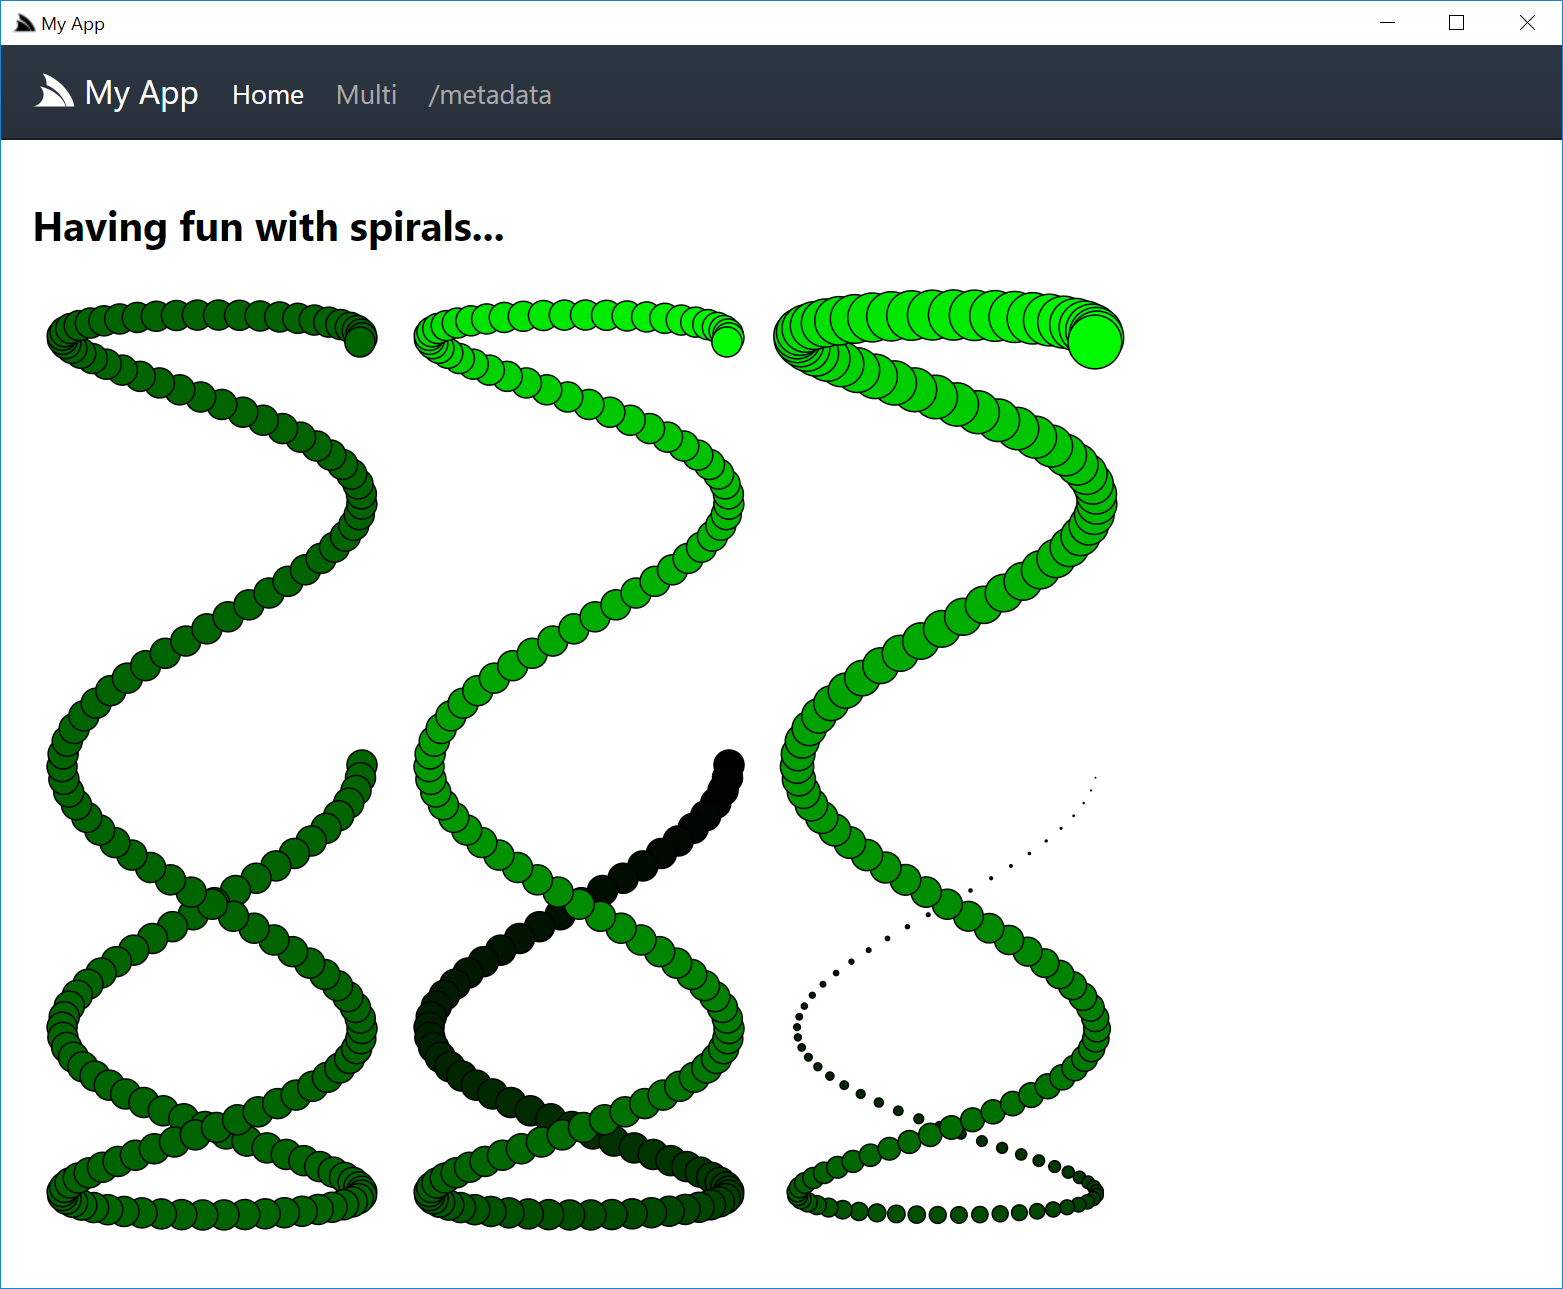
Out of the spirals we've seen lets pick one of the interesting ones and add it to our index.html, let's also enhance them by modifying the fill and
radius properties with different weightings and compare them side-by-side:
<svg height="640" width="240">
{{#each range(180) }}
{{ 120 + 100 * cos((5) * it * 0.02827) | assignTo: x }}
{{ 320 + 300 * sin((1) * it * 0.02827) | assignTo: y }}
<circle cx="{{x}}" cy="{{y}}" r="10" fill="rgb(0,100,0)" stroke="black" stroke-width="1"/>
{{/each}}
</svg>
<svg height="640" width="240">
{{#each range(180) }}
{{ 120 + 100 * cos((5) * it * 0.02827) | assignTo: x }}
{{ 320 + 300 * sin((1) * it * 0.02827) | assignTo: y }}
<circle cx="{{x}}" cy="{{y}}" r="10" fill="rgb(0,{{it*1.4}},0)" stroke="black" stroke-width="1"/>
{{/each}}
</svg>
<svg height="640" width="240">
{{#each range(180) }}
{{ 120 + 100 * cos((5) * it * 0.02827) | assignTo: x }}
{{ 320 + 300 * sin((1) * it * 0.02827) | assignTo: y }}
<circle cx="{{x}}" cy="{{y}}" r="{{it*0.1}}" fill="rgb(0,{{it*1.4}},0)" stroke="black" stroke-width="1"/>
{{/each}}
</svg>
You can use
ALT+LEFT+ALT+RIGHTshortcut keys to navigate back and forward to the home page.
Great, hitting save again will show us the effects of each change side-by-size:
Multiplying
Now that we have the effect that we want, let's go back to the debug inspector and see what a number of different spirals look side-by-side by wrapping our last svg snippet in another each block:
<table>{{#each i in range(0, 4) }}
<svg height="640" width="240">
{{#each range(180) }}
{{ 120 + 100 * cos((1) * it * 0.02827) | assignTo: x }}
{{ 320 + 300 * sin((1+i) * it * 0.02827) | assignTo: y }}
<circle cx="{{x}}" cy="{{y}}" r="{{it*0.1}}" fill="rgb(0,{{it*1.4}},0)" stroke="black" stroke-width="1"/>
{{/each}}
</svg>
{{/each}}
We can prefix our snippet with <table> as a temp workaround to force them to display side-by-side in Debug Inspector. In order to
for spirals to distort we'll only change 1 of the axis, as they're tall & narrow lets explore along the y-axis:

We're all setup to begin our pattern explorer expedition where we can navigate across the range() index both incrementally and logarithmically across
to quickly discover new aesthetically pleasing patterns :)

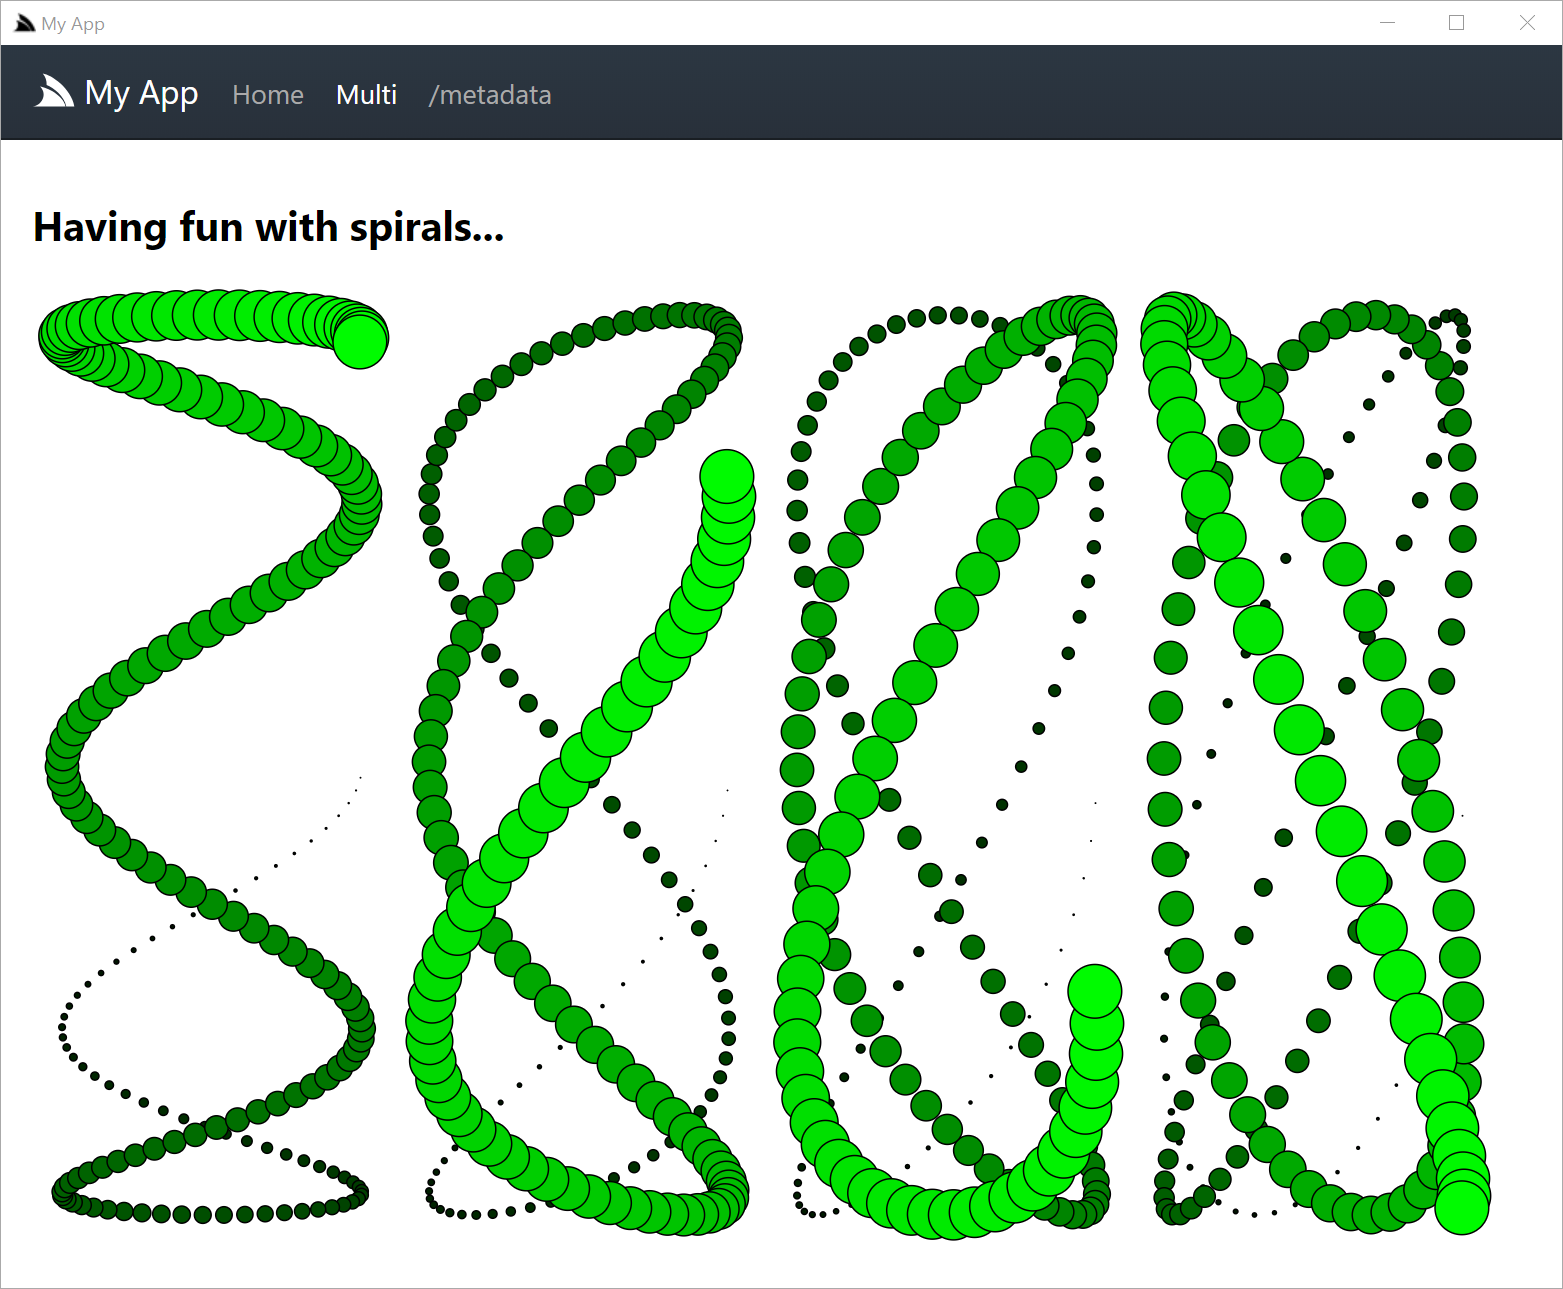
Let's go back to our App and embody our multi spiral viewer in a new multi.html page containing:
{{#each i in range(0, 4) }}
<svg height="640" width="240">
{{#each range(180) }}
{{ 120 + 100 * cos((5) * it * 0.02827) | assignTo: x }}
{{ 320 + 300 * sin((1+i) * it * 0.02827) | assignTo: y }}
<circle cx="{{x}}" cy="{{y}}" r="{{it*0.1}}" fill="rgb(0,{{it*1.4}},0)" stroke="black" stroke-width="1"/>
{{/each}}
</svg>
{{/each}}
Then make it navigable by adding a link to our new page in the _layout.html menu:
{{ 'menu' | partial({
'/': 'Home',
'/multi': 'Multi',
'/metadata': '/metadata',
})
}}
Where upon save, our creation will reveal itself in the App's menu:
Animating
With the help of SVG's <animate> we can easily bring our spirals to life
by animating different properties on the generated SVG circles.
As we have to wait for the animation to complete before trying out different effects, we won't benefit from Debug Inspector's live REPL
so let's jump straight in and create a new animated.html and add a link to it in the menu:
{{ 'menu' | partial({
'/': 'Home',
'/multi': 'Multi',
'/animated': 'Animated',
'/metadata': '/metadata',
})
}}
Then populate it with a copy of multi.html and sprinkle in some <animate> elements to cycle through different <circle> property values.
We're entering the "creative process" of our App where we can try out different values, hit Save and watch the effects of our tuning eventually
arriving at a combination we like:
{{#each i in range(0, 4) }}
<svg height="640" width="240">
{{#each range(180) }}
{{ 120 + 100 * cos((5) * it * 0.02827) | assignTo: x }}
{{ 320 + 300 * sin((1+i) * it * 0.02827) | assignTo: y }}
<circle cx="{{x}}" cy="{{y}}" r="{{it*0.1}}" fill="rgb(0,{{it*1.4}},0)" stroke="black" stroke-width="1">
<animate attributeName="fill" values="green;yellow;red;green" dur="{{it%10}}s" repeatCount="indefinite" />
<animate attributeName="opacity" values="1;.5;1" dur="5s" repeatCount="indefinite" />
<animate attributeName="cx" values="{{x}};{{x*1.02}};{{x*0.98}};{{x}}" dur="3s" repeatCount="indefinite" />
<animate attributeName="cy" values="{{y}};{{y*1.02}};{{y*0.98}};{{y}}" dur="3s" repeatCount="indefinite" />
</circle>
{{/each}}
</svg>
{{/each}}
Although hard to capture in a screenshot, we can sit back and watch our living, breathing Spirals :)
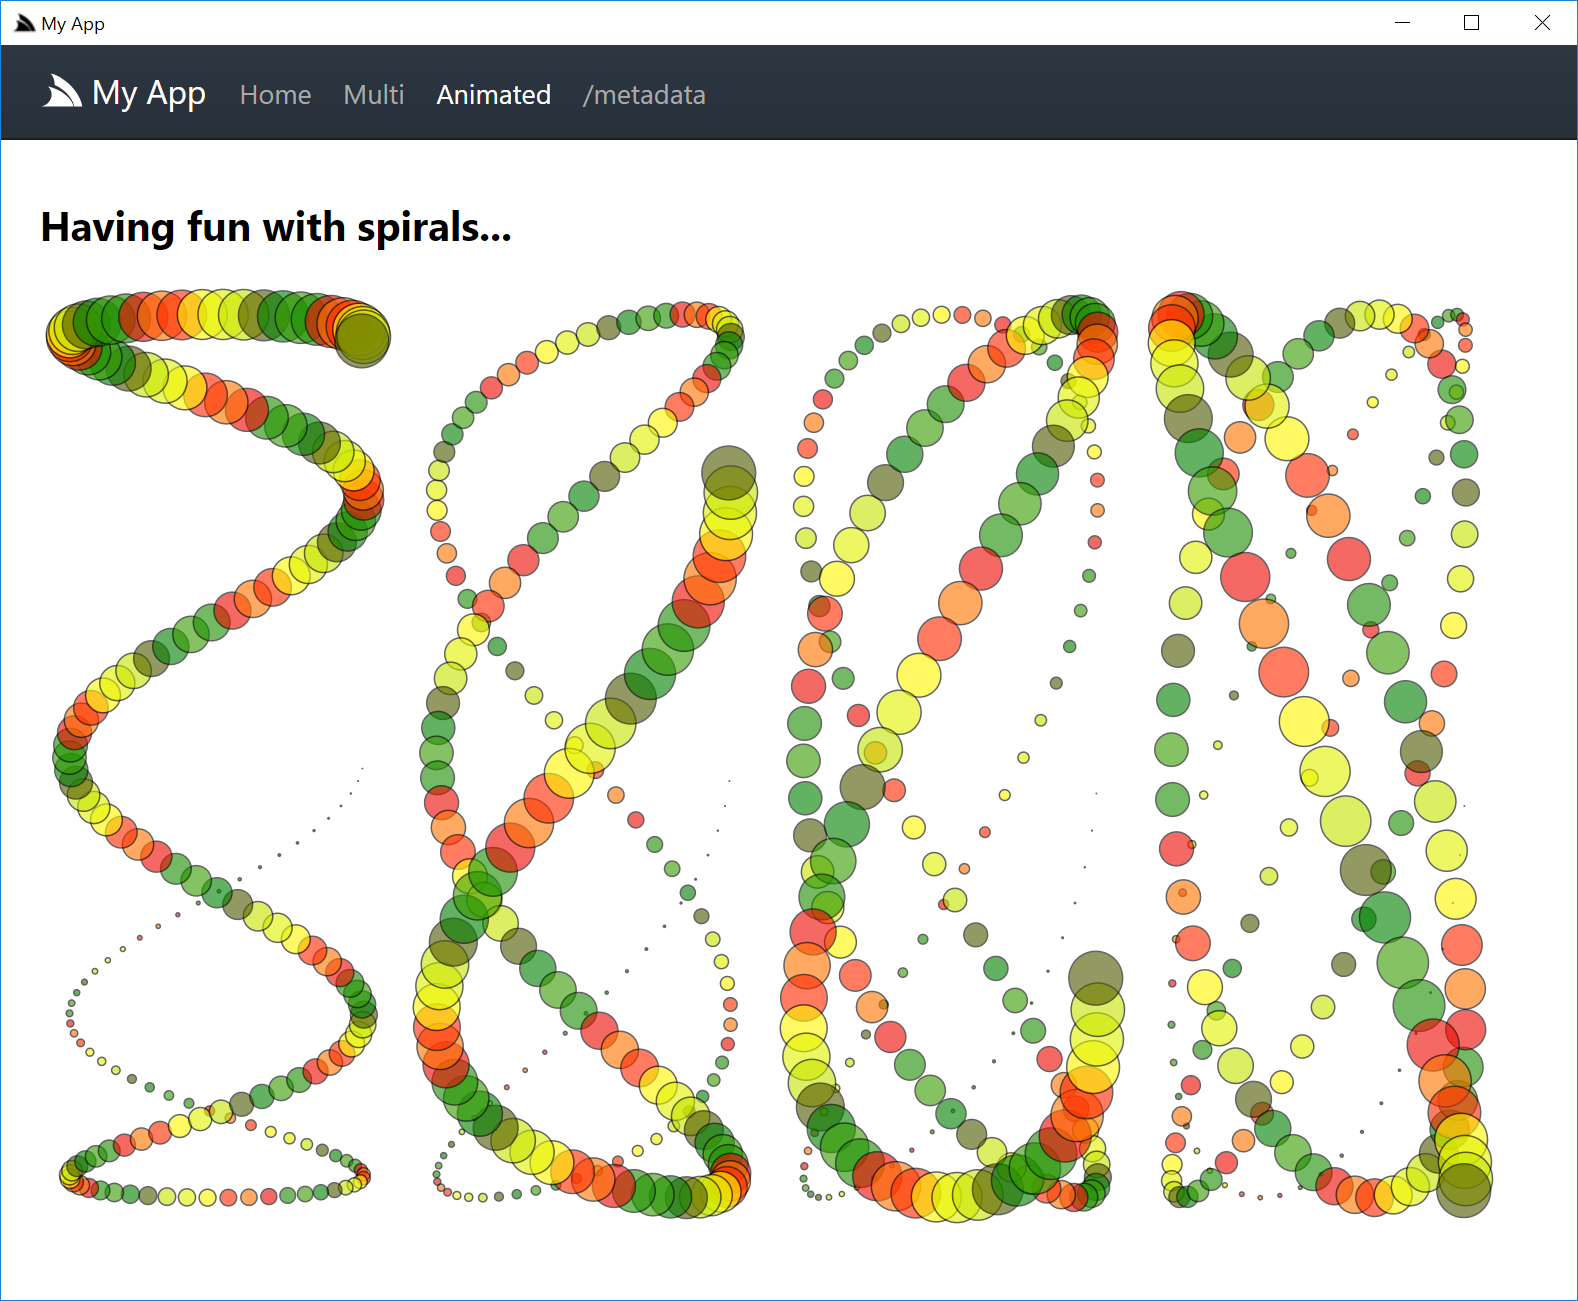
Checkout spirals.web-app.io for the animated version.
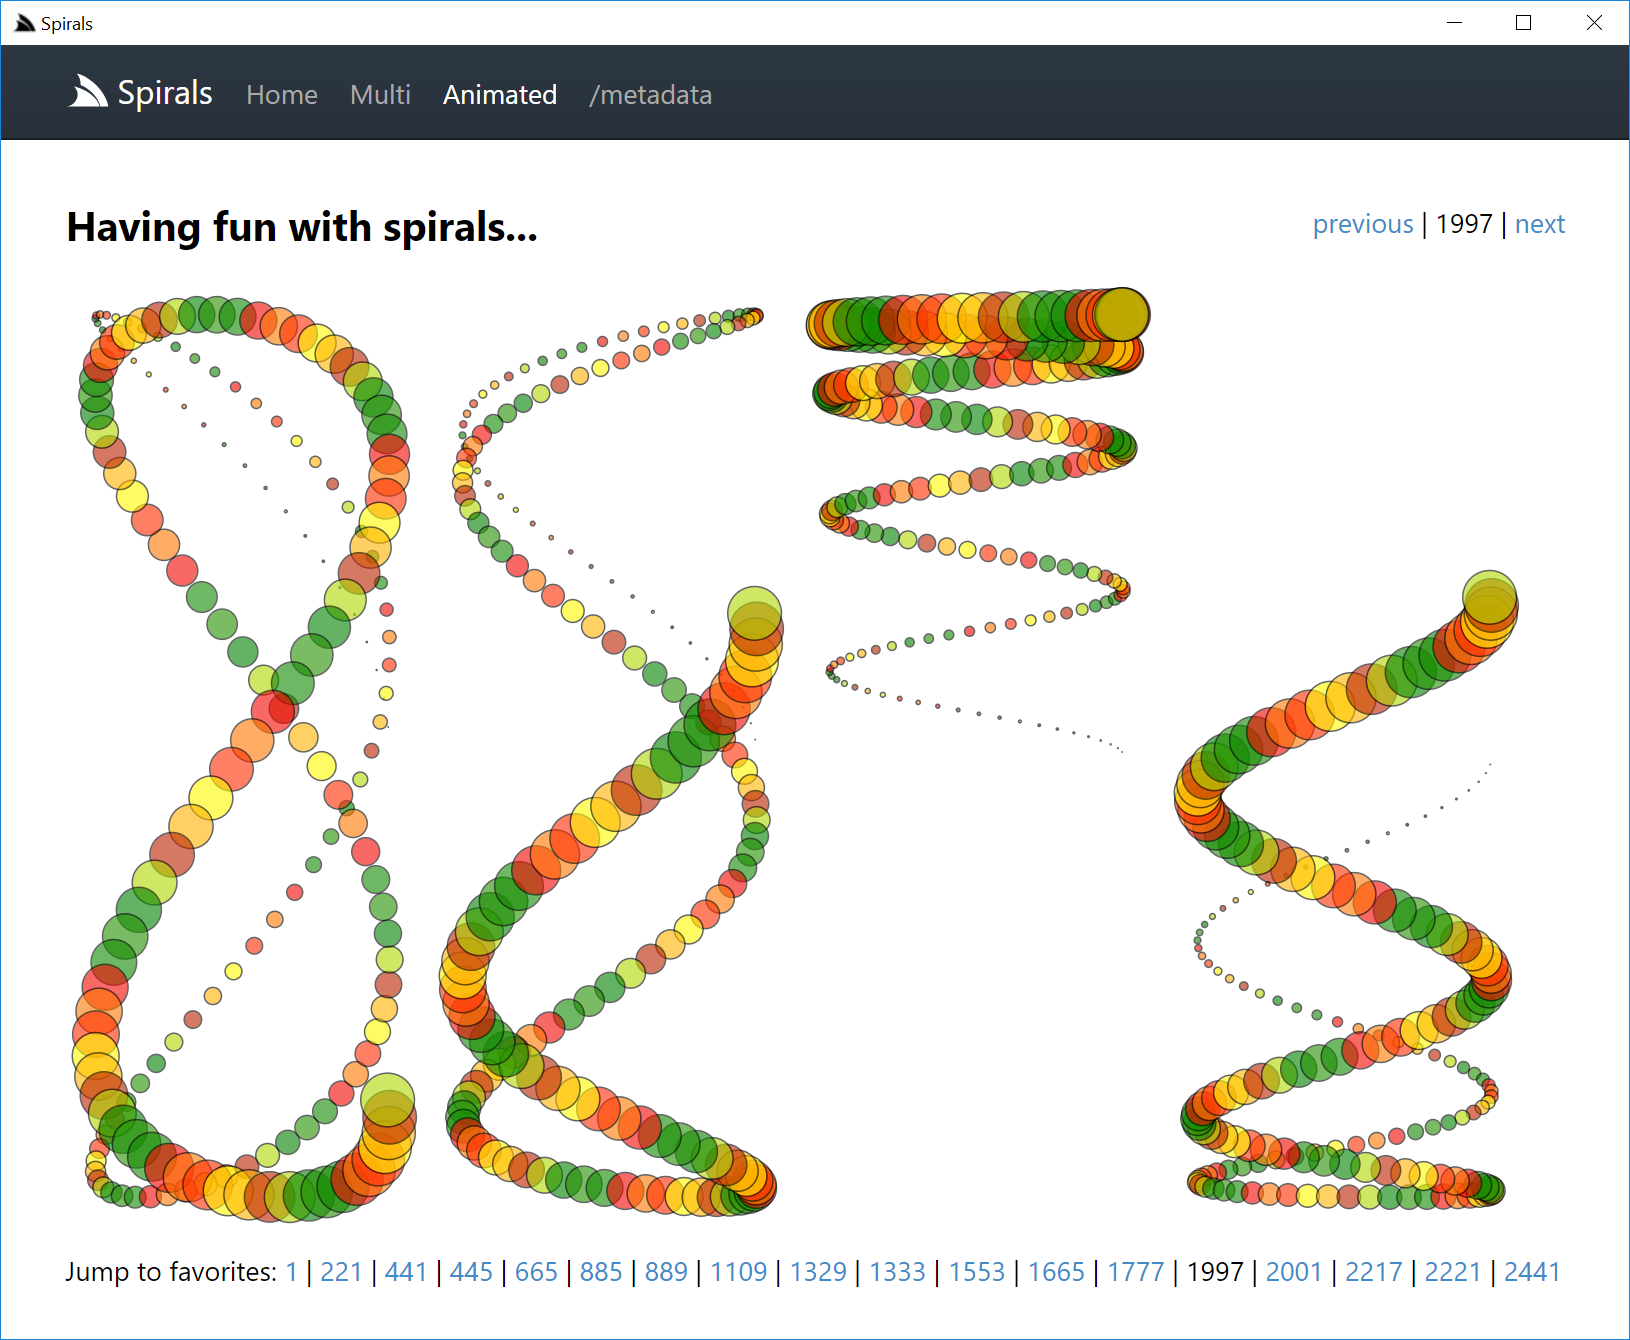
Navigating
Lets expand our App beyond these static Spirals by enabling some navigation, this is easily done by adding the snippet below on the top of the home page:
{{ from ?? 1 | toInt | assignTo: from }}
<div style="text-align:right;margin:-54px 0 30px 0">
{{#if from > 1}} <a href="?from={{ max(from-1,0) }}" title="{{max(from-1,0)}}">previous</a> |{{/if}}
{{from}} | <a href="?from={{ from+1 }}" title="{{max(from-1,0)}}">next</a>
</div>
Whilst the multi.html and animated.html pages can skip by 4:
{{ from ?? 1 | toInt | assignTo: from }}
<div style="text-align:right;margin:-54px 0 30px 0">
{{#if from > 1}} <a href="?from={{ max(from-4,0) }}" title="{{max(from-1,0)}}">previous</a> |{{/if}}
{{from}} | <a href="?from={{ from+4 }}" title="{{max(from-1,0)}}">next</a>
</div>
Then changing the index.html SVG fragment to use the from value on the y-axis:
<svg height="640" width="240">
{{#each range(180) }}
{{ 120 + 100 * cos((5) * it * 0.02827) | assignTo: x }}
{{ 320 + 300 * sin((from) * it * 0.02827) | assignTo: y }}
<circle cx="{{x}}" cy="{{y}}" r="10" fill="rgb(0,100,0)" stroke="black" stroke-width="1"/>
{{/each}}
</svg>
Whilst the multi.html and animated.html pages can use it in its range(from, 4) function:
{{#each i in range(from, 4) }}
<svg height="640" width="240">
{{#each range(180) }}
{{ 120 + 100 * cos((5) * it * 0.02827) | assignTo: x }}
{{ 320 + 300 * sin((1+i) * it * 0.02827) | assignTo: y }}
<circle cx="{{x}}" cy="{{y}}" r="{{it*0.1}}" fill="rgb(0,{{it*1.4}},0)" stroke="black" stroke-width="1"/>
{{/each}}
</svg>
{{/each}}
With navigation activated we can quickly scroll through and explore different spirals. To save ourselves the effort of finding them again lets catalog our favorite picks and add them to a bookmarked list at the bottom of the page. Here are some interesting ones I've found for the home page:
<div>
Jump to favorites:
{{#each [1,5,101,221,222,224,298,441,443,558,663,665,666,783,888] }}
{{#if index > 0}} | {{/if}} {{#if from == it }} {{it}} {{else}} <a href="?from={{it}}">{{it}</a> {{/if}}
{{/each}}
</div>
and my top picks for the multi.html and animated.html pages:
<div>
Jump to favorites:
{{#each [1,217,225,229,441,449,661,669,673,885,1338,3326,3338,4330,8662,9330,11998] }}
{{#if index > 0}} | {{/if}} {{#if from == it }} {{it}} {{else}} <a href="?from={{it}}">{{it}</a> {{/if}}
{{/each}}
</div>
If you've found more interesting ones, let me know!
Now it's just a matter of signing off our digital piece by giving it a name in your app.settings:
name Spirals
Which replaces the name in the menu and used in any shortcuts that are created, and with those finishing touches our App's journey
into the rich colorful world of SVG is complete:
Recap
If you've reached this far you've created a beautiful Desktop App without waiting for a single build or App restart, in a live and interactive environment which let you rapidly prototype and get real-time feedback of any experimental changes, to produce a rich graphical app with fast and fluid animations taking advantage of the impressive engineering invested in Chrome, implemented declaratively by just generating SVG markup.
As Bret Victor shows us in his seminal Inventing on Principle presentation, being able to immediately visualize changes gives us a deep connection and intuition with our creations that's especially important when creating visual software like UIs where the rapid iterations lets us try out and perfect different ideas in the moment, as soon as we can think of them.
It's a good example of the type of App that would rarely be considered to be created with a native GUI toolkit and 2D drawing API, the amount of effort and friction to achieve the same result would take the enjoyment out of the experience and the end result would have much less utility where it wouldn't be able to be re-used on different OS's or other websites.
Publishing your App
To share our digital masterpiece with the world we just need to publish it in a GitHub repo, which I've already done for my Spirals app at: https://github.com/mythz/spirals.
Anyone will then be able to install your App by first downloading the app tool themselves (.NET Core 2.1 Required):
$ dotnet tool install -g app
Then running install with the name of the repo and your GitHub User or Organization name in the --source argument:
$ app install spirals --source mythz
Which installs instantly thanks to the 7kb .zip download that can then be opened by double-clicking on the generated Spirals Desktop Shortcut:
Publishing your App with binaries
The unique characteristics of Web Apps affords us different ways of publishing your App, e.g. to save users from needing to install the
app tool you can run publish in your App's directory:
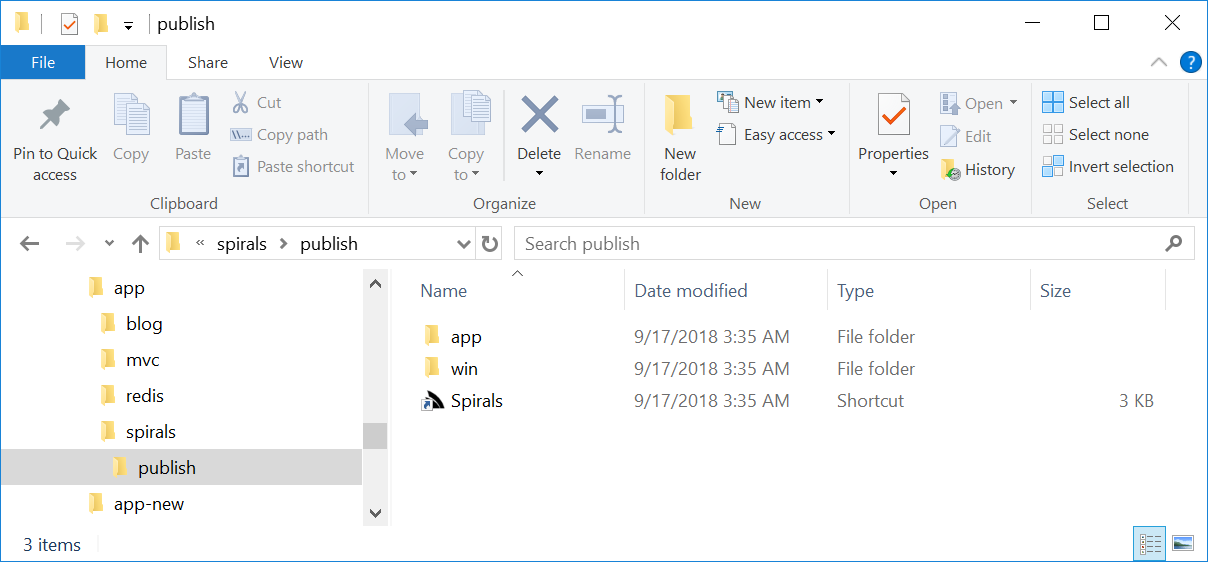
$ app publish
Which will copy your App to the publish/app folder and the app tool binaries in the publish/cef folder:

A Desktop shortcut is also generated for convenience although this is dependent on where the App is installed on the end users computer.
If you know it will be in a fixed location you can update the Target and Start in properties to reference the cef\app.dll and
/app folder:
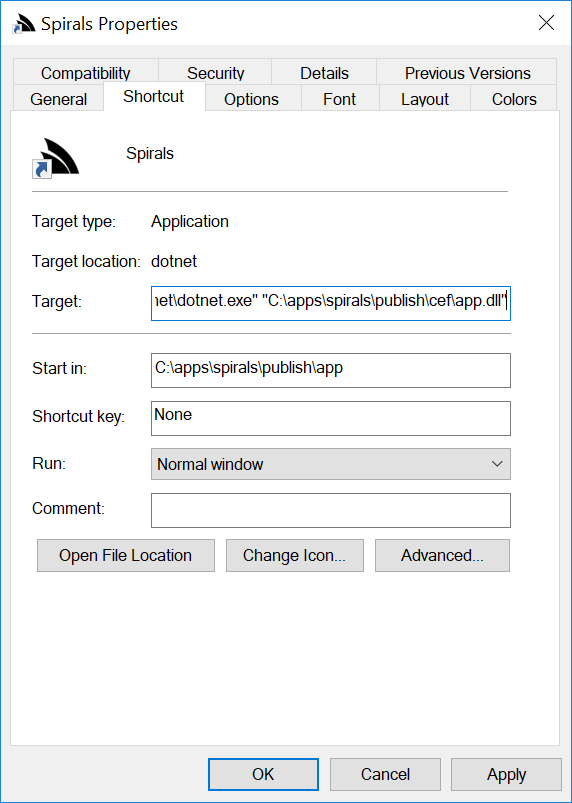
This includes all app binaries needed to run Web Apps which compresses to 89 MB in a .zip or 61 MB in 7-zip .7z archive.
Publishing a self-contained Windows 64 executable
But that's not all, we can even save end users who want to run your app the inconvenience of installing .NET Core :) by creating a self-contained executable with:
$ app publish-exe
This downloads the WebWin self-contained .NET Core 2.1 binaries and copies then to publish/win folder with
the app copied to publish/app.
This publishing option includes a self-contained .NET Core with all app binaries which compresses to 121 MB in a .zip or 83 MB in 7-zip .7z archive.
Publish to the world
To maximize reach and accessibility of your App leave a comment on the App Gallery where after we link to it on NetCoreWebApps it will available to all users when they look for available apps in:
$ app list
Which can then be installed with:
$ app install spirals
Learnable Living Apps
A beautiful feature of Web Apps is that they can be enhanced and customized in real-time whilst the App is running. No pre-installation of dev tools
or knowledge of .NET and C# is required, anyone can simply use any text editor to peek inside .html files to see how it works and see any of their
customizations visible in real-time.
Apps can be customized using both the JavaScript-like #Script language syntax for any "server" HTML generation which can be further customized by any JavaScript on the client.
We'd loved to see this aspect of Web Apps utilized as we believe it creates an enjoyable environment that's an easy introduction for curious people who are new and want to learn programming. We believe it can serve as a great tool to have in a classroom where students can install a "half-finished" App that students can have fun experimenting with and complete.
Advanced Web Apps
Another capability not obvious in Web Apps is that they're highly extensible as you're not limited to just using the built-in methods and can easily extend the language with your own custom blocks and methods to be able to call any .NET method via Plugins.
web
Up until now we've seen how easy it is to run and install Web Apps in a Windows Application but what about our friends not using Windows? and how can we deploy our app as a website?
For that we've created the web dotnet tool which is built from the code-base and has the same features as app but without any dependencies on
Windows so it can be used wherever .NET Core can, i.e. on Windows, macOS or Linux. Since Web Apps don't require any builds or build tools we're
able to re-think the experience of developing Web Apps which are not shackled by the traditional constraints of developing with .NET.
The web tool was actually created before app as a way to further simplify its development model by eliminating the need for managing and deploying
Web App binaries manually as they can be all be installed with a single dotnet tool command where all Web Apps can be updated to use the latest
release with:
$ dotnet tool update -g app
For these reasons we've made web the primary way of developing Web Apps and converted all existing Web App Templates and Web App Demos to use it.
The experience of developing the dotnet web tool shows us how easily we can deliver value-added functionality that benefits all Web Apps. By contrast
in normal .NET Applications any efforts like packaging your App in a Windows Desktop Application is bespoke to your Application whereas since all
Web Apps run the same binary we can build this functionality once in the app tool that now let's all Web Apps run within a Windows Desktop Application.
Likewise all Web Apps can also be run as .NET Core websites. You can replace all existing app commands we've seen up til now with web to run
your App as a .NET Core website instead of a Windows Desktop App, e.g. we can run our spirals app we've created above with:
$ web
Where it will run it as a .NET Core app at ASPNETCORE_URLS if specified, or http://localhost:5000 by default.
But as there's no Windows dependencies there are some minor differences, e.g. if you create a shortcut for Spirals:
$ web shortcut
It will create either spirals.bat or spirals.sh depending on whether its run on Windows or macOS/Linux. E.g. double-clicking start.bat will run
spirals as a .NET Core website on http://localhost:5000 and open the URL in your preferred web browser.
Likewise publishing your App:
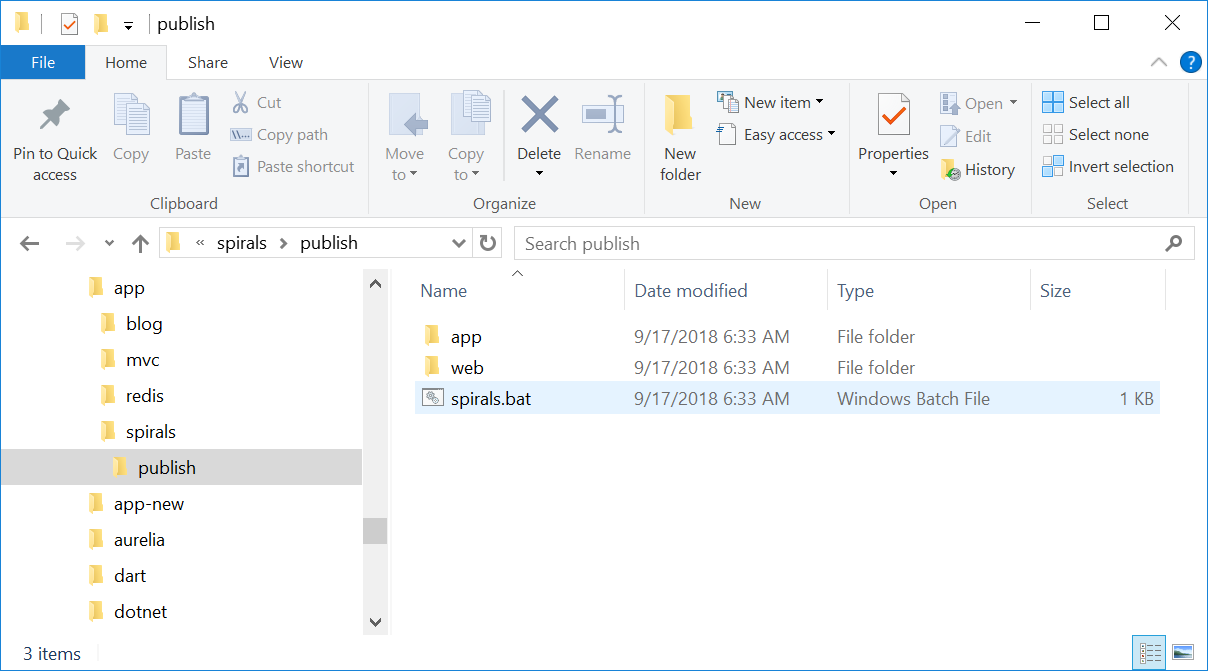
$ web publish
Will copy your App to the /app folder, the web tool binaries to the web/ folder and create a start.bat shortcut:
Apart from those differences everything else is the same and you can use app and web interchangeably. web even lets you publish
a self-contained Windows 64 version of your App:
$ web publish-exe
As it's just copying the pre-built binaries from WebWin.
Deploying Web Apps
The same web tool for developing Web Apps on Windows is also used for deploying and hosting them on Linux that sports new templates
to make the process effortless. We'll walk through how spirals.web-app.io was deployed.
If you haven't already create a new deploy user account then set up SSH and copy over your SSH public key to your remote server.
Then using a Unix command-line or Windows Subsystem for Linux (WSL) ssh into your remote server:
$ ssh deploy@web-apps.io
For simplifying the one-time setup, it's easier to sign-in as super user:
$ sudo su -
Install the dotnet web tool:
$ dotnet tool install -g web
Change into the directory where want to install the app:
$ cd /home/deploy/apps
Install your app from your GitHub project:
$ web install spirals --source mythz
Optional, but you can test that your app runs without issues with:
$ cd spirals && web
To setup the nginx reverse proxy for this website change into:
$ cd /etc/nginx/sites-available/
Then create an nginx website configuration template with:
web init nginx
Rename it to the domain name you want to host it under:
$ mv my-app.web-app.io spirals.web-app.io
Edit the file and replace it to use your App settings:
$ vi spirals.web-app.io
Specifically you want to change the domain name and port you want to host it on which you can do quickly with the search/replace commands:
:%s/my-app.web-app.io/spirals.web-app.io/g
:%s/5000/5009/g
Then type :wq to quit vi. To enable the site in nginx we need to create a symbolic link in /sites-enabled:
$ ln -s /etc/nginx/sites-available/spirals.web-app.io /etc/nginx/sites-enabled/spirals.web-app.io
Then reload nginx to pick up changes:
$ /etc/init.d/nginx reload
Now that we have our website configured with nginx we need to setup supervisor to start and monitor the .NET Core process by changing into:
$ cd /etc/supervisor/conf.d
Then generate a supervisor configuration template with:
$ web init supervisor
Rename it to your Web App's folder name:
$ mv app.my-app.conf app.spirals.conf
Then use vi to customize the configuration for your App:
$ vi app.spirals.conf
If your apps are located in /home/deploy/apps/ then you can just run the Search/Replace rules:
:%s/my-app/spirals/g
:%s/5000/5009/g
Which will change it to:
[program:app-spirals]
command=/home/deploy/.dotnet/tools/web --release
directory=/home/deploy/apps/spirals
autostart=true
autorestart=true
stderr_logfile=/var/log/app-spirals.err.log
stdout_logfile=/var/log/app-spirals.out.log
environment=ASPNETCORE_ENVIRONMENT=Production,ASPNETCORE_URLS="http://*:5009/"
user=deploy
stopsignal=INT
The
--releaseflag overrides debug inapp.settingsso it's always run in release mode.
After reviewing the changes, tell supervisor to register and start the supervisor process with:
$ supervisorctl update
Where your website will now be up and running at: spirals.web-app.io.
Updates
After the one-time setup the process, updating the App can be more easily done with:
$ cd /home/deploy/apps
$ sudo /home/deploy/.dotnet/tools/web install spirals --source mythz
$ sudo supervisorctl restart app-spirals
Which can also be deployed from the Windows Command Prompt using a remote SSH command by copying the contents below in a deploy-spirals.sh text file:
ssh -t deploy@web-app.io "cd /home/deploy/apps && sudo /home/deploy/.dotnet/tools/web install spirals --source mythz && sudo supervisorctl restart app-spirals"
Where App updates can be performed with a single WSL bash command:
$ bash deploy-spirals.sh
Let us know what you create!
We hope you're excited about these new features as we are and can't wait to see what you build with them - please share them with us so we can include it in the App Gallery and make it easy for everyone else to discover and use.
Google Auth Provider
The GoogleOAuth2Provider has been updated to resolve a change Google made to their OAuth endpoints which required moving to a hybrid solution to by-pass
DotNetOpenAuth to handle the last pass of the OAuth flow.
In addition we've created a new GoogleAuthProvider without any dependencies to DotNetOpenAuth so it can be used in both .NET Framework
and .NET Core projects where it's now our preferred OAuth provider for Google.
To switch to the new provider you'll need to change your AppSettings to oauth.google.*, e.g:
<add key="oauth.google.ConsumerKey" value="..." />
<add key="oauth.google.ConsumerSecret" value="..." />
You'll also need to update your Google OAuth App and Auth route to use the /auth/google route, otherwise registering it is the
same as every other OAuth provider:
Plugins.Add(new AuthFeature(() => new CustomUserSession(),
    new IAuthProvider[]
    {
        new BasicAuthProvider(),                    //Sign-in with HTTP Basic Auth
        new CredentialsAuthProvider(),              //HTML Form post of UserName/Password credentials
        new GoogleAuthProvider(AppSettings),        //Sign-in with Google OAuth Provider
        new TwitterAuthProvider(AppSettings),       //Sign-in with Twitter
        new FacebookAuthProvider(AppSettings),      //Sign-in with Facebook
        new GithubAuthProvider(AppSettings),        //Sign-in with GitHub OAuth Provider
        new YandexAuthProvider(AppSettings),        //Sign-in with Yandex OAuth Provider
        new VkAuthProvider(AppSettings),            //Sign-in with VK.com OAuth Provider
        new DigestAuthProvider(AppSettings),        //Sign-in with HTTP Digest Auth
    })
{
    HtmlRedirect = "/",
    IncludeRegistrationService = true,
});
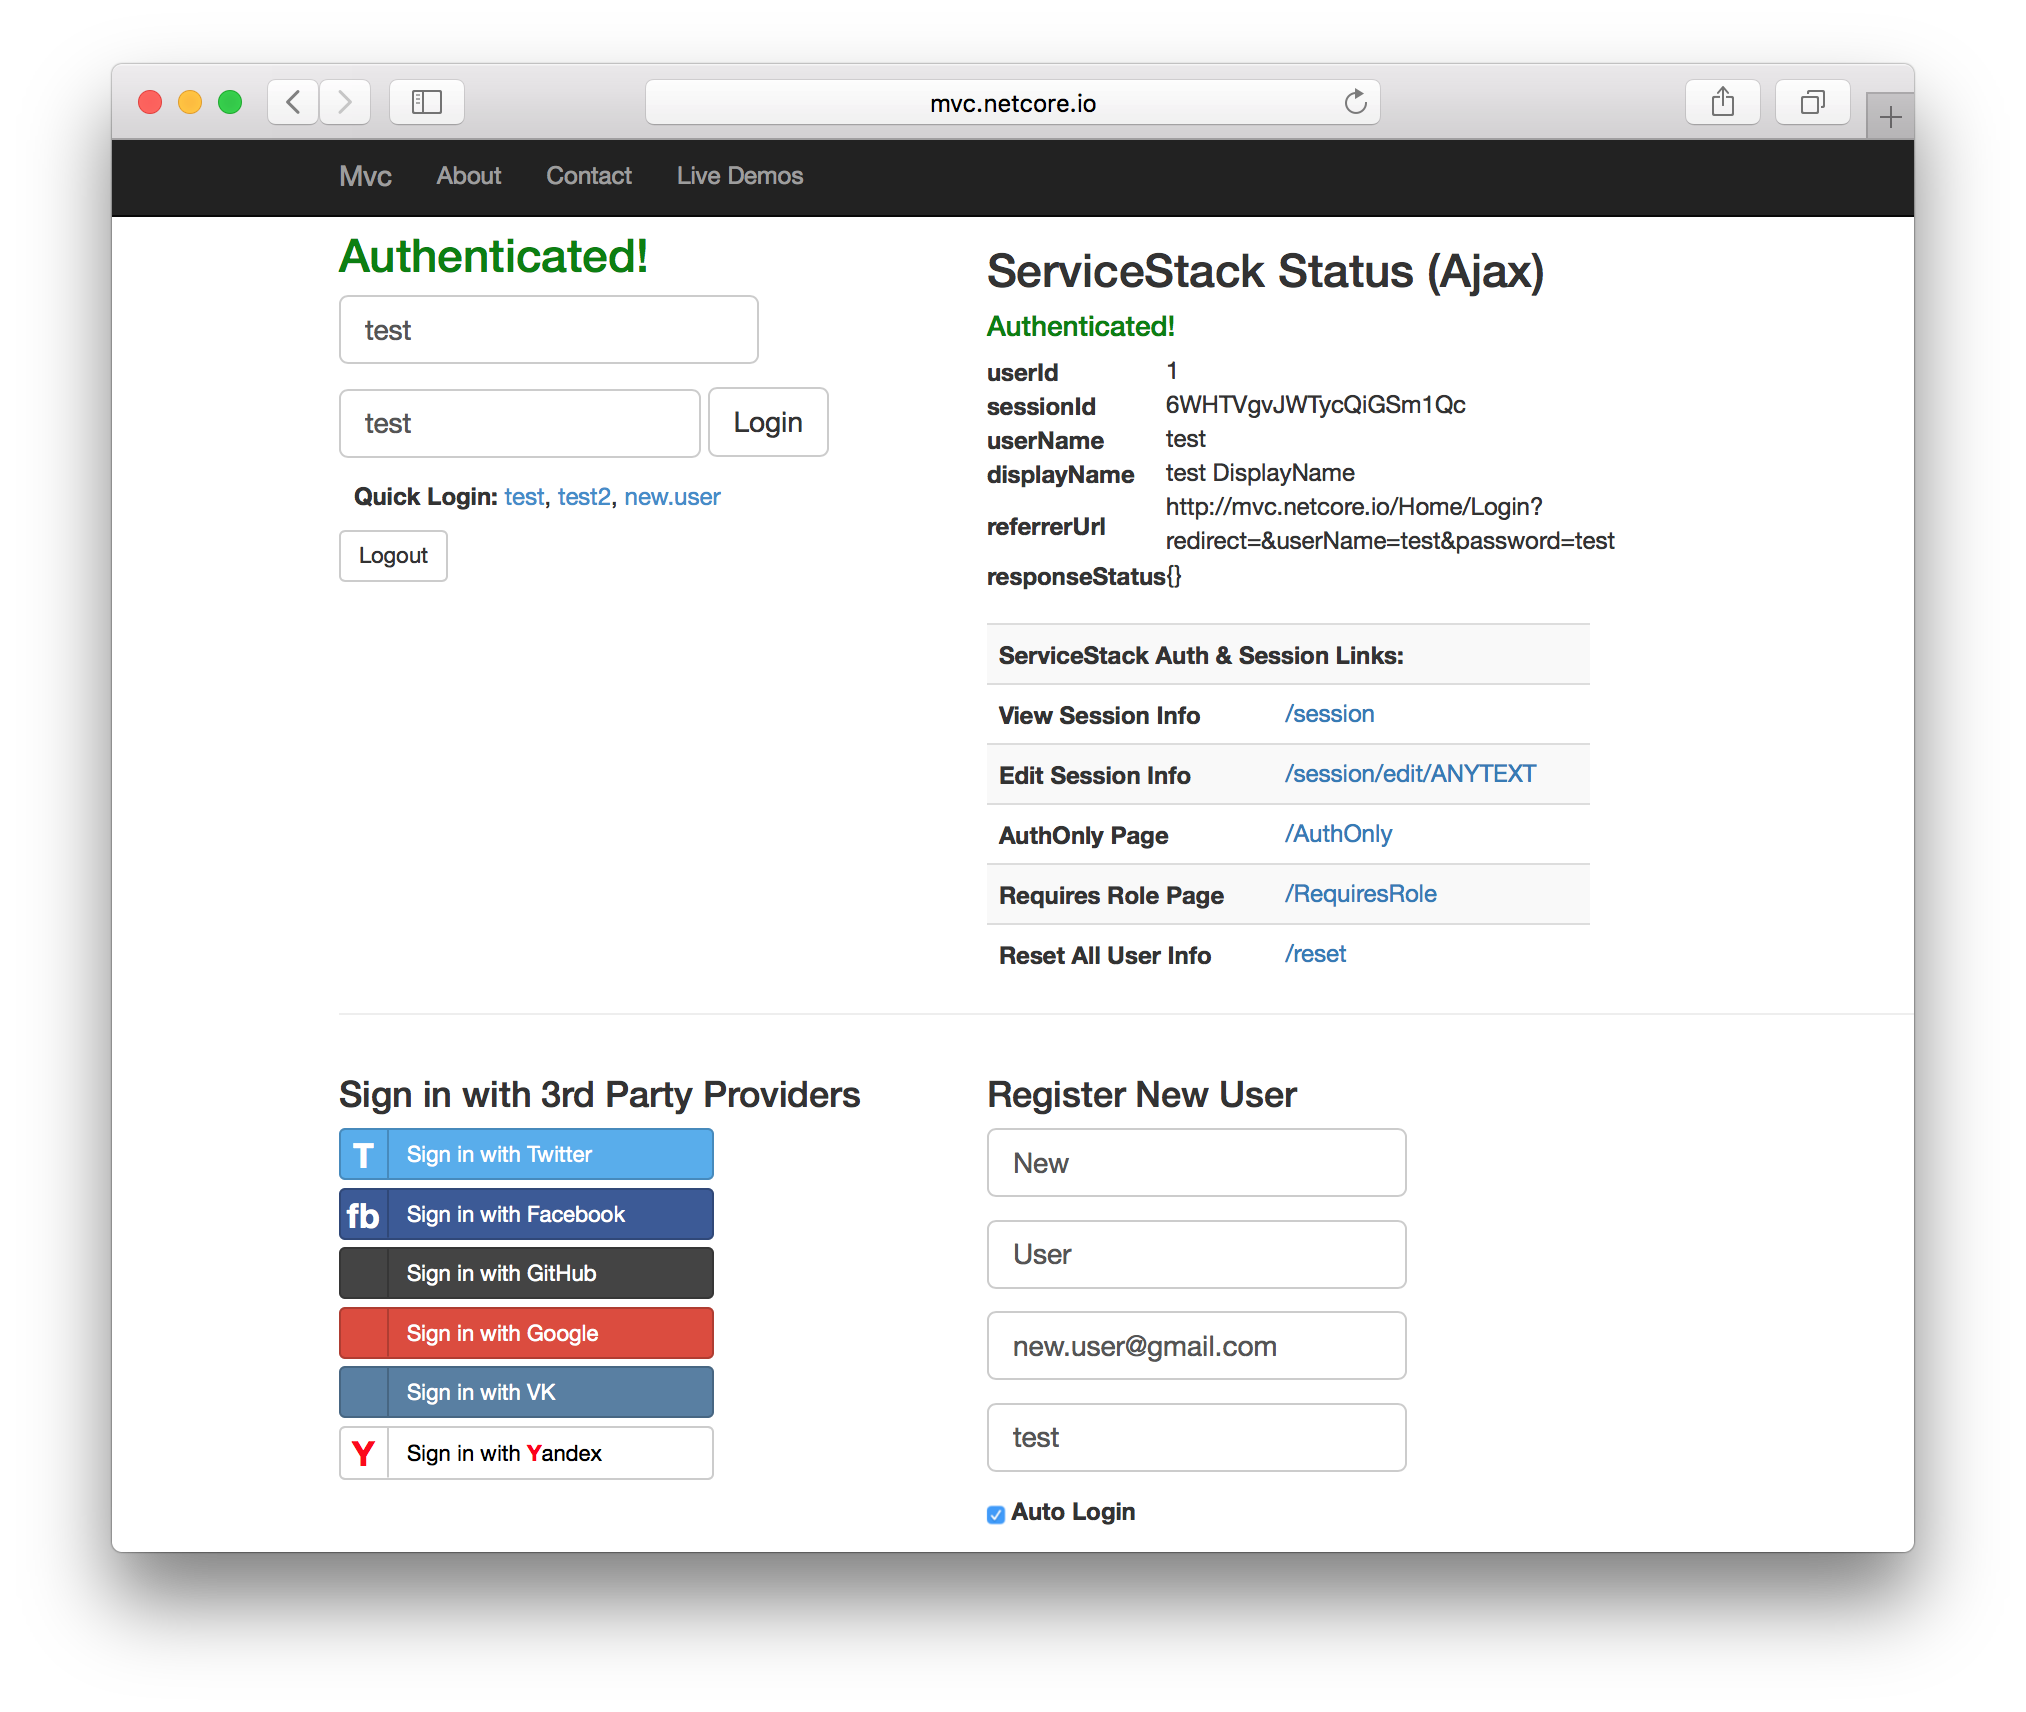
The .NET Core SimpleAuth.Mvc Live Demo has been updated to include a working example at:
ServiceStack.Text
The JsConfig internals have been refactored to use "config snapshots" where new Scopes
are created with a copy of the global configuration so it's no longer accessed when serializing/deserializing with a custom scope.
Global Configuration
To enforce that global configuration should only be initialized on once on Startup so it remains immutable at runtime you can use the new JsConfig.Init() API:
JsConfig.Init(new Config {
    DateHandler = DateHandler.ISO8601,
    AlwaysUseUtc = true,
    EmitLowercaseUnderscoreNames = false,
    EmitCamelCaseNames = false,
    ExcludeDefaultValues = true,
});
Which is now the preferred way to initialize global configuration where it will throw a NotSupportedException if attempting to change Global configuration
at runtime which isn't supported. You need to use a custom scope if you want to use different serialization settings at runtime.
Custom Scopes
The existing JsConfig.With() API to create a custom scope using optional properties has been deprecated:
using (JsConfig.With(emitLowercaseUnderscoreNames: true,
                     emitCamelCaseNames: false,
                     propertyConvention: PropertyConvention.Lenient))
{
    return text.FromJson<T>();
}
The problem with using optional parameters is that adding new optional parameters is a binary-incompatible change which requires re-compilation if a newer version of ServiceStack.Text has added new configuration option.
Instead we recommend using the new JsConfig.With(new Config { ... }) API:
using (JsConfig.With(new Config {
    EmitLowercaseUnderscoreNames = true,
    EmitCamelCaseNames = false,
    PropertyConvention = PropertyConvention.Lenient))
{
    return text.FromJson<T>();
}
Or if preferred you can continue to use JsConfig.BeginScope():
using (var scope = JsConfig.BeginScope())
{
    scope.EmitLowercaseUnderscoreNames = true;
    scope.EmitCamelCaseNames = false;
    scope.PropertyConvention = PropertyConvention.Lenient;

    return text.FromJson<T>();
}
ServiceStack.Templates
For better conformity with JavaScript's behavior both 'single' and "double-quoted" strings have been changed to adopt the same escaping
behavior as template literal '`' quoted strings. You can use ′prime quotes′ to retain existing escaping behavior which is also what's
used in Special string argument syntax where the previous
escaping behavior is most useful:
{{ [3,4,5] | select: { it | incrBy(10) }\n }}