INFO
The "Lite" templates are obsolete, we recommend starting from ASP.NET Core Identity Auth which all configured with JavaScript Modules without requiring any Bundlers
The question we keep asking ourselves is how can ServiceStack make modern Web Development simpler, the natural choice was to provide pre-configured Webpack-powered SPA Project Templates - brining the recommended SPA development model for all popular SPA frameworks to .NET, which we've been doing successfully and seamlessly integrated with ServiceStack for years.
However the next leap in simplicity wont be coming from adding additional tooling to manage the complexity, it will be from removing the underlying complexity entirely. Fortunately one of the targets all premier SPA frameworks offer are encapsulated UMD packages so they can be referenced as a single include in online IDE's like codepen.io but also for simple Web Apps that want to gradually adopt these frameworks but want to avoid the complexity of maintaining an npm build system.
These UMD packages lets us return back to the simple era if web development where we can go back to referencing libraries using simple script includes - which is the strategy embraced in ServiceStack's new "lite" project templates.
Light on Complexity, Big on Features
Surprisingly whilst we're able to rid our selves of the complexity of maintaining an npm-based build system, we're still able to enjoy many of the features that make SPA development with Webpack a joy:
- Integrated hot-reloading
- Advanced JavaScript language features
- Continue developing with same componentized development model as done when using Webpack
- Future proofed to use optimal ES6 source code
- TypeScript with runtime type-checking verification and auto-complete
- Incremental compilation
- TypeScript declarations are included for all default packages
- Smart, effortless bundling and minification
- Optimal unminified during development and minified for production
- No reliance on external tooling necessary, but can use same bundling configuration in website
_layout.htmlif pre-compilation is preferred
Essentially the "lite" templates goal are to provide the richest suite of functionality possible with the least amount of complexity. TypeScript was adopted because it runs as a non-invasive global tool with no dependencies that enables us to take advantage of the latest JavaScript language features to be able to develop in modern JavaScript without compromises, in the same source code as a fully-fledged npm webpack build system, should you wish to upgrade to one in future.
Install
All ServiceStack Project Templates can now be created with our x .NET Core tool:
$ dotnet tool install -g x
If you previously had an existing x tool installed, update it to the latest version with:
$ dotnet tool update -g x
vue-lite
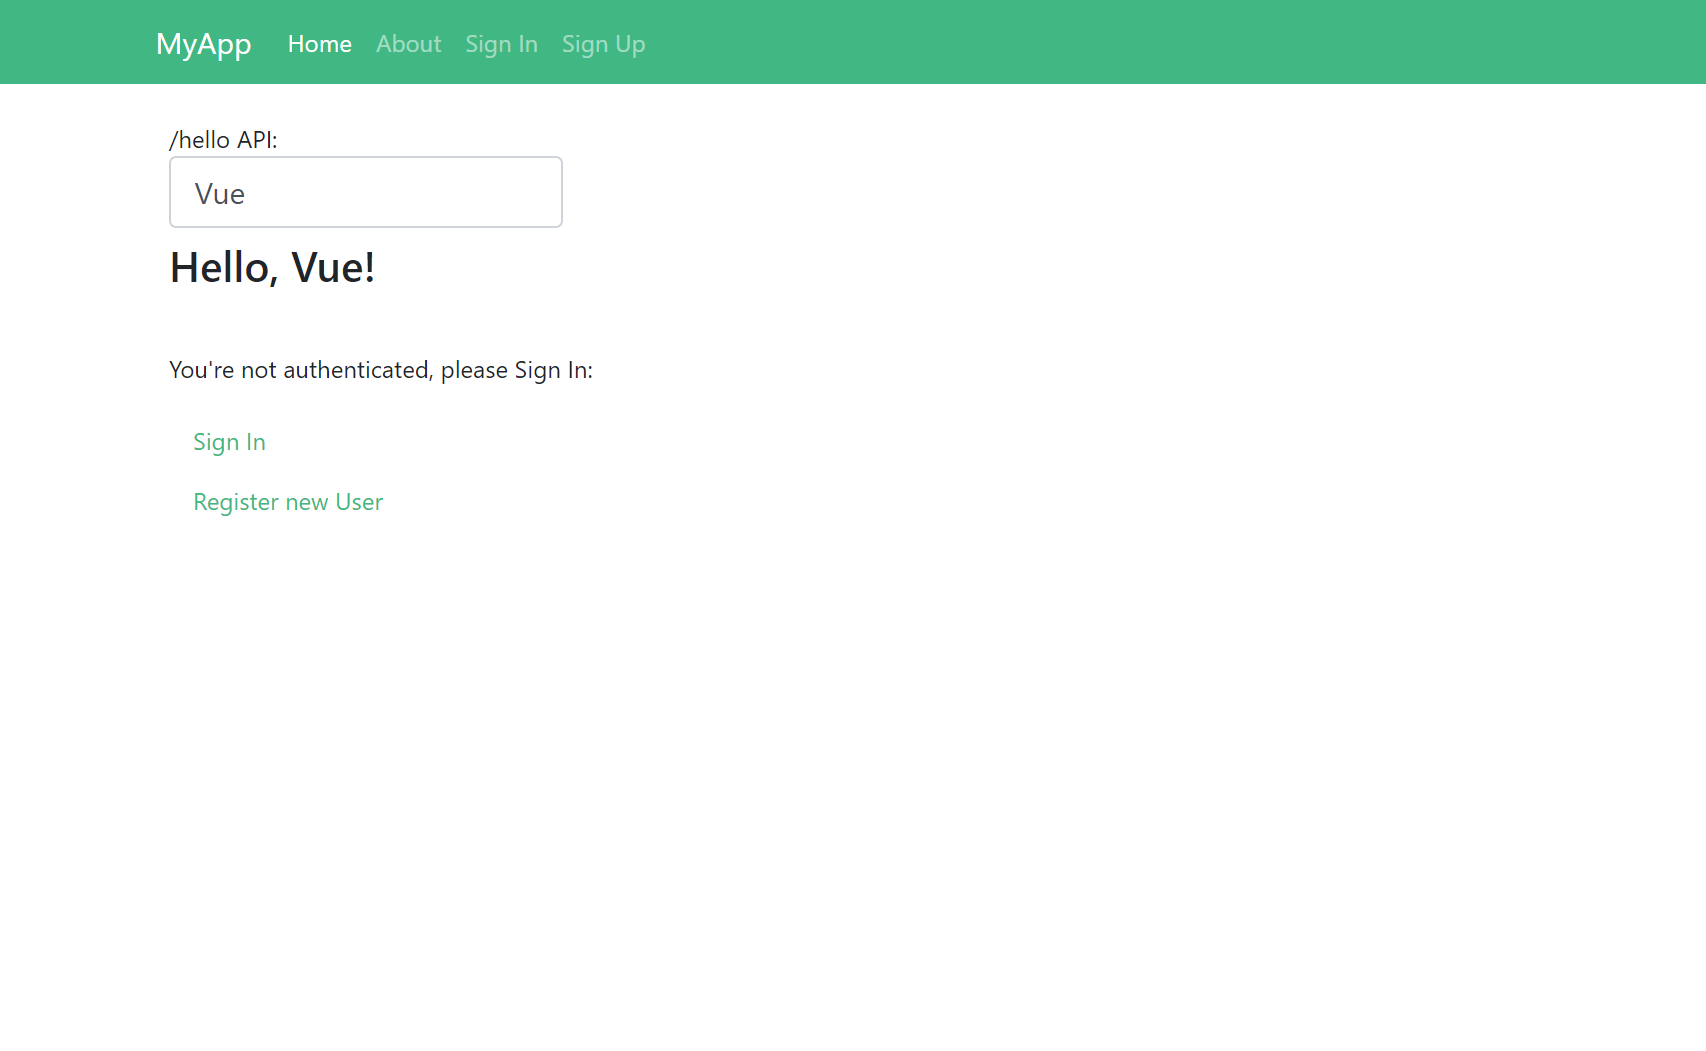
Browse source code, view vue-lite.web-templates.io live demo and install for .NET Core with:
$ x new LegacyTemplates/vue-lite ProjectName
Alternatively you can create an ASP.NET Core LTS project on .NET Framework with:
$ x new vue-lite-corefx ProjectName
react-lite
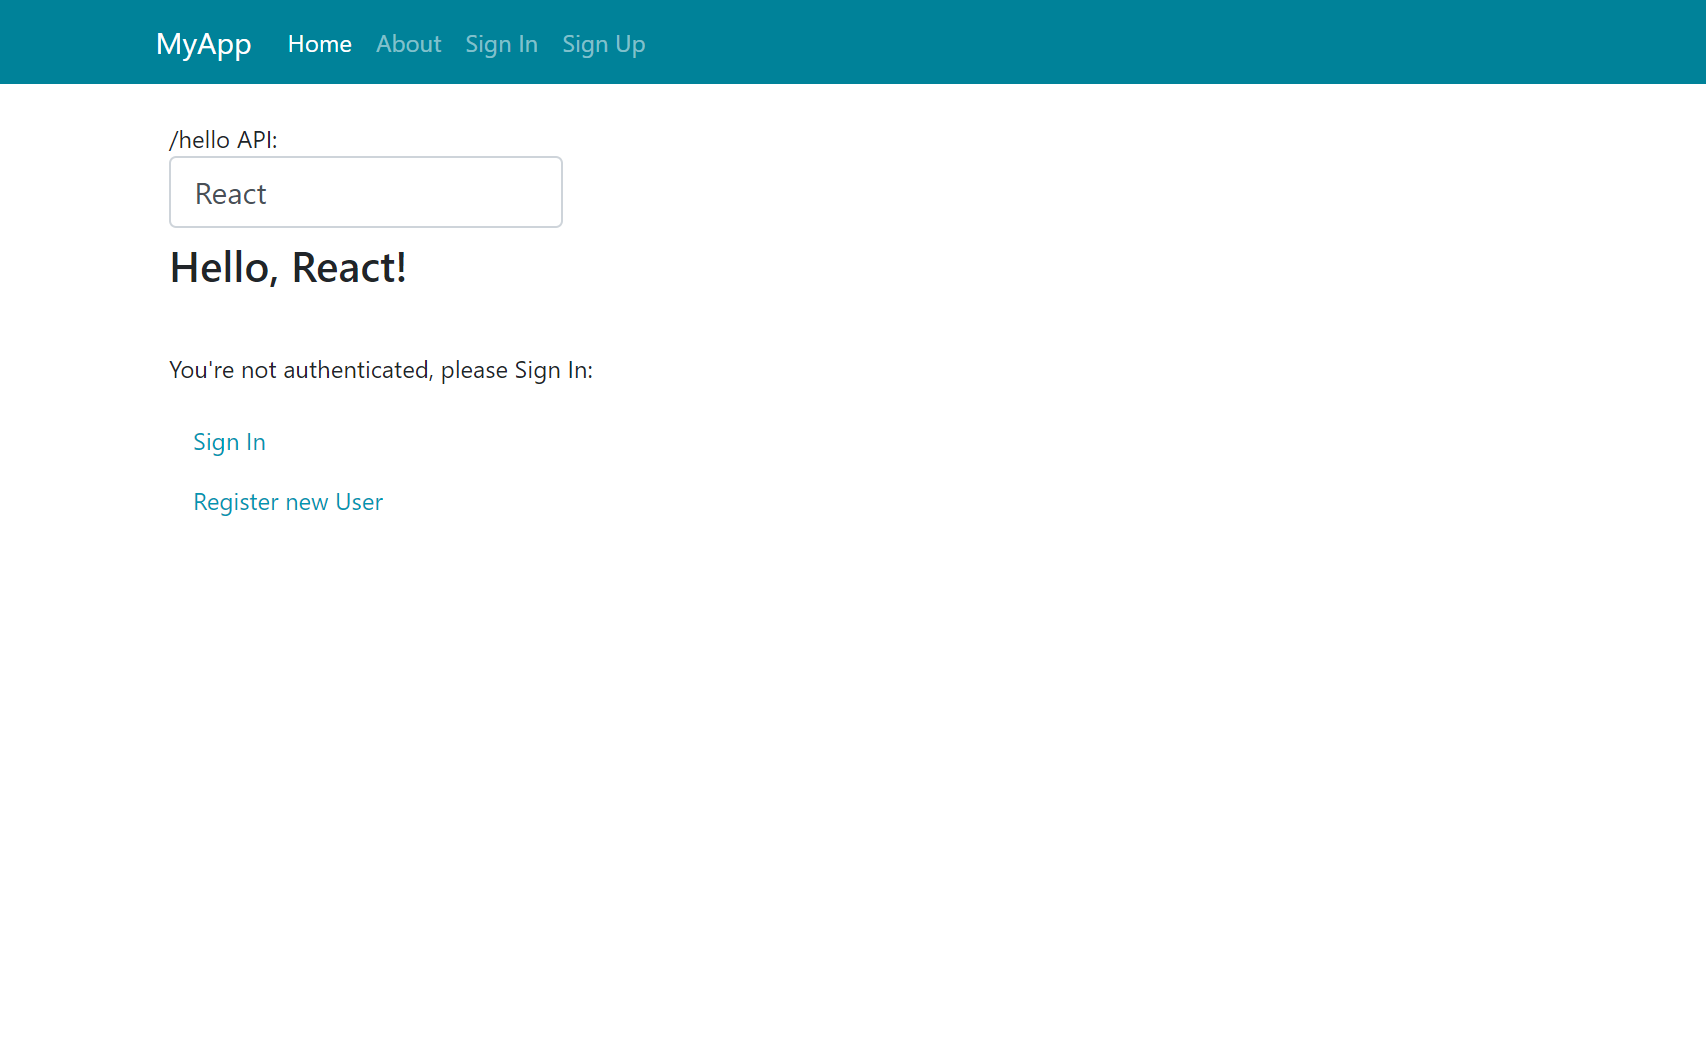
Browse source code, view react-lite.web-templates.io live demo and install for .NET Core with:
$ x new LegacyTemplates/react-lite ProjectName
Alternatively you can create an ASP.NET Core LTS project on .NET Framework with:
$ x new react-lite-corefx ProjectName
Development workflow
All that's needed for client development is to run TypeScript in "watch" mode:
$ tsc -w
Which monitors any changes to any .ts files and incrementally compiles their .js files on save. ServiceStack's built-in
static files hot-reloading detects
changes to any .js files and automatically reloads the page.
The for Server C# development, start your .NET Web App in a new Terminal window with:
$ dotnet watch run
INFO
Using watch run will monitor changes to C# source files and automatically re-builds and restarts the Server
Update TypeScript DTOs
After changing your ServiceStack Services, you can re-generate their Typed TypeScript DTOs with:
$ x ts
Which will recursively update and re-generate all *dto.ts in the current and sub directories.
Integrated Bundling
The way to eliminate needing a build and module system comes down to including dependencies in dependent order which is where ServiceStack's new bundling APIs help with. We'll walk through the vue-lite to see how this is easily done.
All the bundling logic for all .css and .js resources are contained within the _layout.html page below:
/wwwroot/_layout.html
<!DOCTYPE html>
<html lang="en">
<head>
<meta charset="UTF-8">
<meta name="viewport" content="width=device-width, initial-scale=1.0">
<meta http-equiv="X-UA-Compatible" content="ie=edge">
<link href="/favicon.ico" rel="icon">
<link rel="stylesheet" href="/lib/css/bootstrap/bootstrap.css">
<title>{{ title ?? 'MyApp' }}</title>
</head>
<body>
{{ 'buttons,svg-auth,app' |> cssIncludes }}
{{ 'svg-icons' |> cssIncludes |> svgFill('#41B883') }}
{{var cssBundle = '/'.findFilesInDirectory("bundle.*.css").first() }}
{{#if cssBundle }}
<link rel="stylesheet" href="/{{cssBundle.VirtualPath}}">
{{else}}
{{ 'content:/src/css/' |> bundleCss({ minify:false, cache:false, out:'/app.bundle.css' }) }}
{{/if}}
<i hidden>{{ '/js/hot-fileloader.js' |> ifDebugIncludeScript }}</i>
<script>NAV_ITEMS = {{ 'GetNavItems' |> execService |> json }}</script>
<script>AUTH = {{ 'Authenticate' |> execService({ ifErrorReturn: "null" }) |> json }}</script>
<noscript>
You need to enable JavaScript to run this app.
</noscript>
{{page}}
<div id="footer" style="text-align:center; position:absolute; bottom:50px; width:100%;">
<h4>
<img style="height:42px" src="{{ 'servicestack'.svgDataUri('#333') }}" />
<a href="https://github.com/NetCoreTemplates/vue-lite">Learn about this Vue template</a>
</h4>
<div>Copyright © {{ now |> dateFormat('yyyy') }}</div>
</div>
{{ [
`/lib/js/vue/vue.min.js`,
`/lib/js/vue-router/vue-router.min.js`,
`/lib/js/vue-class-component/vue-class-component.min.js`,
`/lib/js/vue-property-decorator/vue-property-decorator.min.js`,
`/lib/js/@servicestack/client/servicestack-client.min.js`,
`/lib/js/@servicestack/vue/servicestack-vue.min.js`,
] |> map => `<script src="${it}"></script>` |> joinln |> raw }}
<script>
var ALIASES = {
'vue': { default: Vue },
'vue-router': { default: VueRouter },
'vue-class-component': VueClassComponent,
'vue-property-decorator': VuePropertyDecorator,
'@servicestack/vue': ServiceStackVue
};
var global = window;
window.exports = {};
window.require = function(name) {
return ALIASES[name] || exports[name] || window[name] || exports;
};
Object.assign(window, window["@servicestack/client"]);
</script>
{{var jsBundle = '/'.findFilesInDirectory("bundle.*.js").first() }}
{{#if jsBundle }}
<script src="/{{jsBundle.VirtualPath}}"></script>
{{else}}
{{ [
'content:/src/components/',
'content:/src/shared/',
'content:/src/',
] |> bundleJs({ minify:false, cache:false, iife:true, out:`/app.bundle.js` }) }}
{{/if}}
{{ scripts |> raw }}
{{htmlError}}
</body>
</html>
Bundling happens on-the-fly at runtime when the index.html page is requested which is embedded in its nearest _layout.html (above).
CSS Bundling
The first bundle created is the .css bundle that's appropriately located in the <head/> section of the HTML page.
How and where the bundle is written depends on whether the page is loaded in Development (debug) or Release mode:
{{ 'content:/src/css/' |> bundleCss({ minify:false, cache:false, out:'/app.bundle.css' }) }}
Bundling Options
The bundler will include all target resources specified on the left of bundleCss using the behavior as specified in the argument options on the right:
minify- whether to minify the.cssfiles before bundlingcache- whether to use the previous cached version if existsdisk- whether to save the output bundle to disk or in the In Memory FileSystembundle- whether to bundle all.cssin a single file or emit include individual<link />importsout- virtual file path where to save the bundle (defaults to/css/bundle{.min}.css)
During development (in DebugMode) this will create an unminified bundle, ignoring any previous caches that's saved to the In Memory Virtual File at /css/bundle.css.
Whereas in Release mode it will create a minified bundle, with all subsequent requests using the pre-bundled asset written at /css/bundle.min.css.
No tooling or pre-compilation is required prior to deployment as the bundler will automatically create one if it doesn't already exist.
All virtual paths are from the wwwroot/ WebRoot. Paths ending with a / indicate to include all .css files in that directory, which
is included in DirectoryInfo (alphabetical) order.
If for example you wanted to include your App's default.css before bootstrap.css you can specify it first, where it will be included first
and ignored in subsequent references, e.g:
{{ [
'/assets/css/default.css',
'/assets/css/'
] |> bundleCss }}
Hot Reloading of Static Resources
The script below enables hot-reloading during development:
<i hidden>{{ '/js/hot-fileloader.js' | ifDebugIncludeScript }}</i>
Where it will automatically reload the page if it detects any modifications to any .html, .js or .css files,
Configured with:
if (Config.DebugMode)
{
    Plugins.Add(new HotReloadFeature {
        DefaultPattern = "*.html;*.js;*.css",
        VirtualFiles = VirtualFiles // Monitor ContentRoot to detect changes in /src
    });
}
The page placeholder is where the page will be rendered inside the Layout template:
{{page}}
JavaScript Library Bundling
The layout creates 2 JavaScript bundles, the first containing all 3rd Party libraries used in the App which is written to /js/lib.bundle{.min}.js
using the same bundling options as the bundleCss above:
{{ [
`/lib/js/vue/vue.min.js`,
`/lib/js/vue-router/vue-router.min.js`,
`/lib/js/vue-class-component/vue-class-component.min.js`,
`/lib/js/vue-property-decorator/vue-property-decorator.min.js`,
`/lib/js/@servicestack/client/servicestack-client.min.js`,
`/lib/js/@servicestack/vue/servicestack-vue.min.js`,
] |> map => `<script src="${it}"></script>` |> joinln |> raw }}
Register UMD Module Mappings
After importing the libraries we need to make the globals registered by the UMD dependencies available under the module name they are imported from.
When they don't match they need to be explicitly registered in the ALIASES object:
<script>
var ALIASES = {
    'vue': { default: Vue },
    'vue-router': { default: VueRouter },
    'vue-class-component': VueClassComponent,
    'vue-property-decorator': VuePropertyDecorator,
    '@servicestack/vue': ServiceStackVue
};
var global = window;
window.exports = {};
window.require = function(name) {
    return ALIASES[name] || exports[name] || window[name] || exports;
};
</script>
Since Vue is imported as a default import:
import Vue from 'vue';
It's expected for require("vue").default to return the module assigned to the Vue global:
(global = global || self, global.Vue = factory());
Dependencies like vue-property-decorator.umd.js and servicestack-client.umd.js that already register themselves under their expected "vue-property-decorator" and "@servicestack/client" module names don't need any manual mappings.
App Source Code Bundling
The last js bundle created is your App's source code which also needs to be imported in dependent order, both vue-lite and react-lite project templates share the same structure so their bundle configuration is identical where /src/components contains each page defined as a separate component, the /src/shared contains any shared functionality used by the different components whilst the base /src folder contains your App's entry point:
{{ [
'content:/src/components/',
'content:/src/shared/',
'content:/src/',
] | bundleJs({ minify:!debug, cache:!debug, disk:!debug, out:`/js/bundle${min}.js` }) }}
Bundling Path Options
The content: prefix specifies that the virtual path is from the ContentRoot directory, in this case so your App source code is maintained outside of the wwwroot/ WebRoot.
Possible values include:
web:- Web Root folder (default)content:- Content Root folderfilesystem:- TheFileSystemVFS provider in the Web Root's cascading Virtual File Sourcesmemory:- TheMemoryVFS provider in the Web Root's cascading Virtual File Sources
Finally the scripts argument is written (unencoded) after the library and App Source code bundles where it contains any additional scripts that
individual pages wants to include at the bottom of the page:
{{ scripts | raw }}
Pre-compiled minified production bundles
Whilst not required you can copy the exact same bundling configuration in your _layout.html above into a separate
/wwwroot/_bundle.ss script:
* run in .csproj AfterPublish, manual usage: `x run _bundle.ss -to <path>` *
let dist = '[hash].min'
{{ [`bundle${dist}.css`,`bundle${dist}.js`]
|> map => vfsContent.findFilesInDirectory(to,it.replace('[hash]','.*'))
|> flat
|> do => vfsContent.deleteFile(it.VirtualPath) }}
[ 'content:/src/css/' ] |> bundleCss({ minify:true, disk:true, out:`content:${to}/bundle${dist}.css` })
{{ [
'content:/src/components/',
'content:/src/shared/',
'content:/src/',
] |> bundleJs({ minify:true, disk:true, out:`content:${to}/bundle${dist}.js`, iife:true }) }}
Bundling
The integrated .js and .css bundling is configured to use a fast unminified in-memory bundle for an optimal development experience whilst
it utilizes a an advanced minified bundle in production releases.
When publishing, the project's Bundle task:
<Target Name="Bundle" BeforeTargets="AfterPublish">
    <Exec Command="x run _bundle.ss -to /bin/Release/netcoreapp3.1/publish/wwwroot" />
</Target>
Runs _bundle.ss to produce an optimized, minified & hashed bundle using ServiceStack's built-in bundling embedded in the dotnet tools which is pre-configured to use NUglify's advanced compression.
Publishing and Deployment
The standard .NET Core tools can be used to publish:
$ dotnet publish -c Release
Then deploy as normal, e.g. via rsync deployments to Linux or to an AWS EC2 container using Docker.
Configure NUglify
You can configure your ServiceStack App to use Nuglify's Advanced HTML, CSS, JS Minifiers using mix with:
$ npx add-in nuglify
Which will write Configure.Nuglify.cs to your HOST project.
Using Cache breakers in minified bundles
Cache Breaker support is available using the [hash] placeholder, which we only want to include in minified bundles.
In this case we need to perform a file pattern search to find and delete any existing generated bundles.
When using [hash] cache breakers the bundle APIs will use any existing generated bundles it finds, so you'll need to
ensure that any older minified assets are removed (as done in the above script).
Available in Razor Helpers
The same Html.BundleJs(), Html.BundleCss() and Html.BundleHtml() bundling implementations as above have also been available in
ServiceStack Razor where it can be used like:
@Html.BundleJs(new BundleOptions {
    Sources = {
        "content:/src/components/",
        "content:/src/shared/",
        "content:/src/",
    },
    Minify = !DebugMode,
    Cache = !DebugMode,
    SaveToDisk = !DebugMode,
    OutputTo = $"/js/bundle{min}.js",
})
Empty MemoryVirtualFiles now registered in VirtualFileSources
To enable shadowing of the WebRoot cascading Virtual File Sources, an empty MemoryVirtualFiles has been added to
InsertVirtualFileSources by default where it gets inserted at the start of VirtualFileSources, i.e:
new AppHost {
    InsertVirtualFileSources = { new MemoryVirtualFiles() }
}
If needed, the individual Memory and FileSystem VFS providers in the WebRoot VFS Sources can be accessed with:
var memFs = appHost.VirtualFileSources.GetMemoryVirtualFiles();
var diskFs = appHost.VirtualFileSources.GetFileSystemVirtualFiles();
Which are also available from the HostContext singleton:
HostContext.MemoryVirtualFiles- WebRoot MemoryVirtualFilesHostContext.FileSystemVirtualFiles- WebRoot FileSystem
The WebRoot Directory and ContentRoot Directories are also available from:
HostContext.RootDirectory- WebRootwwwroot/HostContext.ContentRootDirectory- ContentRoot/
vue-lite Project Template features
vue-lite comes pre-configured with a lot of the functionality needed in most Single Page Apps including client-side routing in /shared/router.ts and Sign In and Registration pages, both of which are integrated with ServiceStack's declarative form validation and auto-binding.
Form Validation Example
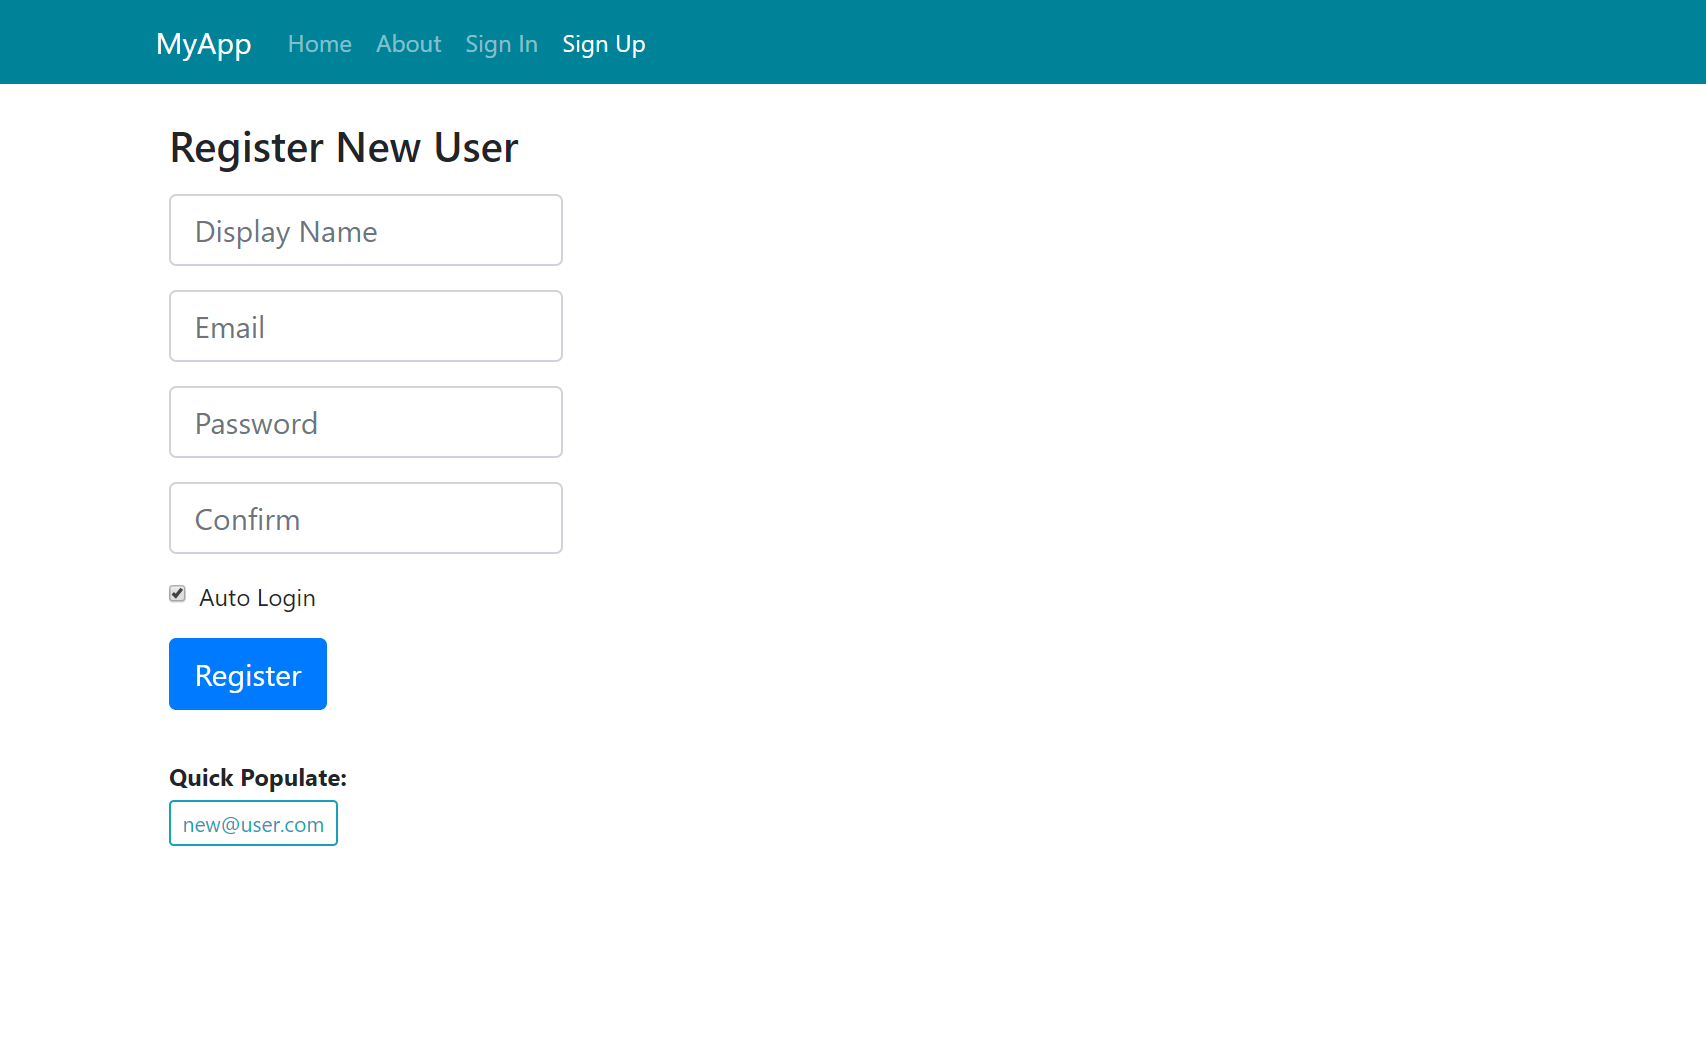
The Sign Up Page shows a typical example of auto-form validation with ServiceStack which can be developed using clean declarative markup:
@Component({ template:
    `<div>
        <h3>Register New User</h3>
        <form ref="form" @submit.prevent="submit" :class="{ error:responseStatus, loading }" >
            <div class="form-group">
                <ErrorSummary except="displayName,email,password,confirmPassword" :responseStatus="responseStatus" />
            </div>
            <div class="form-group">
                <Input name="displayName" v-model="displayName" placeholder="Display Name" :responseStatus="responseStatus" />
            </div>
            <div class="form-group">
                <Input name="email" v-model="email" placeholder="Email" :responseStatus="responseStatus" />
            </div>
            <div class="form-group">
                <Input type="password" name="password" v-model="password" placeholder="Password" :responseStatus="responseStatus" />
            </div>
            <div class="form-group">
                <Input type="password" name="confirmPassword" v-model="confirmPassword" placeholder="Password" :responseStatus="responseStatus" />
            </div>
            <div class="form-group">
                <CheckBox name="autoLogin" v-model="autoLogin" :responseStatus="responseStatus">
                    Auto Login
                </CheckBox>
            </div>
            <div class="form-group">
                <button class="btn btn-lg btn-primary" type="submit">Register</button>
            </div>
            <div class="pt-3">
                <b>Quick Populate:</b>
                <p class="pt-1">
                    <a class="btn btn-outline-info btn-sm" href="javascript:void(0)" @click.prevent="newUser('new@user.com')">new@user.com</a>
                </p>
            </div>
        </form>
    </div>`
})
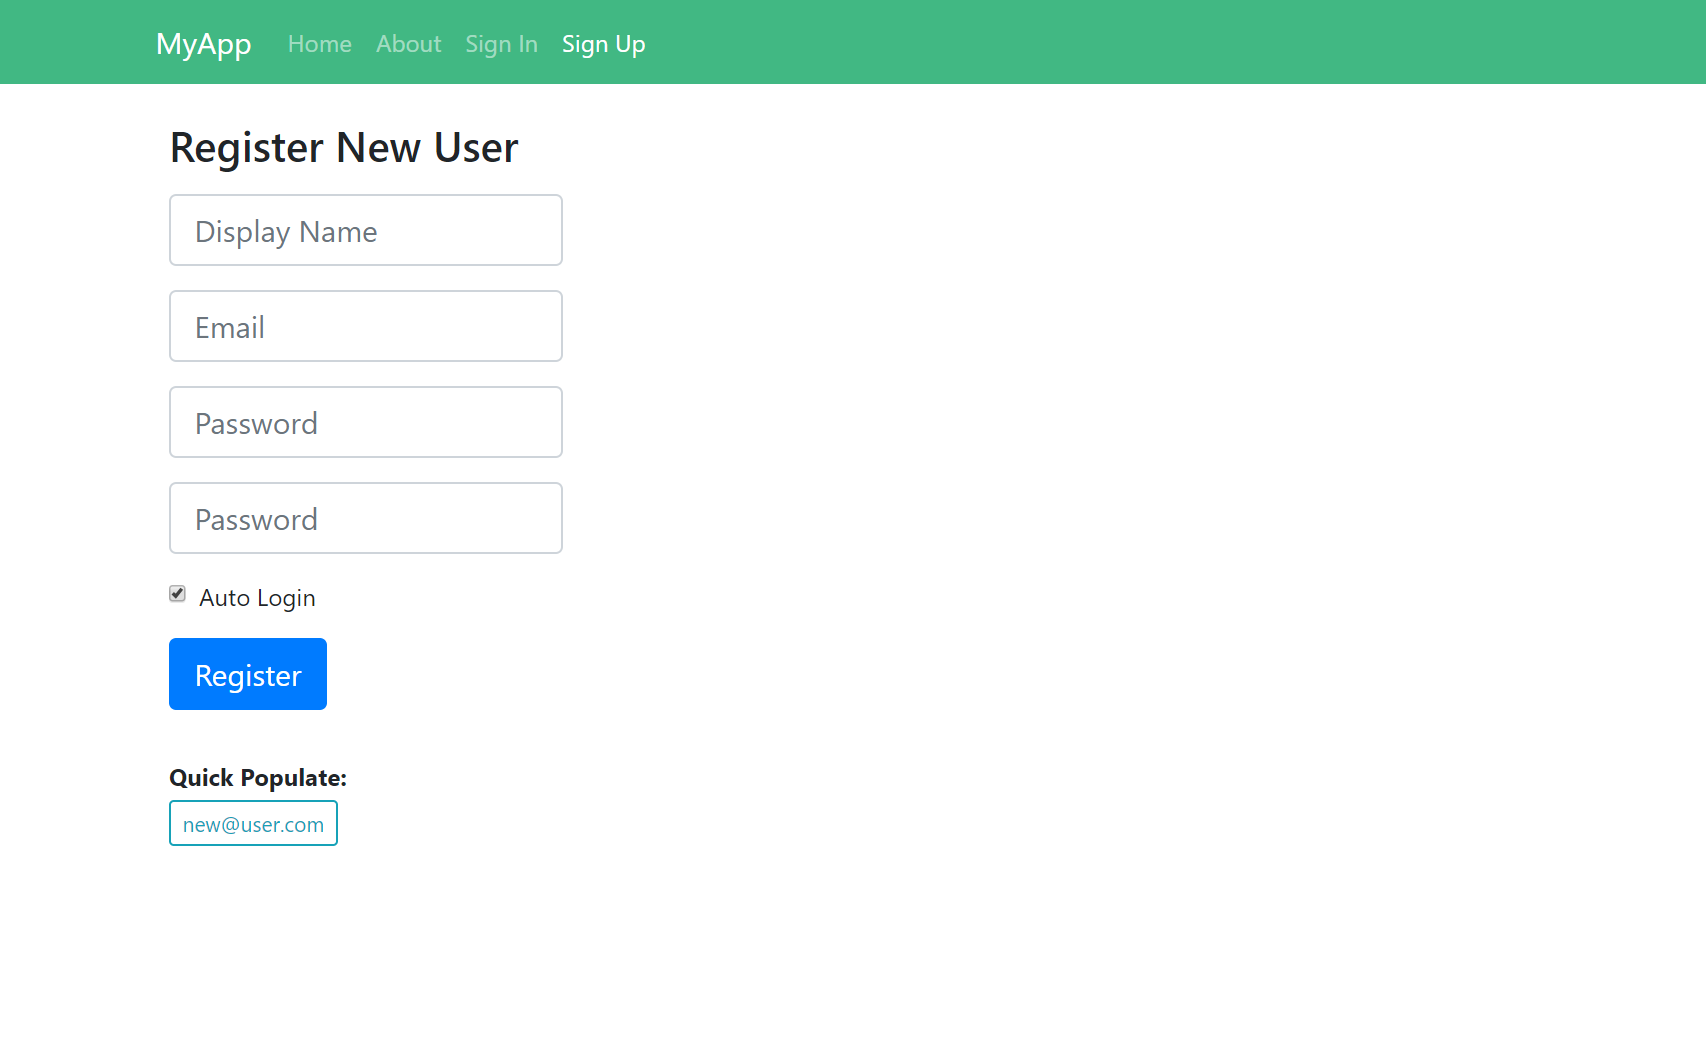
Which renders into the following Bootstrap Form UI:
All custom controls used are defined in /shared/controls.ts which encapsulate the label and input controls and their validation error bindings within reusable Vue components.
Validation Error Binding
All validation errors are sourced from the Component's this.responseStatus reactive property, populated by any Exception's thrown when using the
ServiceStack's TypeScript JsonServiceClient which in this case is used to
Register the user by sending the Register Request DTO generated in /shared/dtos.ts:
export class SignUp extends Vue {
    displayName = ''
    email = ''
    password = ''
    confirmPassword = ''
    autoLogin = true
    loading = false
    responseStatus = null

    async submit() {
        try {
            this.loading = true;
            this.responseStatus = null;

            const response = await client.post(new Register({
                displayName: this.displayName,
                email: this.email,
                password: this.password,
                confirmPassword: this.confirmPassword,
                autoLogin: this.autoLogin,
            }));

            await checkAuth();
            redirect('/');

        } catch (e) {
            this.responseStatus = e.responseStatus || e;
        } finally {
            this.loading = false;
        }
    }

    newUser(email:string) {
        const names = email.split('@');
        this.displayName = toPascalCase(names[0]) + " " + toPascalCase(splitOnFirst(names[1],'.')[0]);
        this.email = email;
        this.password = this.confirmPassword = 'p@55wOrd';
    }
}
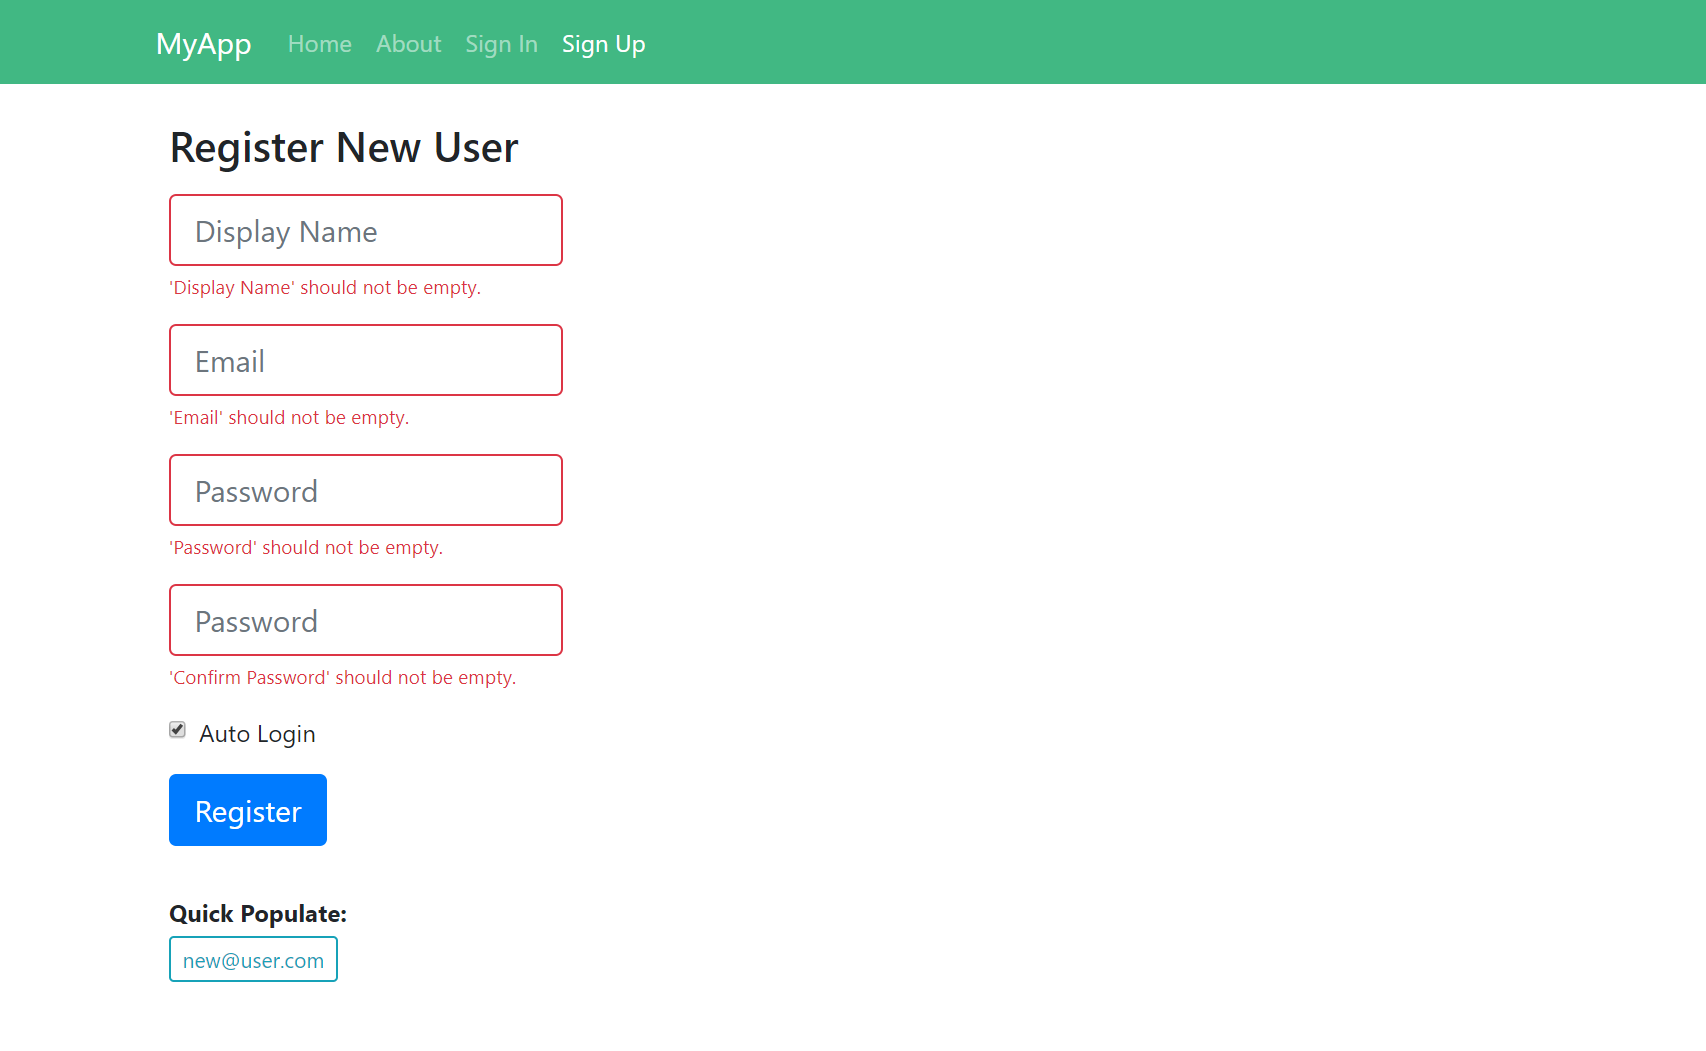
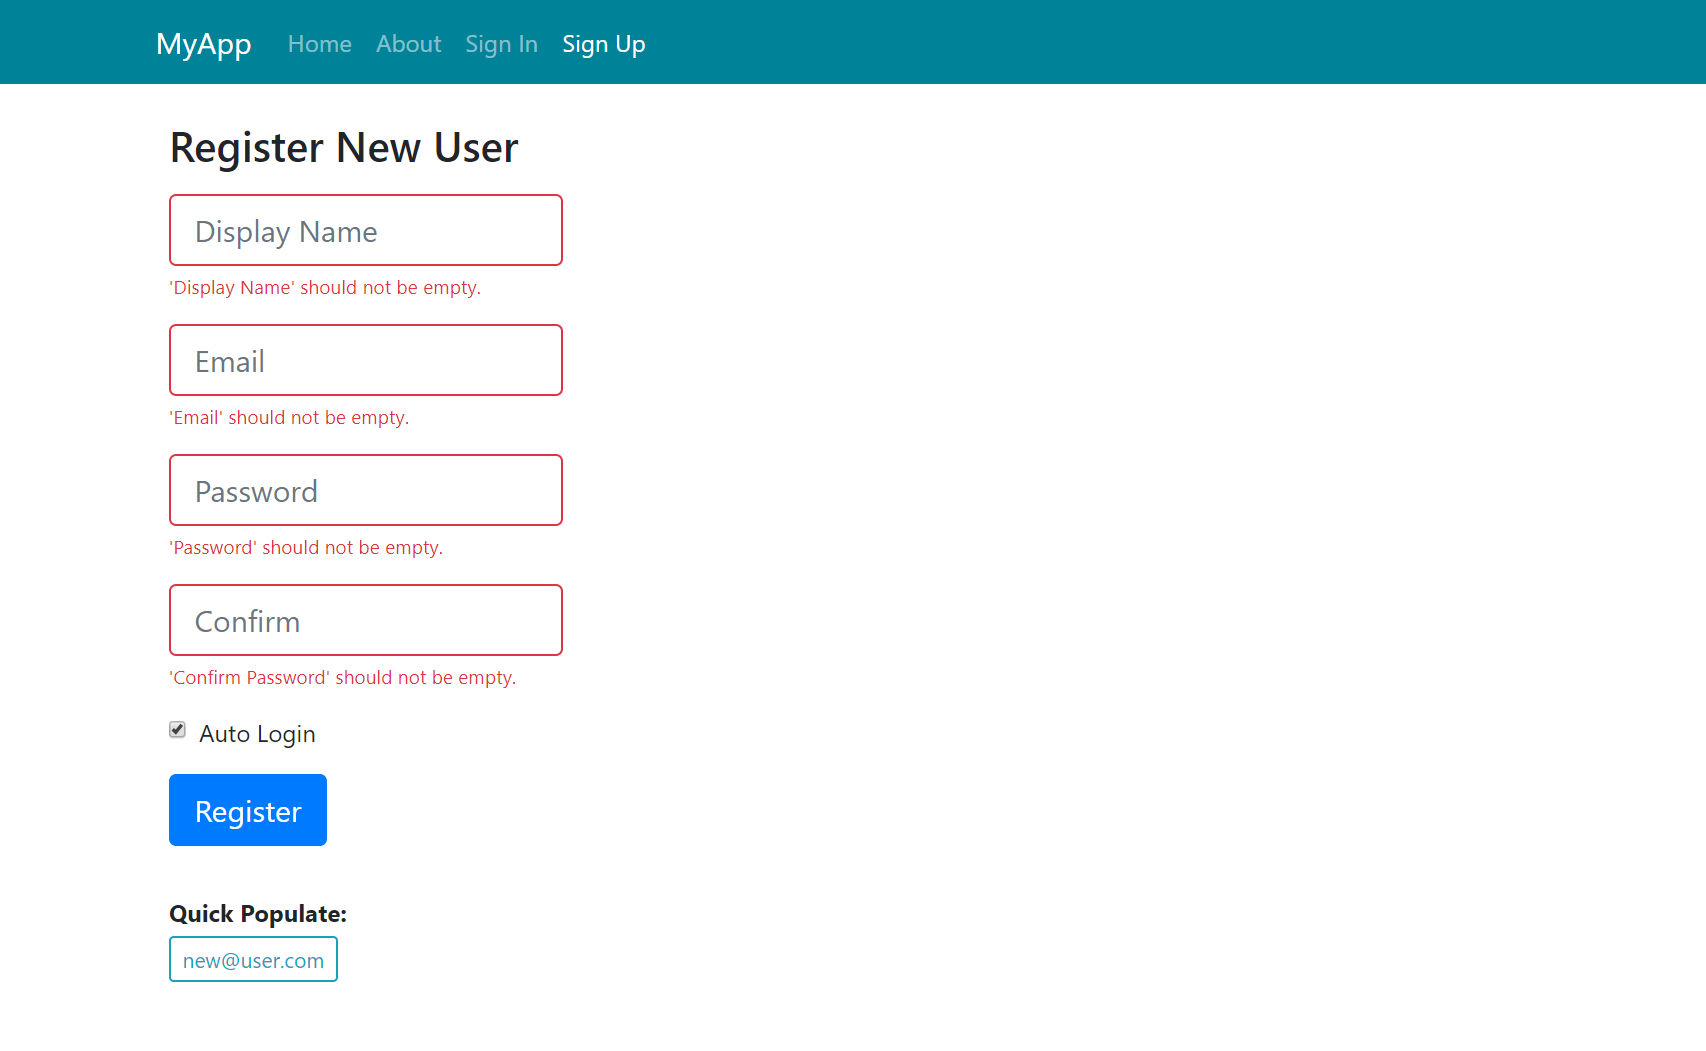
This is all it takes to render any server validation errors against their respective fields which we can test by submitting an empty form:
Vue Global State Management
Instead of immediately reaching for Vuex, we've kept the templates "lite" by leveraging existing
functionality built into the core libraries. So for global state management we're using a global Vue instance as a pub/sub EventBus that
our decoupled components use to update global state and listen for events.
This is used by checkAuth to post an empty Authenticate DTO to ServiceStack to check if the user is still authenticated on the server,
which depending if they're Authenticated will either returns basic session info or fails with a 401 error response, which the pub/sub event listeners
use to update global its state:
export const store:Store = {
    isAuthenticated: false,
    userSession: null,
};

class EventBus extends Vue {
    store = store
}
export var bus = new EventBus({ data: store });

bus.$on('signin', (userSession:AuthenticateResponse) => {
    bus.$set(store, 'isAuthenticated', true);
    bus.$set(store, 'userSession', userSession);
})

export const checkAuth = async () => {
    try {
        bus.$emit('signin', await client.post(new Authenticate()));
    } catch (e) {
        bus.$emit('signout');
    }
}
react-lite Project Template features
The react-lite template is functionality equivalent to vue-lite but created using the latest React features. For client-side routing we use React Router's declarative markup defined in main.tsx.
All components are written as Functional Components and makes use of React's new Hooks functionality which enable functional components to retain local state. Just like vue-lite all high-level controls are encapsulated into reusable functional components defined in /shared/controls.tsx which ends up retaining similar markup as vue-lite despite their completely different implementations:
export const SignUpImpl: React.SFC<any> = ({ history }) => {
const {state, dispatch} = useContext(StateContext);
const [loading, setLoading] = useState(false);
const [responseStatus, setResponseStatus] = useState(null);
const [displayName, setDisplayName] = useState('');
const [email, setEmail] = useState('');
const [password, setPassword] = useState('');
const [confirmPassword, setConfirmPassword] = useState('');
const [autoLogin, setAutoLogin] = useState(true);
const newUser = (email:string) => {
const names = email.split('@');
setDisplayName(toPascalCase(names[0]) + " " + toPascalCase(splitOnFirst(names[1],'.')[0]));
setEmail(email);
setPassword('p@55wOrd');
setConfirmPassword('p@55wOrd');
}
const submit = async () => {
try {
setLoading(true);
setResponseStatus(null);
const response = await client.post(new Register({
displayName,
email,
password,
confirmPassword,
autoLogin,
}));
await checkAuth(dispatch);
setLoading(false);
(history as History).push('/');
} catch (e) {
setResponseStatus(e.responseStatus || e);
setLoading(false);
}
};
return (<div>
<h3>Register New User</h3>
<form className={classNames({error:responseStatus, loading})}
onSubmit={async e => { e.preventDefault(); await submit(); }}>
<div className="form-group">
<ErrorSummary responseStatus={responseStatus} except={'displayName,email,password,confirmPassword'} />
</div>
<div className="form-group">
<Input type="text" name="displayName" value={displayName} onChange={setDisplayName} responseStatus={responseStatus} placeholder="Display Name" />
</div>
<div className="form-group">
<Input type="text" name="email" value={email} onChange={setEmail} responseStatus={responseStatus} placeholder="Email" />
</div>
<div className="form-group">
<Input type="password" name="password" value={password} onChange={setPassword} responseStatus={responseStatus} placeholder="Password" />
</div>
<div className="form-group">
<Input type="password" name="confirmPassword" value={confirmPassword} onChange={setConfirmPassword} responseStatus={responseStatus} placeholder="Confirm" />
</div>
<div className="form-group">
<CheckBox name="autoLogin" checked={autoLogin} onChange={setAutoLogin} responseStatus={responseStatus}>
Auto Login
</CheckBox>
</div>
<div className="form-group">
<button className="btn btn-lg btn-primary" type="submit">Register</button>
</div>
<div className="pt-3">
<b>Quick Populate:</b>
<p className="pt-1">
<a className="btn btn-outline-info btn-sm" href="javascript:void(0)" onClick={() => newUser('new@user.com')}>new@user.com</a>
</p>
</div>
</form>
</div>);
}
export const SignUp = withRouter(SignUpImpl);
Which renders the same Bootstrap form UI:
Despite React and Vue's stylistic differences the ServiceStack integration remains the same where the populated Register Request DTO
in /shared/dtos.ts is used to register the User with any failures used to
populate the responseStatus local state where it's reactively referenced in all Input components to render field validation errors against their targeted control:
React Global State Management
Likewise with global state management we've leveraged existing functionality instead of depending on an external state library like Redux or MobX.
Instead react-lite use React's new useReducer hook within a global StateContext which is made available to all components using
React's Context where they're used to dispatch actions that mutate global state:
const initialState: State = {
  isAuthenticated: false,
  userSession: null
};

const reducer = (state:State, action:Action) => {
    switch (action.type) {
        case 'signin':
            return { ...state, isAuthenticated:true, userSession:action.data };
        case 'signout':
            return { ...state, isAuthenticated:false, userSession:null };
        default:
            throw new Error();
    }
}

export const StateContext = createContext({} as Context);

export const StateProvider = (props:any) => {
    const [state, dispatch] = useReducer(reducer, initialState);
    return (<StateContext.Provider value={ { state, dispatch } }>{props.children}</StateContext.Provider>);
}

type Dispatch = React.Dispatch<Action>;

export const checkAuth = async (dispatch:Dispatch) => {
    try {
        dispatch({ type: 'signin', data: await client.post(new Authenticate()) });
    } catch (e) {
        dispatch({ type: 'signout' });
    }
};
"lite" Project Structure
Unlike most other project templates which follow our Recommended Physical Project Structure, the "lite" project templates are all within a single project as it's more suitable for smaller projects and can be developed using lightweight IDE's like VS Code which doesn't work well with multi-project solutions.
So what would've been separate projects are being maintained separate folders:
Where they still retain the same source code and namespaces and can be easily be moved out into a different project when wanting to upgrade to a multi-project solution.
Updating "lite" project dependencies
We've also enabled a novel approach for updating your "lite" project 3rd Party dependencies where instead of everyone maintaining their own bespoke configuration and a tool like libman for updating their local dependencies, vue-lite projects can simplify update their NuGet dependencies which will automatically upgrade ServiceStack.Desktop containing all the Vue, React, Bootstrap .js & .css library dependencies.
